*
*
)Hadi
IdeK^Zl
H^YZK^Zl
(
$
-
8djciZgh^c`dc7diidb
&
$
)
=daZ
Figure 78.
5.
Figure 78
Tip: Consider making the miter bar longer for
larger featherboards—approximately half the
length of the total featherboard—to support
the force applied to the featherboard during
use.
6.
7.
8.
Figure
79
4.
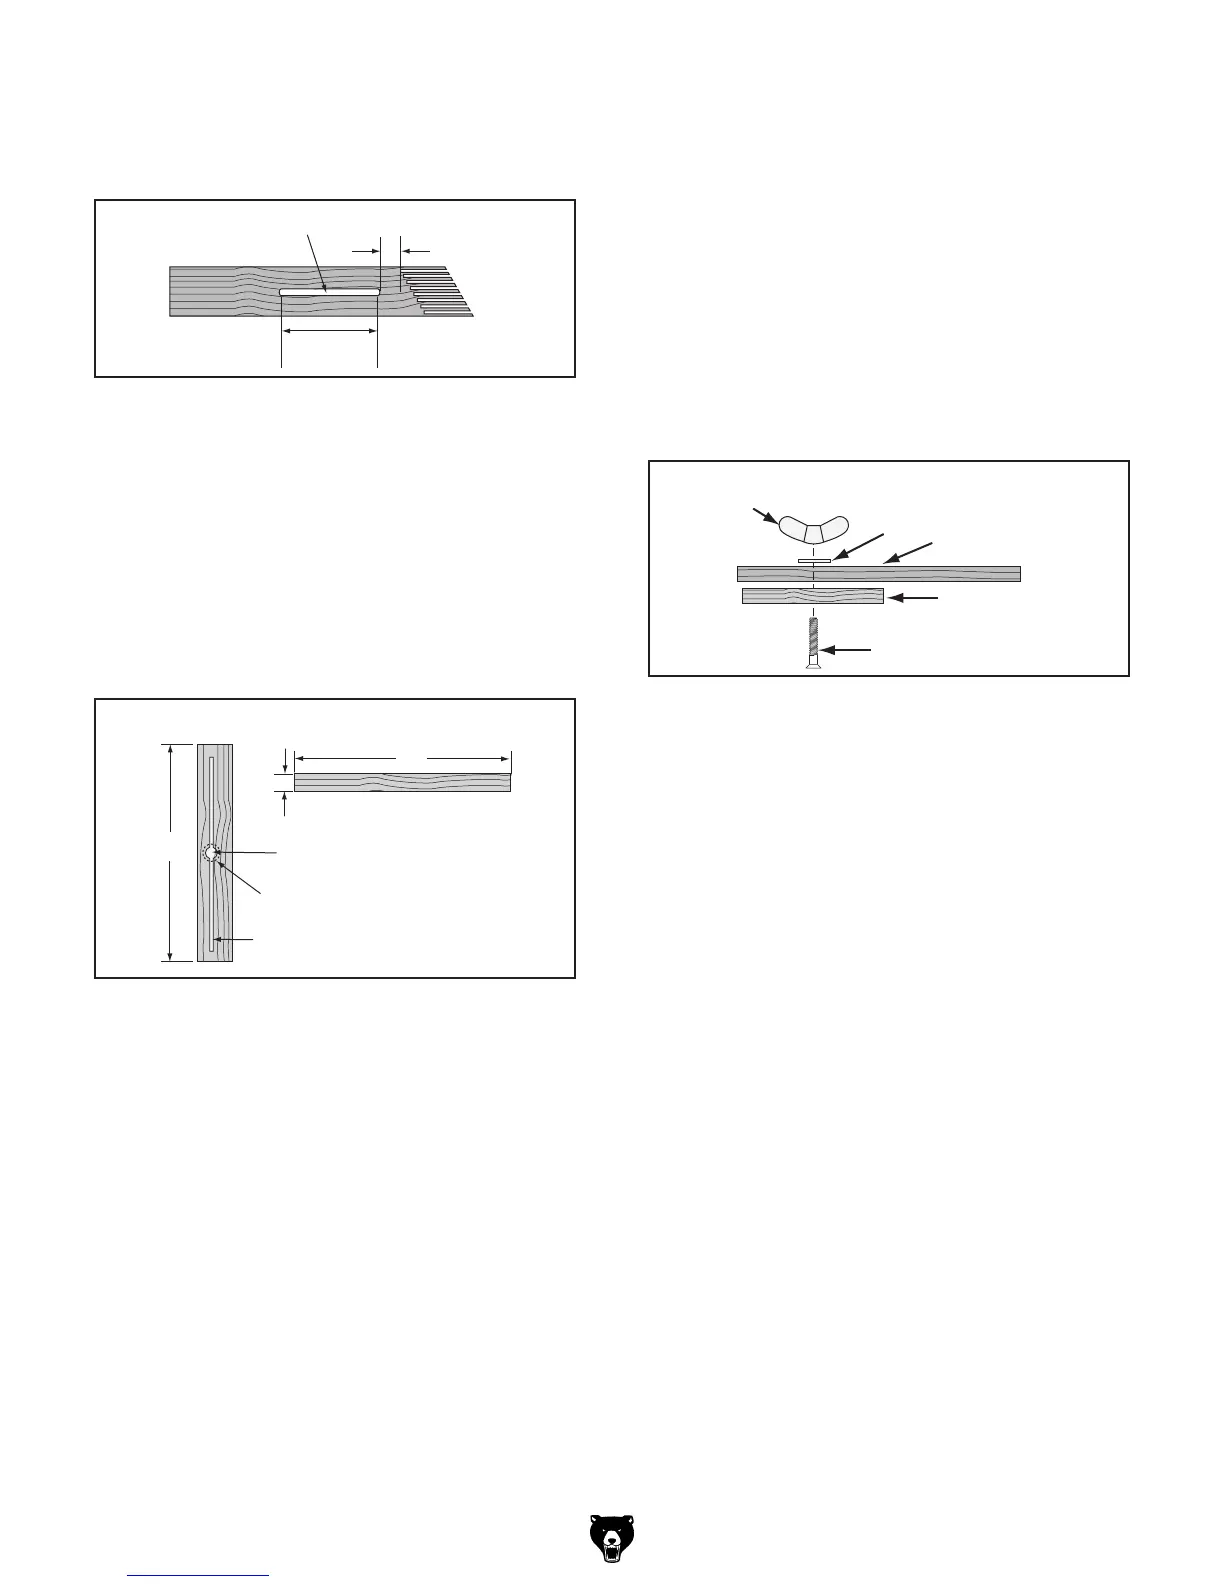
Figure 77
Figure 77.
H^YZK^Zl
L^c\Cji
B^iZg7Vg
;ZVi]ZgWdVgY
;aVi=ZVYHXgZl
;aViLVh]Zg
Figure 79.
Tip:The length of the flat head screw depends
on the thickness of the featherboard—though
1
1
⁄2" to 2" lengths usually work.
Mounting Featherboard in
Miter SlotPage 55
Note:The routed slot, countersink hole, and
the flat head screw are essential for the miter
bar to clamp into the miter slot. When the
wing nut is tightened, it will draw the flat head
screw upward into the countersunk hole. This
will spread the sides of the miter bar and
force them into the walls of the miter slot,
locking the featherboard in place.
 Loading...