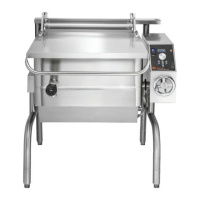
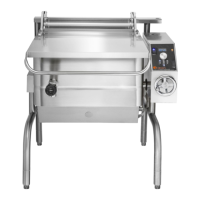
4. User Instructions
4.1 Lighting and Operation
a) Check that gas and electricity mains are on.
b) Turn the toggle switch (Main Control Box) to the
“ON” position. The power neon (Main Control
Box) will illuminate.
c) Turn the thermostat (Upper Control Box) to the
desired setting.
d) Observe that the burners light by the lighting of
the heat neon (Main Control Box) (approximately
10-15 seconds).
e) Should the unit fail to light, it will lock-out.
Turn the unit off and wait for one or two minutes
before attempting to switch it on again.
f) Repeat steps b through e.
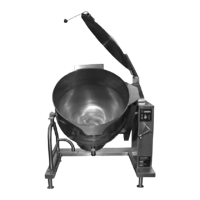
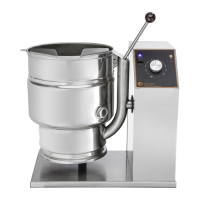
4.2 To Shut Down Braising Pan
a) Turn thermostat dial to the Off position.
b) Switch the On/Off switch to the Off position.
c) For a prolonged shut down
— Follow steps a and b
— Turn the gas and electricity mains off
d) Turn the tilting handle clockwise to pour out the
water or contents.
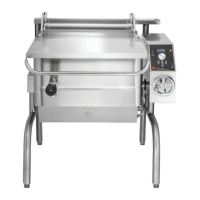
4.3 Filling the Braising Pan
Using hot water and detergent, clean out the pan
thoroughly prior to operation.
The pan should not be overfilled, and an allowance
should always be made for expansion and foaming of
the food being cooked. The maximum fill level is
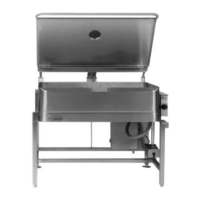
marked on the inner pan wall (See Fig. 14)
For frying,
Do not leave the braising pan unattended
when heating.
2.
1.
the depth of oil in the pan must never
exceed the maximum oil level mark on the inner
pan wall.
WARNING
DO NOT OVERFILL WITH OIL OR FIRE MAY
RESULT. DO NOT ADD WATER OR WET FOOD
INTO HOT OIL.
4.4 Users’ Thermostat
Provides automatic control of the braising pan
temperature at selected temperatures up to a
maximum of 190ºC.
4.5 Sequence of Operation
The following “sequence of operation” is provided to
help the user understand how the unit functions.
a) Switching the On/Off switch to the On position to
start the appliance causes the power neon to
illuminate.
b) Turning the thermostat sends a signal to the
ignition module.
c) The ignition module opens the pilot control valve
which allows gas to go to the pilot burner. It
simultaneously starts a sparking sequence
at the pilot.
d) The spark ignites the main pilot burner. Once this
occurs, the sensing probe detects the flame.
This confirms that lighting has been successful.
f) The sparking/ignition sequence shuts off, and the
“Heat” neon illuminates.
e) After a short period of time the main control valve
opens to full flow and lights the burners.
g) If, however, a pilot flame is not detected within
55 seconds, the ignition module goes into lock-
out mode.
h) To restart the ignition sequence the ON/OFF
switch must be set to OFF and then back to ON.
i) In addition to the gas lockout, other safety
features include:
Fig. 14