7
5. Cable sizing
Single-phase 60 Hz maximum cable length motor service to entrance:
6. Splicing the cable
Splice the drop cable with the motor cable. If the
splice is carefully made, it will be as efficient as any
other portion of the cable and will be completely
watertight.
There are a number of cable splicing kits available to-
day - epoxy-filled, rubber-sealed, etc. Many perform
well if the manufacturer’s directions are followed
carefully. If one of these kits is not used, we recom-
mend the following method for splicing the motor
cable to the drop cable:
1. Examine the motor cable and the drop cable care-
fully for damage.
2. Cut the motor leads off in a staggered manner.
3. Cut the ends of the drop cable so that the ends
match up with the motor leads.
Be sure to match the colors.
4. Strip back and strip off one inch of insulation from
each lead, making sure to scrape the wire bare to
obtain a good connection.
Be careful not to damage the copper conductor
when stripping off the insulation.
5. Insert a properly sized Sta-Kon™-type connector
on each pair of leads, again making sure that col-
ors are matched.
Using Sta-Kon™ crimping pliers, indent the lugs.
Be sure to squeeze down hard on the pliers, partic-
ularly when using large cable.
6. Form a piece of electrical putty tightly around
each Sta-Kon™. The putty should overlap on the
insulation of the wire.
7. Use a good quality tape such as #33 Scotch Water-
proof or Plymouth Rubber Company Slipknot Grey.
Wrap each wire and joint tightly for a distance of
about 2½ inches on each side of the joint.
Make a minimum of four passes over each joint
and overlap each pass approximately one inch to
ensure a completely watertight seal.
Note: Do not lower or lift the pump using the motor
cable.
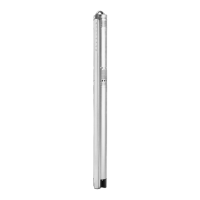
7. Fitting the cable plug to the motor
The cable plug supplied with the motor is factory-
greased. Check that the plug is greased correctly,
see fig. 5.
Fig. 5 Greasing of plug
To fit the cable plug, proceed as follows:
1. Check that the cable is of the correct type, cross-
section and length.
2. Check that the mains on the location has correct
connection to ground.
3. Check that the motor socket is clean and dry.
4. Press the cable plug onto the motor socket.
The plug will only fit one way, see fig. 6.
5. Fit and tighten the four screws, see fig. 6.
When the plug has been fitted, there must not be
a clearance between the motor and the cable plug.
Fig. 6 Fitting the cable plug
Motor rating Copper wire size
Volts hp 14 12 10 8 6 4 2 0 00
115 0.5 65 100 160 260 410 660 1050 1680
230 0.5 300 480 760 1210 1930 3060 4870
230 0.75 190 300 470 750 1190 1890 3010 4800
230 1.0 140 220 350 560 890 1420 2260 3600 4540
230 1.5 130 210 330 520 830 1320 2110 3360 4230
TM02 9604 3504TM02 9605 3504
 Loading...