29
English (US)
7. Start-up
If the pump is not operating satisfactorily, see section 10. Fault finding chart.
Step Action
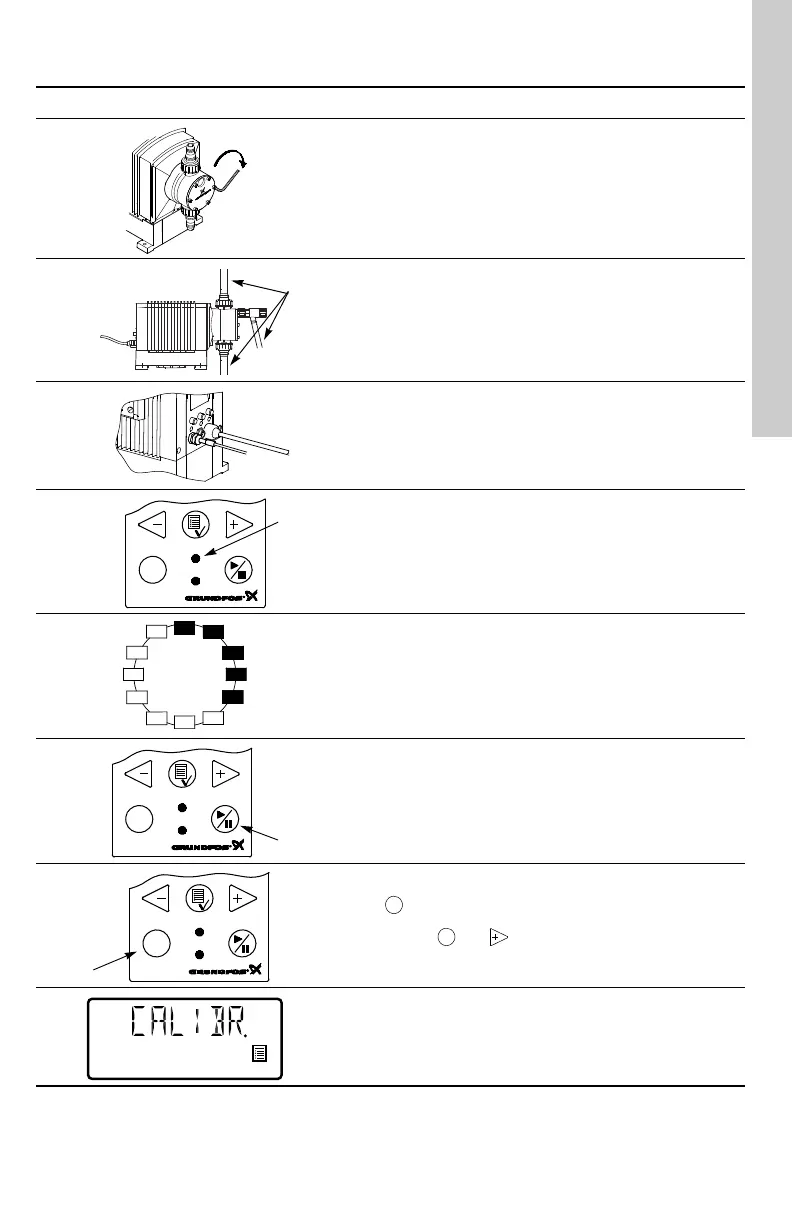
1
Prior to start-up, retighten the dosing head screws:
• Cross-tighten the dosing head screws with a torque wrench once
before commissioning and again after 2-5 operating hours at
torque 4.06 ft·lb (+ 0.37/- 0 ft·lb) (5.5 Nm. (+ 0.5/- 0 Nm)).
2
Connect the hoses/pipes:
• Connect the suction and dosing tubes/pipes to the pump.
• Connect a tube to the vent valve, if required, and lead the hose to
the tank.
• Never attach a hose to the drain opening.
3
Connect the cables:
• Connect the control/level cables, if any, to the pump, see
section 5.6 Connection overview.
4
Switch on the electricity supply:
• The display is on.
• The green indicator light is flashing (the pump has stopped).
• Select language, if required, see section 6.20 Language.
5
Select the operating mode (see section 6.9 Operating modes):
• Manual.
•Pulse.
• Analog.
•Timer.
•Batch.
6
Start the pump:
• Start the pump by pressing the on/off button.
• The green indicator light is permanently on.
7
Priming/venting:
• Press the button on the pump control panel and let the pump
run without a counter pressure. Open the vent valve, if required.
When the buttons and are pressed simultaneously during
priming, the pump can be set to run for a specific number of
seconds at maximum capacity.
8
Calibration:
• When the pump has been primed and is running at the right
counter pressure, calibrate the pump, see section 8. Calibration
 Loading...