Seen – Seen A
7
SEEN - SEEN A
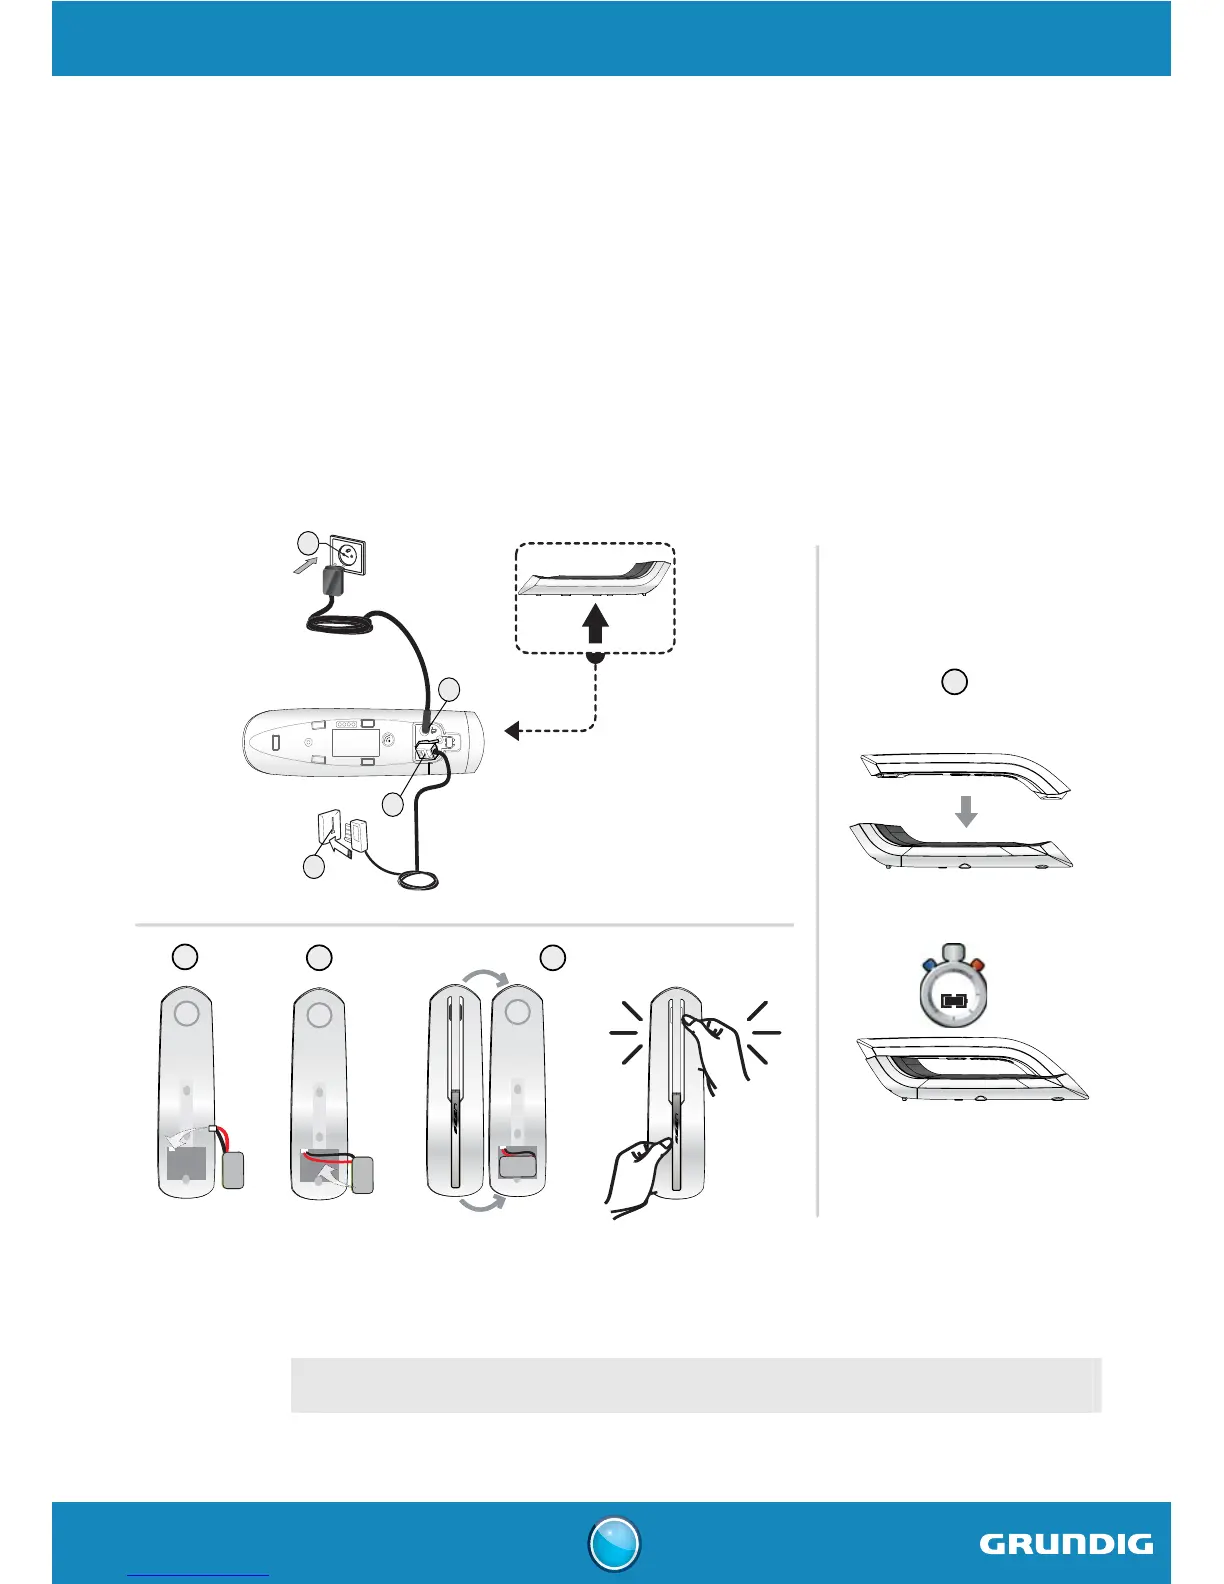
Installing the phone
1. Connect the power adapter cord to the socket on the bottom of the base.
2. Connect the other end of the cable with the power wall socket.
3. Plug the phone cable into the socket of your base.
4. Connect the other end of the cable with the phone wall socket.
5. Insert the battery connector into the respective socket complying with its position.
6. Slide the battery pack into its housing.
7. Fit the rear part of the handset to the front part.
8. Place the handset in the base station to charge for 12 hours prior to first use.
400mAh 2.4 V
Ni-MH battery
400mAh 2.4 V
Ni-MH battery
400mAh 2.4 V
Ni-MH battery
Clack
5
6
7
8
400mAh 2.4 V
Ni-MH battery
400mAh 2.4 V
Ni-MH battery
400mAh 2.4 V
Ni-MH battery
Clack
2
1
3
4
12 H
IMPORTANT
If your handset battery is empty leave the handset in the charging unit for at least 4
minutes. You will then be able to switch it on again.