EasyManuals Logo

Guest 2815M User Manual

Guest 2815M
8 pages
To Next Page IconTo Next Page
To Previous Page IconTo Previous Page
Page #3 background imageLoading...
Page #3 background image
Operation
Checklist for required
tools
and mate
rials
When
the
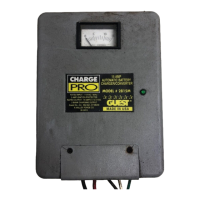
2815M
charger
senses
a drop
in
battery
voltage,
it
automatically
increases
its
output
to
re-charge
the
battery.
By
using
a
sophisticated
3
stage
charging method,
it
recharges
your
batteries
in
the
fastest,
healthiest
way.
The
amp
meter
on
the
front
of
the
charger
shows
the
total
combined
charging
current during
the
first
and second
charging
stages,
(“bulk”
charging
and
“absorption”
charging).
When the
low battery approaches full charge,
the
charger
reduces
its
output
to
a
“float”
charging rate, indicated
by
the
green
LED
light.
This
low
float
voltage
gently
“tops
off’
your batteries, then
keeps
them
fully charged
and
ready
for
use
without overcharging.
The
total
15
amp
output
of
this charger
is
divided
between both
of
the
batteries
connected
to it,
however
the
charge
being
applied
to
each
battery
is
individually
regulated.
When
using
the
281
SM
to
charge
a
single
battery,
ajumper
wire,
(not
included),
must
be
connected
between
the
two
DC
positive
(+)
outputs
of
the
charger.
(See
page
10.)
The
Guest
ChargePro
281
SM
battery
charger
is
fully
automatic,
requires
no
maintenance,
and can
be
left
unattended
indefinitely.
However,
the
electrolyte
(battery
acid)
in
lead-acid
batteries
can
gradually
evaporate,
particularly
in
warm
climates.
Check
your
batteries once
a
month
as
a
part
of
your
maintenance
routine.
Overload
Protection
If
an electrical
overload
(excessive
demand)
occurs
in
the
DC
system
connected
to
this
charger,
it
will
reduce
its
output
voltage to
a
safe
level.
In
the
event
of
a
dead
short,
the
charger’s
output
voltage will
effectively
be
zero
volts.
Once
the overload
or
short is
removed,
the
281
SM
will automatically
resume
normal
operation.
-3-
)(
Tools
Electric
drill
with
1/4”
and
1/16”
drill
bits
Wire
cutting
and
crimping
tools
1/4”
slotted
screwdriver
2
5/16”
and
3/8” socket
wrenches
or
nut driven
Portable
DC
volt
meter
Safety
glasses,
work
gloves,
and
long
sleeved
shirt
Additional
materials
4 #10
SS
hex
head
or round
head
machine
bolt’
4
(Bolt
length
=
mounting surface
thickness
ph
s
1”)
each
#10
SS
flat
washers, lock
washers
and hex
nuts.
20
7”
cable
ties
w/mounting holes
(cx
Beckson
L-7M1-I)
20
# 8
x
3/4”
SS
pan
head self-tapping
screws
(for
fastening
cable
ties
to
mounting surface).
AC
wiring
1
6
5
amp
AC
circuit
breaker or
fuse
(if
one
is
rot
already
installed
and
available
in
your
Main
AC
panel)
#8
ring
terminals
(to
attach the
AC
input
wires
to
the
charger
and
to
the
main
AC
panel).
as
~i
3
conductor,
14
gauge
Marine
UL
listed
AC
cable
to
bring
power
from
your
AC
Main
panel
to
the
charger.
DC
wiring
as
req.
Tinned,
stranded
copper
wire
to
connect
the
charger’s
DC
outputs
to
your
batteries.
(Red
wire
for
positive
(+)
connections
and
black
wire
for
ne~ative
(-)
connections).
Use
the
table
“DC
wire
size”
on page
8
to
determine
the
correct
diameter
wire
to
use
ror
your
installation.
4
#10
ring
terminals
to
attach
DC
output
wires
to
charger.
3
5/16”
ring
terminals
(for
connecting
the
1)C
output
wires
to
the
batteries’
positive
(+)
terminal pcsts).
1
ring
terminal
to
fit
the
engine’s
negative
(-)
ground
post
-4-

Questions and Answers:

Question and Answer IconNeed help?

Do you have a question about the Guest 2815M and is the answer not in the manual?

Guest 2815M Specifications

General IconGeneral
BrandGuest
Model2815M
CategoryBattery Charger
LanguageEnglish

Related product manuals