This document outlines the features, usage, and maintenance of the GVM-PRO-SD200B and GVM-PRO-SD300B professional photography lights. These products are designed for senior photography enthusiasts and are suitable for various applications including live broadcasts, outdoor shooting, film production, studio photography, and YouTube video creation.
Function Description
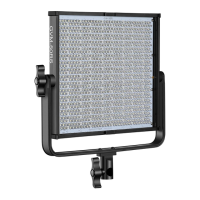
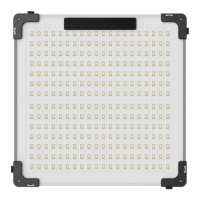
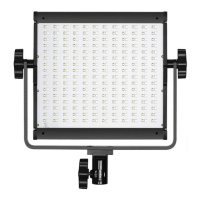
The GVM-PRO-SD200B and GVM-PRO-SD300B are high-definition COB LED lights engineered to restore and enrich the color of objects, providing natural and vivid shooting effects. They offer versatile control options, including APP control via iOS and Android smart mobile devices, supporting Bluetooth Mesh networking for grouped control with other compatible GVM brand devices. Additionally, these lights feature a standard DMX interface, enabling both low-precision 8-bit and high-precision 16-bit DMX control modes.
The lights offer three distinct lighting modes to cater to diverse creative needs:
- CCT Mode (White Light Mode): In this mode, users can precisely adjust both the light intensity and color temperature, allowing for fine-tuning of the white light output.
- Light Source Matching Mode: This mode provides 12 different styles of light source types. This feature is particularly useful when a specific light source simulation is required, saving significant adjustment time.
- Light Effect Mode: This mode offers 12 pre-programmed light effects to enhance creative shooting scenarios. These effects include Lightning, CCT Loop, Candle, Bad Bulb, TV, Paparazzi, Explosion, Pulsing, Strobe, Fire, Fireworks, and Welding, providing a wide range of dynamic lighting options.
Usage Features
Safety Instructions:
Before using the product, it is crucial to read the manual carefully. The device is designed for use within a temperature range of -20°C to 45°C. It should not be placed near flammable or volatile solvents like alcohol and gasoline. After use, ensure the device has cooled down completely before storing it. Always unplug the power cord during storage, and keep the equipment in its carrying case or a well-ventilated, dry place.
This lighting fixture is not intended for general illumination. Individuals with eye injuries or sensitivity should avoid using it. It is a professional light, and children are prohibited from using it without close supervision to prevent personal injury. Always remove the protective cover before operation. When the light is on, never stare directly at the light source due to its high intensity. High-intensity lighting should only be used under the guidance of a professional lighting technician. If any discomfort is experienced, immediately turn off the light and seek medical attention. Handle the fixture carefully when on, avoiding contact with high-temperature components like the LED light source to prevent burns.
Do not use damaged equipment or accessories. Any repairs should be performed by a professional repairman. If the light source is damaged or deformed by heat, cease use immediately and contact the manufacturer or a qualified repairman for replacement. If the product is cracked due to falling, squeezing, or strong impact, discontinue use to avoid electric shock from internal electronic components. Do not disassemble the product; malfunctions should be checked and repaired by the manufacturer or authorized personnel. Before cleaning or maintenance, always unplug the power supply by pulling the plug, not the cable. The device must only be operated with earthed power outlets or emergency power generators.
When cleaning, use a dry, soft cloth; do not use wet cloths. If an extension cord is needed, ensure it has adequate capacity to prevent overheating. For products with long power cords, route them properly to avoid contact with overheated surfaces or tripping hazards. Use only original power cords; damage from non-original cords is not covered by warranty. Avoid using accessories not recommended by the brand to prevent fire, electric shock, or personal injury.
For products using batteries, use only specified batteries, power sources, or accessories. Keep batteries and accessories out of reach of children. If a battery leaks, changes color, deforms, smokes, or emits an odor, remove it immediately, being careful to avoid burns. Do not use deformed or modified batteries, disassemble or modify the product or battery, heat or solder the battery, or expose it to fire, water, or strong external force. Ensure correct polarity when inserting batteries and do not mix old and new or different types of batteries. For products with built-in lithium batteries, use the dedicated charger and follow operating instructions within the prescribed voltage and temperature range.
Installation Method:
- Mounting to a Light Stand: Loosen the light stand fixing knob, install the light onto the light stand, and then tighten the knob securely.
- Adjusting Angle: Loosen the angle locking handle, adjust the spotlight to the desired angle, and then tighten the angle locking handle firmly.
- Attaching Standard Cover: Insert the standard cover into the Bowens bayonet socket and turn it clockwise gently until secure. To remove, pull it outward and rotate counterclockwise.
- Installing Light Mixing Mirror: Screw the light mixing mirror into the socket clockwise to install. To uninstall, perform the opposite action.
- Power Connection: Connect the power cord to the power supply.
Product Control Keys:
The device features a clear display screen showing current settings, modes, and parameters.
- Mode Key: Switches between different light modes.
- Menu Key: Enters the settings menu.
- Return Key: Returns to the previous menu level.
- Cooling Key: Activates high-volume air cooling to reduce temperature to a touchable level.
- Knob ① (INT/SELECTOR): A multi-functional coding knob for "Select/Brightness" adjustments by pressing or rotating.
- Knob ② (CCT/SPEED): Adjusts color temperature and light effect change rate by rotating.
- Power ON/OFF Button: Controls the device's power.
- Power Input Interface: Connects to the power supply.
- DMX Input/Output Interfaces: Connects to a DMX controller.
Menu Key (MENU) Functions:
Press the MENU button to access the menu setting screen. Rotate Knob ① to select an item, then press Knob ① to enter its setting screen. Adjust parameters by pressing or rotating Knob ①. Press the BACK button to navigate up the menu.
- DMX SETTINGS: Configure DMX parameters, including address (001-512) and mode (8-bit/16-bit).
- DIM CURVE: Set the dimming curve (linear, logarithmic, exponential, or S curve).
- WL SETTINGS: Manage RF channel settings, RF switch, Bluetooth switch, and Bluetooth reset.
- STUDIO: Set studio mode or non-studio mode. In studio mode, the light restores its previous settings after power off and on. In non-studio mode, it reverts to default settings.
- FREQUENCY SETTINGS: Adjust the dimming frequency.
- FAN SETTINGS: Set the cooling fan mode (Smart, High, Silent).
- LANGUAGE: Select the system language (English, Simplified Chinese).
- SYSTEM SETTINGS: View system information and restore factory settings.
Mode Key (MODE) Functions:
Press the MODE button to enter the main mode selection page. Rotate Knob ① to select a mode, then press Knob ① to enter its interface. Adjust parameters by pressing or rotating Knob ①. Press the BACK button to go up one level.
- CCT Mode: Adjust brightness with Knob ① and color temperature with Knob ②.
- Source Mode: Rotate and press SELECTOR briefly to choose desired light source effects.
- Effect Mode: Rotate and short press SELECTOR to select FX mode, offering various light effects like Lightning, CCT Loop, Candle, Bad Bulb, TV, Paparazzi, Explosion, Pulsing, Strobe, Fire, Fireworks, and Welding.
APP Control:
Download the GVM APP by scanning the QR code on the back of the manual. It's available on official website QR code, Google Play, Huawei Store for Android, and App Store for iOS.
- Register Account: Register and sign in using an email address. Be aware of potential delays in verification code delivery and check blocked email inboxes if needed.
- Adding Devices: Ensure Bluetooth and network data are enabled on your phone, and reset the device's Bluetooth. Click "Add Device" on the "My Devices" page to find nearby Bluetooth lighting devices and connect. Android systems require location permission for Mesh technology, but no location information is collected.
- Equipment Management: After successful pairing, the device appears in the "My Devices" list. Click the device entry to access its control interface.
Maintenance Features
Use and Save:
Avoid placing the product in high humidity, strong electromagnetic fields, high temperature environments, or direct sunlight. Disconnect the power supply if the product will not be used for an extended period.
Cleaning:
Always unplug the power before cleaning. Use a damp cloth for cleaning, avoiding detergents or soluble liquids that could damage the surface.
Power Supply:
Ensure the power supply is within the specified operating range. Incorrect voltage (too high or too low) can affect performance.
Maintenance:
Do not open the shell package yourself if there is a malfunction or performance degradation, as this could damage the machine and void the warranty. In case of malfunction, contact customer support for assistance.
Accessories:
Use only accessories provided by the manufacturer or approved accessory products to ensure optimal performance.
Warranty:
Modifying the product will void the warranty. The warranty period is one year, covering the circuit board for 12 months with customer service repair. Consumables like batteries, adapters, power cords, and other accessories are not covered. The warranty is invalidated if the equipment has been privately repaired, incurring repair costs. Malfunctions due to non-standard operations are also not covered. The manufacturer reserves the right to change designs and specifications without notice; customers can check the official website for the latest information.
Troubleshooting:
- Switch indicator not lighting up: Check power connection to the lamp and ensure the power supply is normal. If using a lithium battery, confirm it's not in "low battery" protection mode. Ensure the adapter is well-connected to the power plug. Charge the battery if necessary.
- Device not found by APP: Verify the device is turned on and not bound by another user. Ensure mobile Bluetooth and network data are on, and Android location permission is granted. Reset device Bluetooth.
- APP fails to connect to network: Check if the device is on and not bound by another user. Confirm good Bluetooth and network conditions on the mobile phone. Reset device Bluetooth and restart the App, then try connecting again.
- Device not found after removal from APP: Check if the device was removed while offline or with poor network conditions. Reset device Bluetooth, search, and add the device again.
- Device in APP cannot be clicked for control: Ensure the device is online (indicated by a small green dot). If offline, follow network connection troubleshooting steps. Restart the device, wait 5 seconds, and if it displays as online, it can be controlled. Otherwise, reset device Bluetooth and add it to the device list again.
Precautions:
The product is not waterproof; protect it from wet conditions, condensation, dripping, splashing water, and high air humidity. It is not anti-corrosion; avoid contact with corrosive liquids. Ensure the product is placed firmly during use to prevent falls and damage. Turn off the product when not in use for a long time to save energy.