21
Connecting the power cord for a PSR180-56A, PSR360-56A,
PSR720-56A, PSR1110-56A, PSR600-54A-B,
PSR920-54A-B, or PSR1600-54A-B power supply
The power cord connection procedure is the same for the PSR180-56A, PSR360-56A, PSR720-56A,
PSR1110-56A, PSR600-54A-B, PSR920-54A-B, and PSR1600-54A-B power supplies. The
following procedure uses a PSR360-56A power supply as an example.
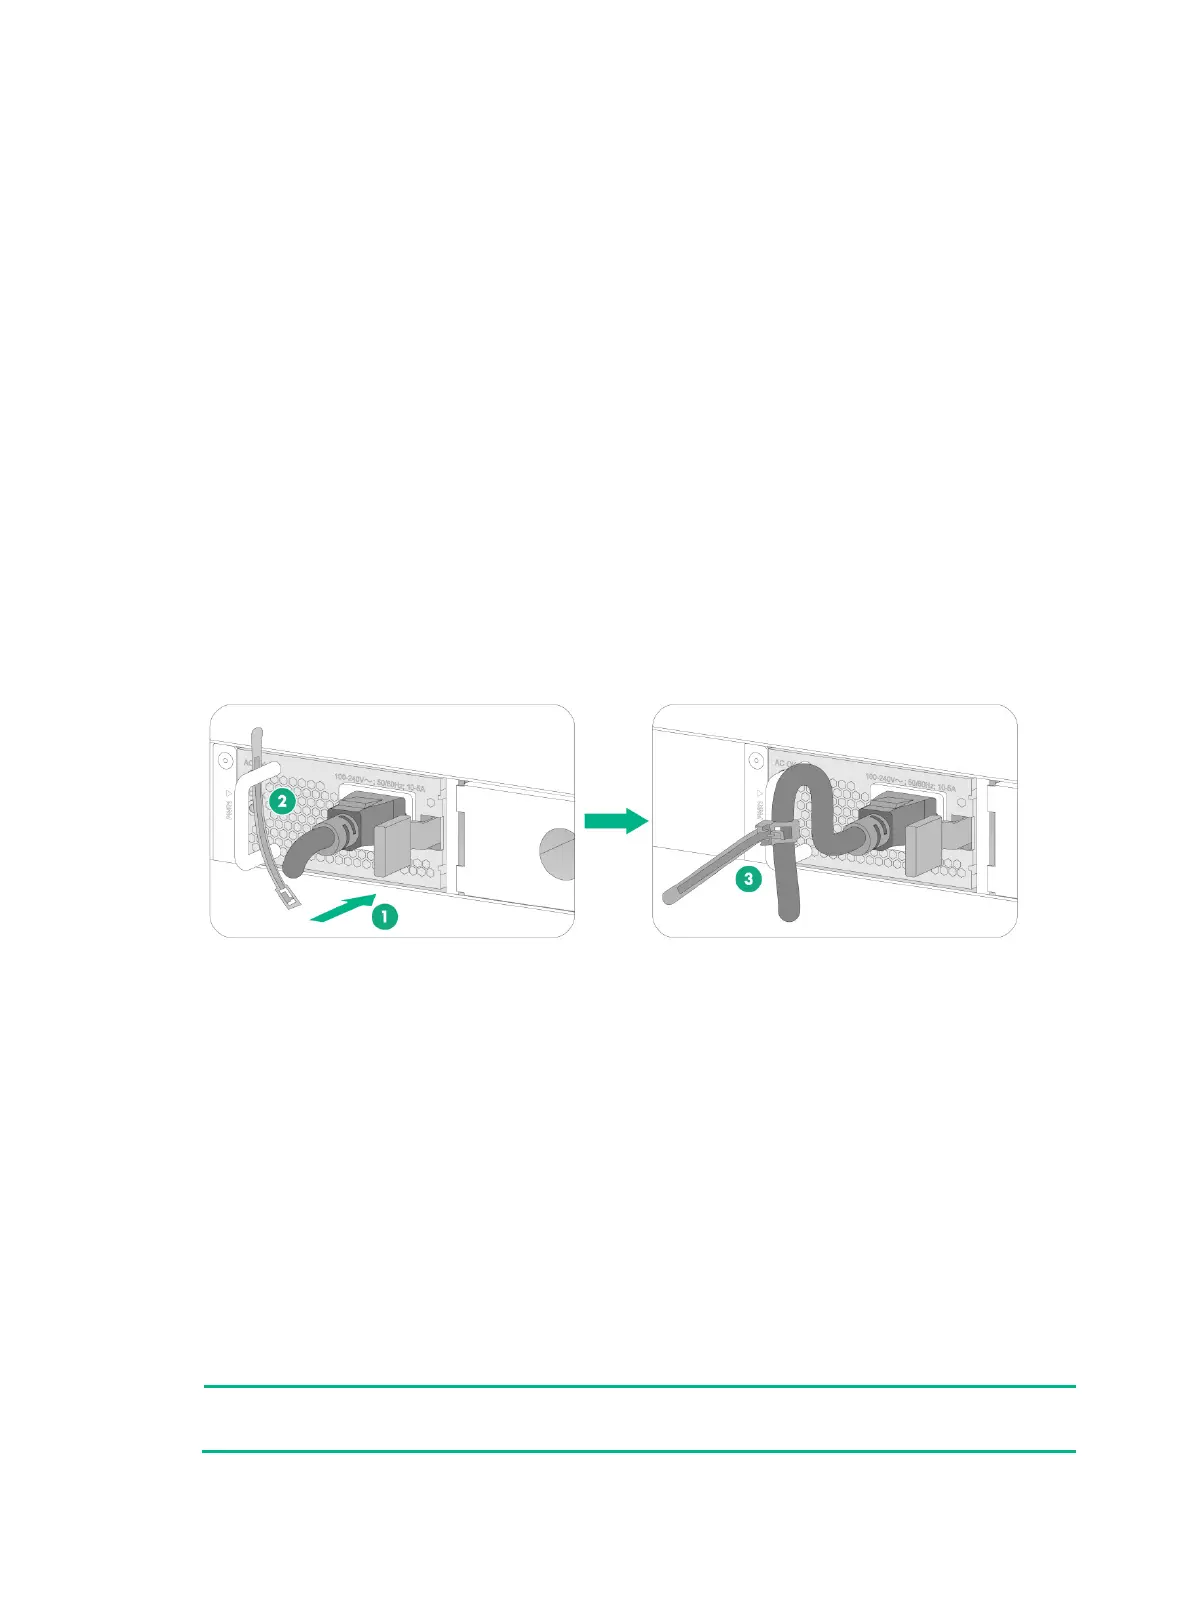
To connect the power cord for a PSR360-56A power supply:
1. Wear an ESD wrist strap and make sure it makes good skin contact and is reliably grounded.
2. Plug the female connector end of the power cord into the input socket of the power supply (see
callout 1 in Figure 25).
3. Use a cable tie to secure the power cord to the handle of the power supply (see callout 2 and
callout 3 in Figure 25).
4. Connect the other end of the power cord to a power source.
For a PSR360-56A, PSR720-56A, or PSR1110-56A power supply, you can connect the power
cord only to an AC power source. For a PSR180-56A, PSR600-54A-B, PSR920-54A-B, or
PSR1600-54A-B power supply, you can connect the power cord to an AC or HVDC power
source.
Figure 30 Connecting the power cord for a PSR360-56A power supply
Verifying the installation
Before powering on the switch, verify the following items:
There is enough space around the switch for heat dissipation.
The rack or workbench on which the switch is mounted is stable.
The grounding cable is securely connected.
The power source specifications are as required by the device.
The power cords are correctly connected.
If part of the network cable for a port is routed outdoors, verify that a network port lightning
protector is used for the port.
If a power line is routed from outdoors, verify that a surge protected power strip is used for the
switch.
For information about lightning protection for the switch, see H3C Lightning Protection Guide.

 Loading...


