N O T I C E
Indicates a situation which, if not avoided, may cause damage to the instrument. Information that
requires special emphasis.
3.3 Precautionary labels
Read all labels and tags attached to the instrument. Personal injury or damage to the instrument
could occur if not observed. A symbol on the instrument is referenced in the manual with a
precautionary statement.
Electrical equipment marked with this symbol may not be disposed of in European
domestic or public disposal systems. Return old or end-of-life equipment to the
manufacturer for disposal at no charge to the user.
3.4 Product hazards
C A U T I O N
Chemical exposure hazard. Obey laboratory safety procedures and wear all of the
personal protective equipment appropriate to the chemicals that are handled. Refer to
the current safety data sheets (MSDS/SDS) for safety protocols.
C A U T I O N
Chemical exposure hazard. Dispose of chemicals and wastes in accordance with local,
regional and national regulations.
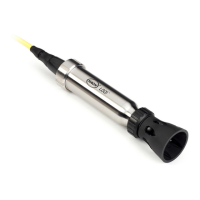
Section 4 Preparation for use
Prepare the probe for calibration and measurement as follows. Do not touch the protective black
layer on the LDO sensor cap.
1. Remove the shroud. Refer to Remove or install the shroud on page 9.
2. Open the pressure sensor module cap and make sure that the label on the iButton is on top.
3. Make sure that the LDO sensor cap and iButton label have the same lot code. Refer to Figure 2.
4. Install the LDO sensor cap and tighten by hand. Do not tighten more than is necessary for a good
seal.
5. Soak the probe in 100 mL of tap water for 30 minutes before use. For probes that will be in
aqueous solutions for more than 6 hours continuously, soak the probe for 72 hours.
Note: After 72 hours, the LDO sensor cap is fully hydrated.
6. Make sure that the meter has the correct date and time settings. The service-life time stamp in
the probe comes from the date and time settings in the meter.
Note: Some meters automatically open the date and time settings when the meter starts for the first time, or
after battery replacement.
7. Connect the probe to the meter.
8. Install the shroud. Refer to Remove or install the shroud on page 9.
Note: Make sure to install the shroud during field use to prevent damage to the sensing elements. The product
warranty does not include such damage.
English
5