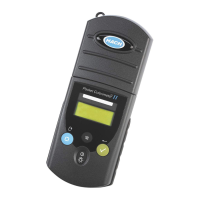
Calibrate the tester before initial use and when:
• Results drift
• Results are not accurate
• "?" shows next to the calibration icon
Calibrate the tester with the:
• Auto calibration procedure
• Custom calibration procedure
5
Before the initial calibration and after a dry storage, soak the sensor for several minutes
in the sample or tap water.
Auto calibration
Items to collect: One, two or three auto-recognition calibration standards
1. Set the power to on.
2. Remove the cap from the sensor.
3. Push to go to calibration mode.
The auto-recognition standard(s) to measure shows on the bottom line.
Note: If "C1" shows on the bottom line, do not continue. Set the tester to auto calibration mode.
Refer to Configure the settings on page 9.
4. Rinse the sensor and cap with deionized water and blot dry.
5. Pour the auto-recognition standard shown into the cap to the fill line.
6. Put the sensor fully into the cap.
7. When the measurement is stable, push
to save the measurement.
The measured value flashes three times.
8. Optional: To measure another calibration standard (maximum of 3), do steps 4–7
again.
9. Push and hold to go to continuous measurement mode. "END" shows on the
display.
Note: "ECAL" shows on the display if the calibration was not successful. Refer to
Troubleshooting on page 10.
10. Rinse the sensor and cap with deionized water and blot dry.
Custom calibration (Pocket Pro+ only)
Items to collect: One or two calibration standards or samples of known pH value
1. Set the power to on.
2. Remove the cap from the sensor.
3. Go to the settings menu. Make sure that the bUFr setting is set to Cus (custom
standard). Refer to Configure the settings on page 9.
4. Push to go to calibration mode.
"C1" shows on the bottom line.
5. Rinse the sensor and cap with deionized water and blot dry.
6. Pour the calibration standard or sample into the cap to the fill line.
7. Put the sensor fully into the cap.
8. When the measurement is stable, push and until the pH value of the
calibration solution or sample shows on the display.
9. Optional: To measure a second pH calibration standard or sample of known value,
push , then do steps 5–8 again.
5
Custom calibration can only be done on the Pocket Pro+ tester.
8
 Loading...

