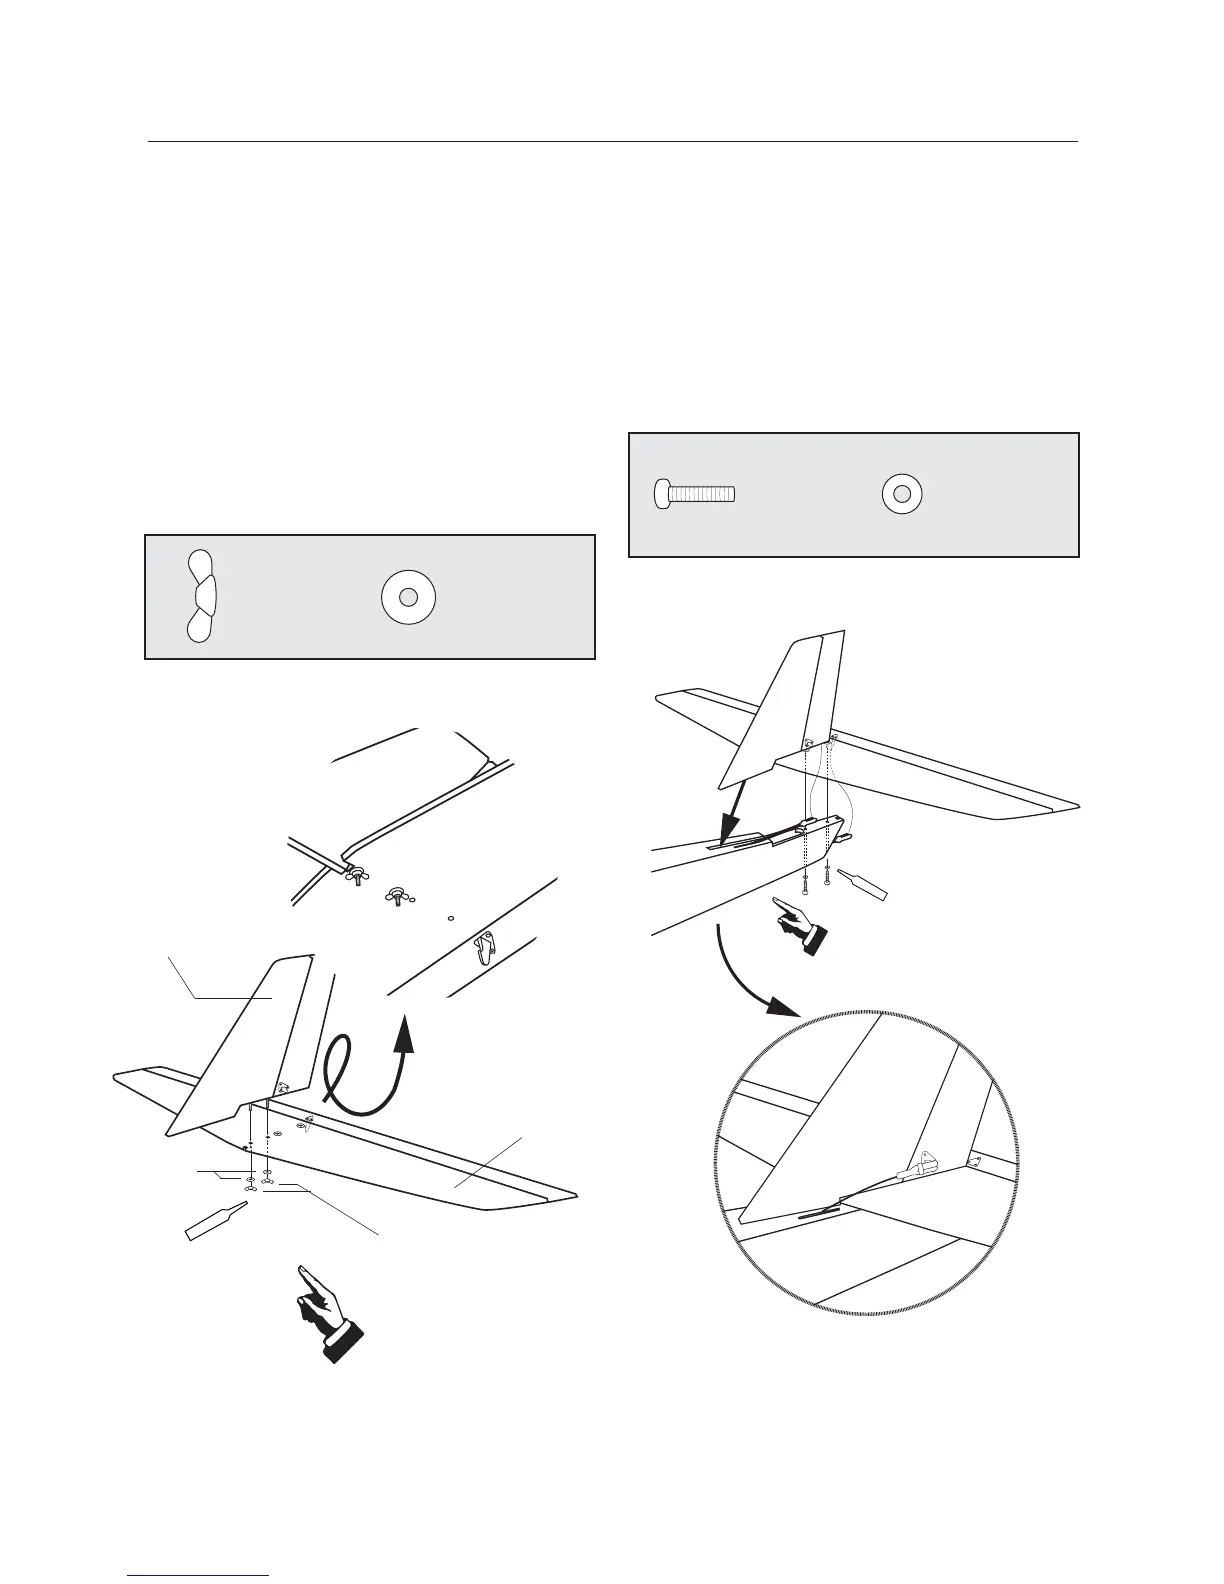
Section 3: Installing the Tail Assembly
7
Locate the horizontal stabilizer and vertical stabilizer assemblies.
The rudder and elevator have been prehinged at the factory, and
the control horns are also attached.
Remove the shipping tape holding the rudder and elevator in place.
Check both the rudder and elevator for freedom of movement.
Step 1
The vertical stabilizer has threaded rods in the bottom that secure
it to the horizontal stabilizer. Insert the threaded rods through the
predrilled holes in the horizontal stabilizer. Secure them together
using two large washers and wing nuts. Be sure to use a drop of
threadlock on the threaded rods before tightening the wing nuts.
Step 2
Slide the tail assembly into the slot in the rear of the fuselage,
making sure the rudder pushrod is on top of the horizontal
stabilizer. Use the two long screws and two small washers to
secure the tail assembly to the fuselage. There is a hole in the
bottom of the fuselage to access the forward screw location. Place
a drop of threadlock on the screws before installing them.
Hint: Use a magnetic screwdriver when installing the screws.
Attach the vertical stabilizer
to the horizontal stabilizer
using washer and wing nut.
Apply threadlock to
the threaded rods
before installing
the wing nuts.
Slide tail assembly into the
slot at the fuselage rear.
Large
Washer
Wing Nut
Small Washer
Long Screw
Step 1
Step 2
Apply threadlock to the
screws before installing.
Large Washer
Wing Nut
Horizontal Stabilizer
Vertical
Stabilizer