32
Required Parts
• Elevator joiner wire • CA hinge (6)
• Fuselage assembly
• Elevator (left and right)
Required Tools and Adhesives
• Thin CA • T-Pins
• 30-minute epoxy • Medium sandpaper
Step 1
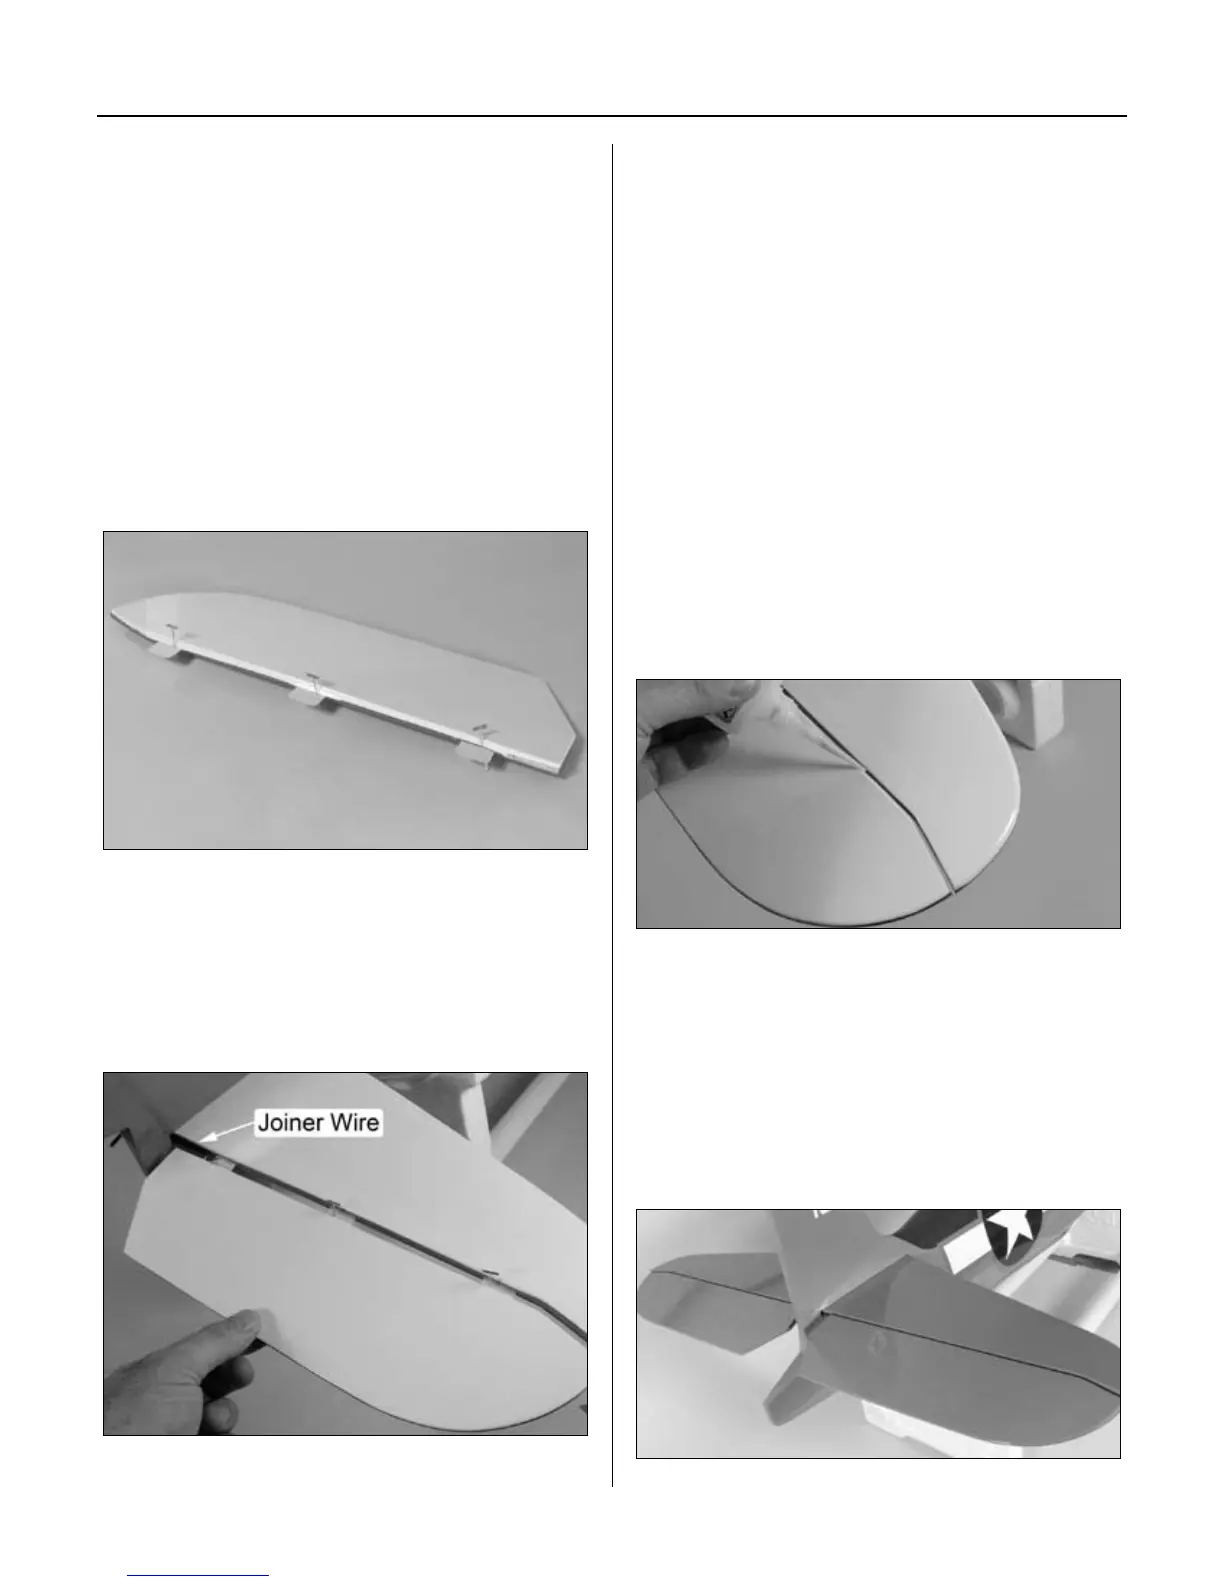
Remove the covering from the slot in the elevator.
Locate three CA hinges. Place a T-pin in the center of
the hinges. Place the hinges into the elevator half.
Step 2
Lightly sand the elevator joiner wire. Clean the wire
using a paper towel and rubbing alcohol. Slide
the elevator joiner wire into position. Test fit the
elevator and stab together. The elevator joiner wire
will be inserted into the hole exposed in Step 1.
Step 3
Mix 1/2 ounce of 30-minute epoxy and apply it to the
groove and hole in the elevator half. Insert the elevator
joiner wire. Press the elevator against the stabilizer so
that the hinge gap between the elevator and stabilizer is
roughly 1/64" (.4mm). Remove the T-pins and remove any
excess epoxy using rubbing alcohol and a paper towel.
Note: You can combine the previous step with
the following step if you like. This will hold
the elevator in position while the epoxy cures.
Step 4
Line up the tip of the elevator with the stabilizer tip.
Again, check to make sure the hinge gap between
the elevator and stabilizer is roughly 1/64" (.4mm).
Apply thin CA to both sides of the hinge. Make sure
to saturate the hinge and don’t use accelerator.
Step 5
Once the CA and epoxy have fully cured, gently pull on the
elevator and stab to make sure the hinges are well glued.
Flex the elevators a few times to break in the hinges.
Step 6
Repeat Steps 1 through 5 to install the remaining
elevator half.
Section 8: Installing the Elevators