8
Required Parts
• Quick connector retainer (2) • 3mm setscrew (2)
• Retract servo tray rail (2) • Retract servo tray
• 3
1
/
4
" (82.5mm) main wheel (2)
• 5/32" wheel collar (4)
• 3mm x 10mm screw (8) • 3mm washer (8)
• 3mm lock nut (8) • Aluminum bracket (4)
• Landing gear door (L&R) • 3mm setscrew (4)
• Quick connector (2) • Wheel well (2)
• Quick connector washer (2)
Required Tools and Adhesives
• 6-minute epoxy • Thick CA
• Retract Servo (JRPS791) • Hobby knife
• Drill • Rubbing alcohol
• Drill bit: 1/16" (1.5mm), 5/64" (2mm), 1/8" (3mm)
• Hex wrench (included in kit) • Paper towel
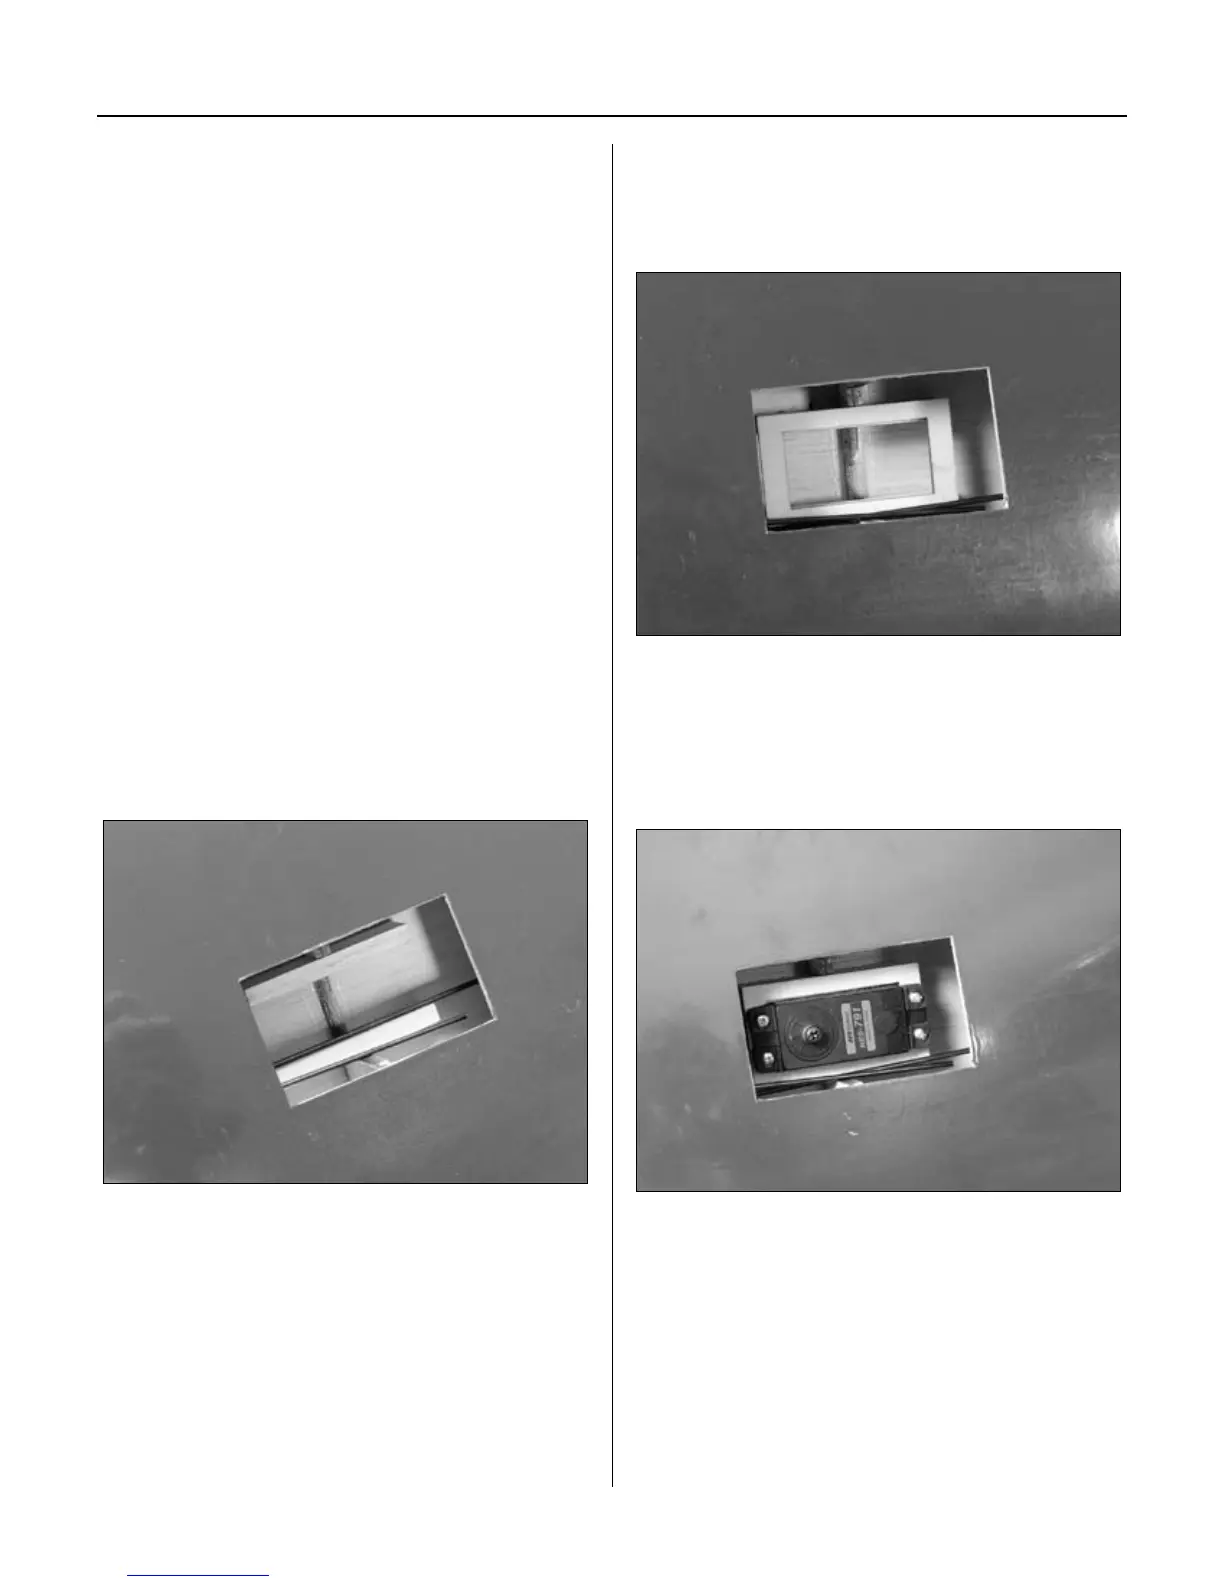
Step 1
Use 6-minute epoxy to glue the two retract servo
tray rails into the wing. Make sure the rails
rest on the bottom sheeting of the wing.
Step 2
Locate the retract servo tray. Use 6-minute epoxy
to glue the servo tray into position. Keep the retract
actuating wires on the top side of the servo tray.
Step 3
Install the low-profile retract servo in the servo
tray using the hardware provided with the servo.
Prevent splitting the servo tray by drilling 1/16"
(1.5mm) holes for the servo mounting screws.
Section 1: Retract Linkage Installation