Page GB-26 Installing and connecting the washing machine
Fixing with a hose holder
CAUTION!
Risk of scalding!
■ Connect the hose to the drain or
bath, ensuring the recoil force gen
-
erated during draining will not cause
the hose to slip.
■ Ensure the cross-section of the dis-
charge pipe is large enough to pre-
vent the suds overflowing.
■ Do not touch the suds being drained.
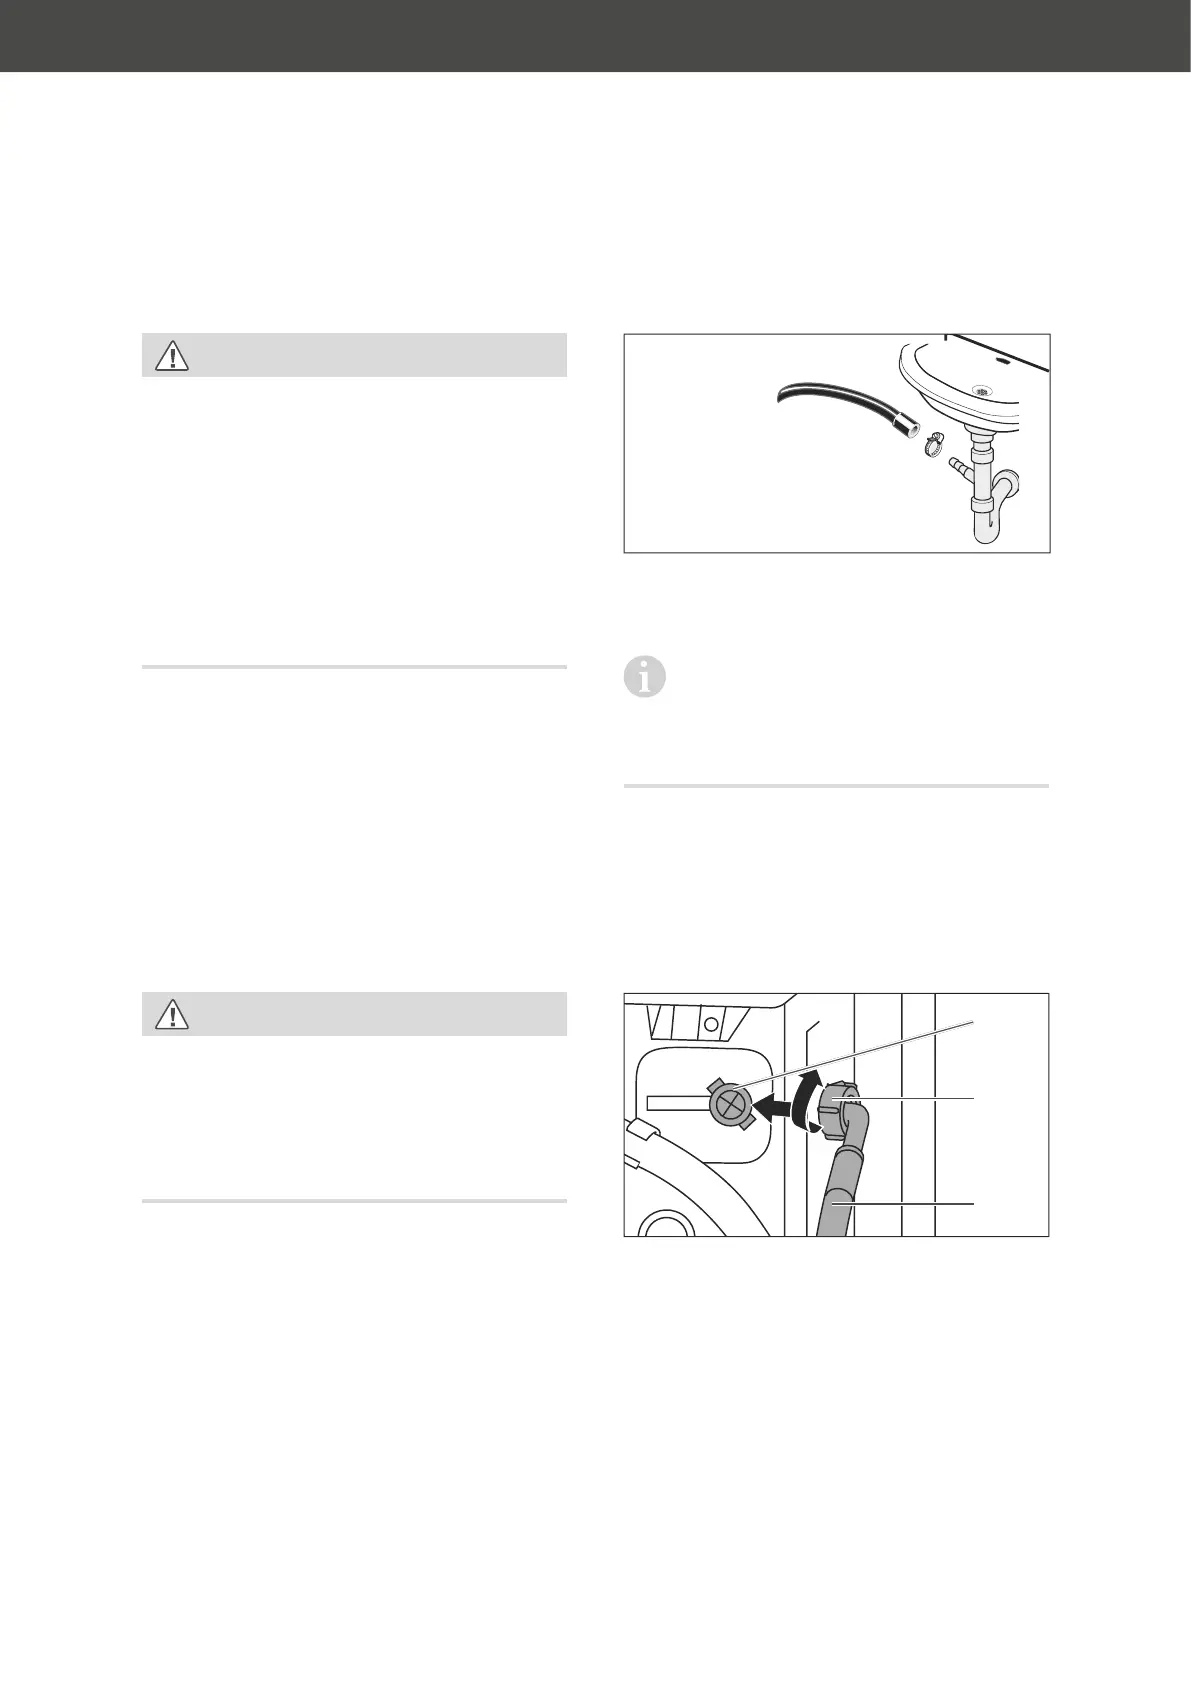
• Insert the end of the outlet hose into a hose
holder. Hang this over the edge of a wash
basin or a bath (suitable hose holders are
available from specialist retailers or DIY
stores.)
• Tether the hose holder tightly to ensure it
cannot slip.
• Make sure that the end of the hose is not
immersed in the drained suds.
Securing to a floor drain
CAUTION!
Risk of scalding!
■ Firmly secure the hose, ensuring the
recoil force generated during drain
-
ing will not cause the hose to slip out
of the floor drain.
Securing on the syphon
• Engage a professional to mount the outlet
hose on an appliance connecting nozzle.
An unused appliance connecting noz-
zle contains a washer to prevent water
owing out. This washer must be replaced
by a seal ring before connecting the outlet
hose.
Creating a water inlet
You require a valve with a ¾-inch connecting
thread for the water supply.
(14)
(b)
(38)
1. Screw the angled end of the supply
hose (b) hand-tight onto the connecting
nozzle (14) on the rear of the washing
machine.
 Loading...