INITIAL INSTALLATION
7
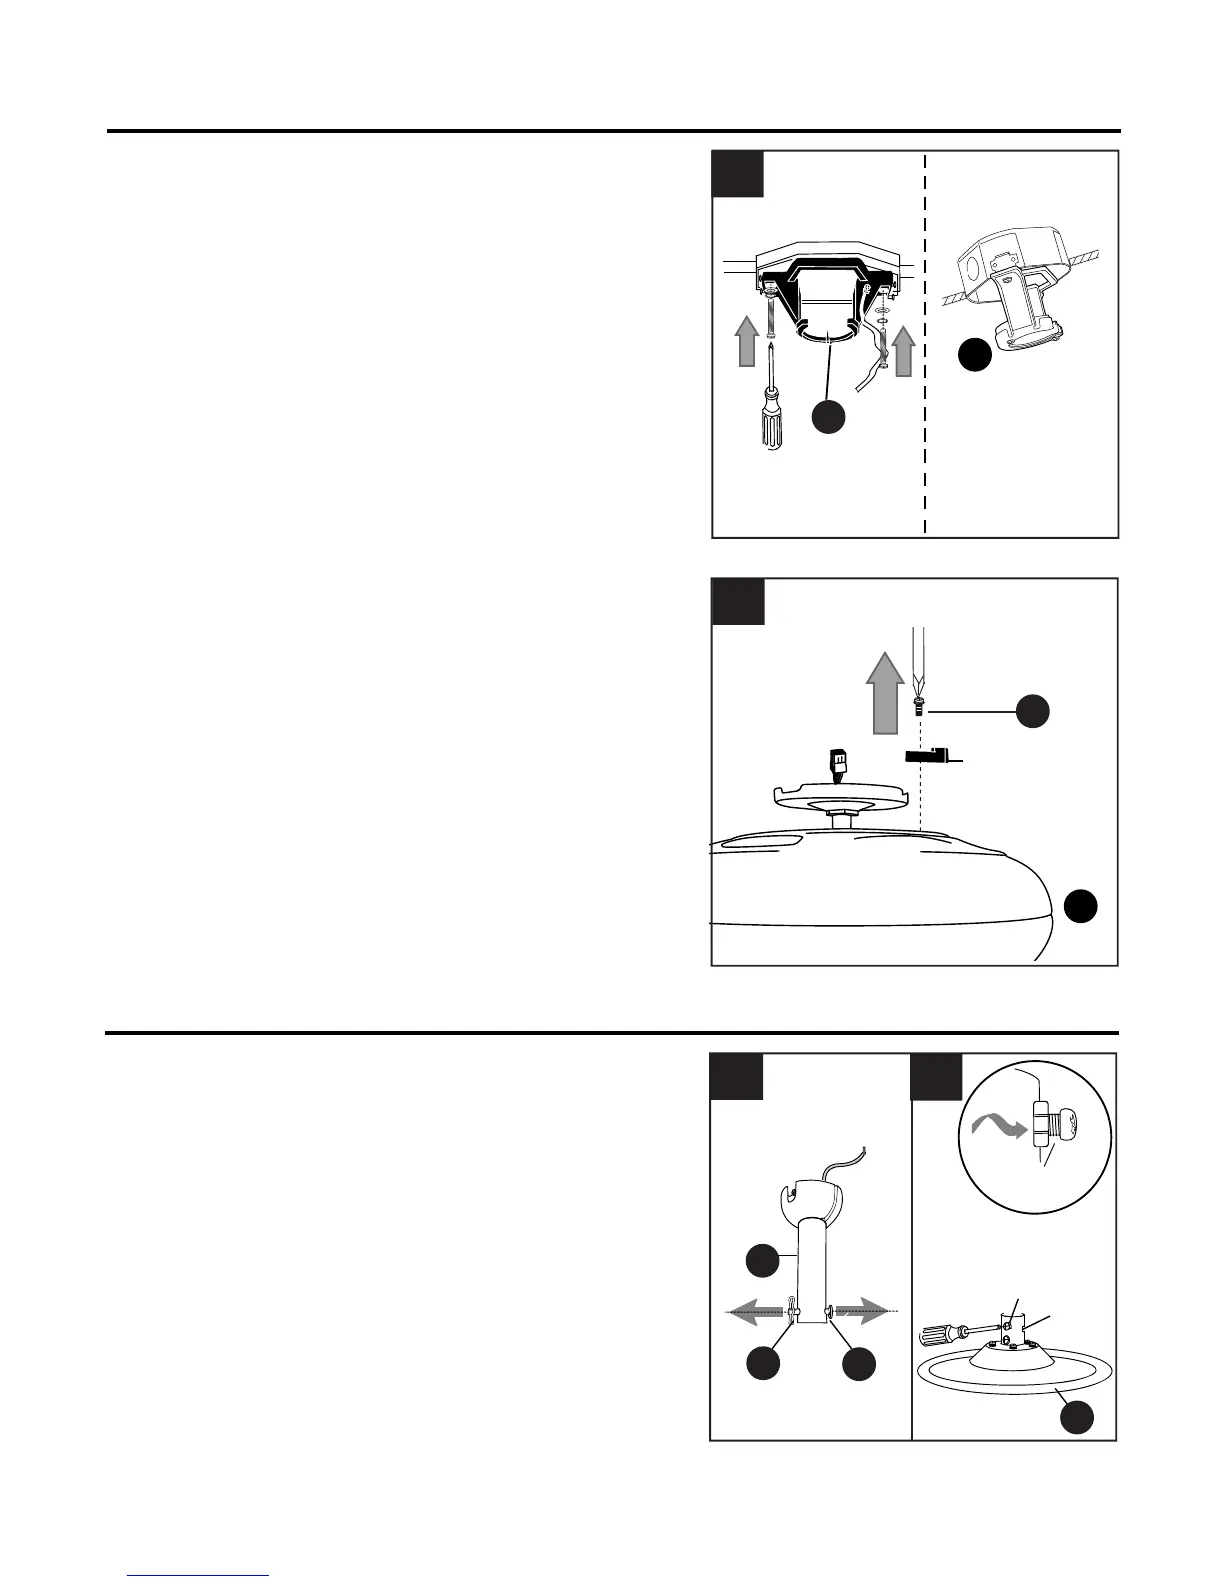
5.
Remove motor screws (I) from underside of
motor and save for blade arm (H) attachment
later on. If there are plastic motor blocks
installed with the motor screws (J), discard the
plastic motor blocks.
For DOWNROD-STYLE FAN MOUNTING,
proceed to step 1 on the next page.
For CLOSEMOUNT-STYLE FAN MOUNTING,
skip to page 9.
Secure mounting bracket (C) to outlet box (not
included) using screws, spring washers and flat
washers provided with the outlet box.
*NOTE: It is very important you use the proper
hardware when installing the mounting bracket (C)
as this will support the fan.
IMPORTANT: If using angle mount, make sure
open end of mounting bracket (C) is installed
facing the higher point of the ceiling.
4b.
5
I
C
C
4b
ANGLE
MOUNT
STANDARD
MOUNT
D
Plastic Motor
Block
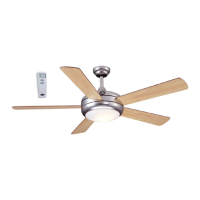
DOWNROD-STYLE FAN MOUNTING
Remove pin (L) and clip (M) from downrod (A).
Partially loosen preassembled set screws and
nuts in yoke at top of motor housing (D).
Set
Screws
and Nuts
1a.
1a
L
D
M
1b
A
1b.
Yoke
Sideview
Set Screw
& Nut
 Loading...