Do you have a question about the Harman Kardon DPR 1005 and is the answer not in the manual?
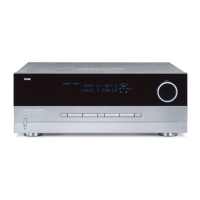
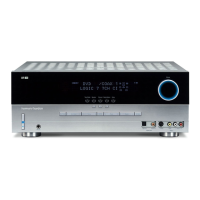
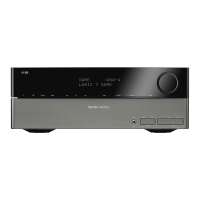
Details the breakthrough Digital Path Receiver technology and features.
Provides critical safety precautions for operation and installation.
Details guidelines for proper placement and ventilation.
Instructions for cleaning the unit safely and effectively.
Guidance on safely unpacking the unit and its packaging.
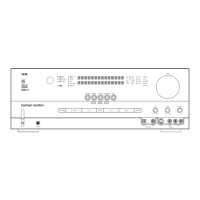
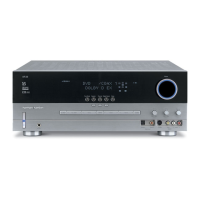
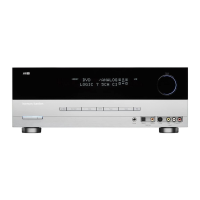
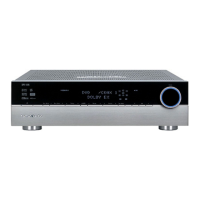
Controls the primary power state of the DPR unit.
Manages the unit's on/off state and standby mode.
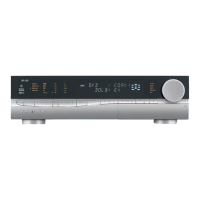
LED indicator showing standby or operational status.
Port for private listening via headphones.
Selects top-level groups of surround sound modes.
Initiates the speaker configuration process.
Used for scrolling through available options.
Enables or disables bass, treble, and balance controls.
Cycles through individual surround modes.
Adjusts radio frequency tuning up or down.
Switches between AM and FM tuner bands.
Confirms settings and enters them into memory.
Scrolls through stored radio station presets.
Used for scrolling through available options.
Changes the active input source for the DPR.
Displays RDS data messages from the tuner.
Initiates the adjustment of delay settings.
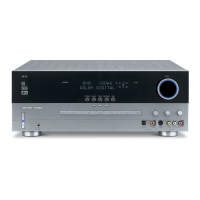
Connects optical digital audio sources.
Shows the status of front panel A/V jacks.
Connects coaxial digital audio sources.
Front panel A/V jacks for input or output.
Hides front panel controls and jacks.
Indicates the currently selected surround mode.
Shows speaker configuration and input signal status.
Selects a digital source for an input.
Initiates channel output level trimming.
Adjusts the system's audio volume.
Indicates the current input or function.
Displays status messages and operational feedback.
Receives infrared signals from the remote control.
Connects the AM loop antenna.
Connects FM antenna for reception.
Connects audio recorders for playback input.
Connects audio recorders for recording output.
Line-level output for a powered subwoofer.
Connects analog audio from DVD/audio sources.
Connects analog audio from CD players/audio sources.
Outputs for remote zone audio feed.
Connects A-BUS keypads or control modules.
Inputs for discrete analog audio sources.
Outputs for digital audio recorders.
Outputs for viewing on-screen menus/video.
Inputs for DVD player video signals.
Connects front left/right speakers.
Connects surround speakers.
Provides switched power to accessory devices.
Provides unswitched power to accessory devices.
Connection point for the unit's power cord.
Inputs for component video sources.
Outputs component video for projector/monitor.
Inputs for component video sources.
Outputs IR signals for external devices.
Receives IR signals for remote control.
Receives IR signals for multiroom control.
Outputs for VCR video recording.
Inputs for VCR video playback.
Outputs for second VCR video recording.
Inputs for third video source.
Inputs for second VCR video playback.
Connects optical digital audio/video sources.
Connects coaxial digital audio/video sources.
Outputs for second VCR audio recording.
Inputs for second VCR audio playback.
Inputs for third audio source.
Inputs for VCR audio playback.
Outputs for VCR audio recording.
Outputs for connecting external power amplifiers.
Outputs for surround back or multiroom speakers.
Interface for serial control and upgrades.
Inputs for fourth video source.
Inputs for fourth audio source.
Turns the unit off or places it in standby mode.
Transmits infrared signals from the remote.
Displays status messages and operational feedback.
Turns the unit on from standby mode.
Selects input sources and controls device operation.
Switches remote control to DPR functions.
Selects tuner input and switches between AM/FM bands.
Selects direct analog audio inputs for SACD/DVD-Audio.
Initiates speaker calibration sequence.
Sets the unit to turn off automatically after a set time.
Cycles through different surround sound modes.
Reduces dynamic range for low-volume listening.
Initiates channel output level adjustments.
Controls front panel display brightness.
Used for navigating menus and adjusting settings.
Confirms selections and saves settings.
Assigns digital inputs to specific sources.
Enters numbers for presets, channels, or codes.
Selects between automatic and manual tuner modes.
Enables direct entry of station frequencies.
Tunes radio stations up or down.
Activates or deactivates the on-screen display.
Selects various Dolby surround processing modes.
Selects appropriate DTS surround modes.
Selects Harman Kardon's Logic 7 surround modes.
Controls playback functions for compatible devices.
Activates the remote's backlight.
Skips tracks on CD/DVD players.
Selects stereo playback modes, including Surround Off.
Selects DTS Neo:6 surround modes for analog sources.
Stores and recalls custom command sequences.
Displays RDS data messages from the tuner.
Scrolls through stored tuner presets.
Clears incorrect entries during programming.
Stores tuner presets into memory.
Adjusts audio delay and previous channel.
Initiates remote programming modes.
Configures speaker settings for the system.
Activates and controls multiroom audio functions.
Adjusts the system's audio volume.
Selects EzSet function or manual SPL meter mode.
Changes channels when controlling TV/VCR.
Silences audio output temporarily.
Microphone for EzSet calibration.
Adjusts bass, treble, and tone modes.
Turns the Zone II system or DPR standby off.
Turns on the DPR and selects the last used input.
Selects tuner input and switches AM/FM bands.
Turns on unit and selects input source.
Tunes tuner or controls fast play/reverse.
Activates record or pause on compatible decks.
Selects presets or skips tracks on players.
Changes discs on compatible changers.
Adjusts volume in the main or remote room.
Controls playback on compatible players.
Silences audio output in the remote room.
Guides connection of audio source and recording equipment.
Guides connection of video source equipment.
Details SCART to RCA/S-Video adapter connections.
Notes on signal conversion and OSD visibility.
Guidance on using SCART-Cinch adapter cables.
Specific instructions for S-Video connections.
Notes on specific control signals lost with adapters.
Notes on RGB signal path requirements with SCART.
Extends remote control signal for obstructed placements.
Links remote room IR sensor to DPR for control.
Options for sending audio to a remote zone.
Connects A-BUS modules for multiroom operation.
Serial interface for control and system upgrades.
Connects the unit to AC power and accessory outlets.
Guidelines for optimal placement of surround sound speakers.
Steps for initial power-up and setup.
Guides use of on-screen menus for adjustments.
Configures various system parameters.
Configures input sources and their associated settings.
Configures speaker size, crossover, and type settings.
Selects desired surround sound modes for inputs.
Customizes settings for specific input sources.
Adjusts timing for speaker signals to ensure proper sync.
Preserves dialog intelligibility at low volumes.
Calibrates speaker output levels for optimal sound.
Automated system calibration using the remote control.
Manually adjusts output levels using test tone or meter.
Details features and delay times for various surround modes.
Instructions for turning the DPR on/off and basic functions.
Steps to power the unit on, off, or into standby mode.
Sets the unit to turn off automatically after a set time.
How to choose and switch between input sources.
Connects discrete analog audio sources like DVD-Audio.
Adjusts volume, mute, tone, and headphone connection.
Guides selection of surround modes based on source and preference.
Explains digital audio formats like Dolby Digital and DTS.
Details Dolby Digital audio format and connection requirements.
Details DTS digital audio format and connection requirements.
Playback of PCM digital audio from CDs and other sources.
High Definition Compatible Digital audio playback.
On-board decoding for MP3 audio files.
Steps to connect and select digital audio sources.
Shows received digital signal type and channel information.
Indicators showing digital signal status and interruptions.
Adjusts Dolby Digital for low-volume intelligibility.
Instructions for recording audio/video sources.
Configuring front panel Video 5 jacks as input or output.
Adjusts output levels using program material or test signals.
Controls front panel display brightness.
System retains settings if unit loses power.
Assigns surround back channels for multiroom use.
Sets front panel displays to fade after button press.
Adjusts front panel display brightness level.
Sets default volume level upon unit power-on.
Configures one-line display messages for system changes.
Adjusts duration on-screen menus remain visible.
Overview of multiroom system capabilities and control.
Guidance for installing multiroom system wiring.
Serial interface for control and system upgrades.
Configures DPR for multiroom audio and IR link.
Operating the multiroom system from a remote location.
Instructions for tuning radio stations.
Steps to select AM/FM stations manually or via presets.
Stores and recalls radio station presets.
Methods to manually select stored radio stations.
Utilizes RDS data for station information and text.
Automatic display of station call signs with RDS.
Cycles through available RDS data types.
Searches for stations based on Program Type (PTY).
Overview of remote programming capabilities.
Enters codes for devices using the remote's library.
Automatically searches for device codes.
Learns commands from original remotes.
Reassigns device control codes to different buttons.
Records and recalls custom command sequences.
Allows control of specific functions on different devices.
Enables volume controls to work across devices.
Enables channel controls to work across devices.
Enables transport controls to work across devices.
Configures EzSet feature, including disabling the SPL button.
Customizes display names for devices or keys.
Changes the name of a device/input selector.
Renames specific remote buttons for custom labels.
Restores remote to factory default settings.
Provides tips on remote programming, battery life, and backlight.
Resets the DPR's system memory to factory defaults.
Specifications for stereo and surround audio performance.
Specifications for FM tuner sensitivity and performance.
Specifications for AM tuner performance.
Specifications for video input/output and frequency response.
General specifications including power and dimensions.
| Continuous Average Power (FTC) | 70 Watts per channel, 20Hz–20kHz, <0.15% THD, both channels driven into 8 ohms |
|---|---|
| Power per Individual Channel - Front L&R channels | 70 Watts per channel, <0.15% THD, 20Hz–20kHz into 8 ohms |
| Power per Individual Channel - Center channel | 70 Watts, <0.15% THD, 20Hz–20kHz into 8 ohms |
| Power per Individual Channel - Surround channels | 70 Watts per channel, <0.15% THD, 20Hz–20kHz into 8 ohms |
| Input Sensitivity/Impedance | 200mV/47k ohms |
| Signal-to-Noise Ratio (IHF-A) | 97dB |
| Frequency Range | 87.5–108.0MHz |
|---|---|
| Usable Sensitivity IHF | 1.3µV/13.2dBf |
| Signal-to-Noise Ratio Mono/Stereo | 70/68dB |
| Distortion Mono/Stereo | 0.2/0.3% |
| Stereo Separation | 40dB @ 1kHz |
| Selectivity | ±400kHz, 70dB |
| Frequency Range | 520–1720kHz |
|---|---|
| Signal-to-Noise Ratio | 45dB |
| Usable Sensitivity Loop | 500µV |
| Distortion | 0.8% @ 1kHz, 50% Mod |
| Selectivity | ±10kHz, 30dB |
| Television Format | NTSC |
|---|---|
| Input Level/Impedance | 1Vp-p/75 ohms |
| Output Level/Impedance | 1Vp-p/75 ohms |
| Video Frequency Response (Composite and S-Video) | 10Hz–8MHz (–3dB) |
| Video Frequency Response (Component Video) | 10Hz–50MHz (–3dB) |
| Power Requirement | AC 120V/60Hz |
|---|---|
| Power Consumption - Standby | 8.9W |
| Power Consumption - Idle | 52W |
| Power Consumption - Max | 760W (7 channels driven) |
| Width - Product | 17.3 inches (440mm) |
|---|---|
| Width - Shipping | 22.6 inches (573mm) |
| Height - Product | 4.5 inches (114mm) |
| Height - Shipping | 8.9 inches (225mm) |
| Depth - Product | 18.8 inches (476mm) |
| Depth - Shipping | 21.9 inches (555mm) |
| Weight - Product | 23.1 lb (10.5kg) |
| Weight - Shipping | 27.5 lb (12.5kg) |