Installation
The unused portion
of
the mounting gasket has been included
to
for use
in
tracing the perfect 3
1/
2" mounting hole cut out.
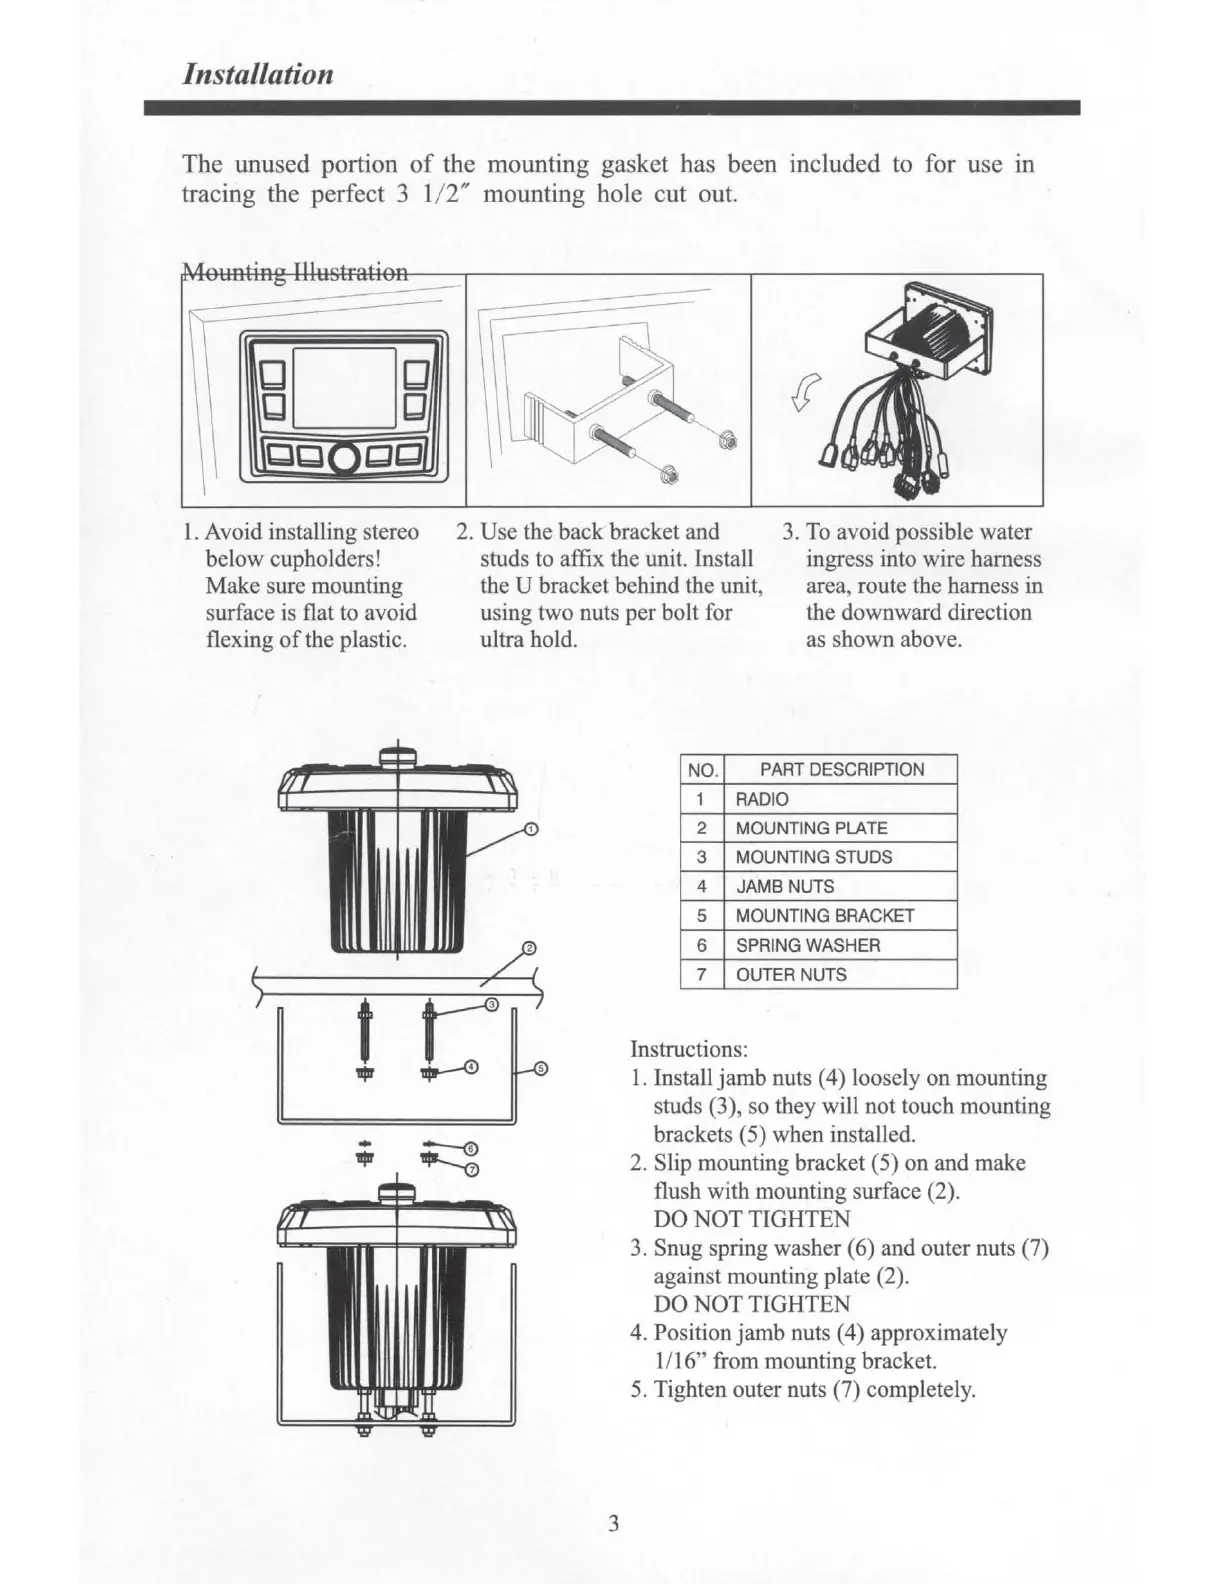
1. Avoid installing stereo
below
cupholders!
Make
sure mounting
surface is flat to avoid
flexing
of
the plastic.
2.
Use
the
back
bracket
and
studs to affix the unit. Install
the U bracket behind the
unit
,
using two nuts
per
bolt
for
ultra
hold.
3. To avoid possible
water
ingress into
wire
harness
area, route the harness
in
the downward direction
as
shown
above.
3
NO
.
PART
DESCRIPTION
1
RADIO
2
MOUNTING
PLATE
3 MOUNTING
STUDS
4
JAMB NUTS
5
MOUNTING
BRACKET
6
SPRING
WASHER
7
OUTER
NUTS
Instructions:
1.
Install
jamb
nuts (
4)
loosely
on
mounting
studs (3 ), so
they
will
not
touch mounting
brackets (5) when installed.
2. Slip mounting bracket (5)
on
and
make
flush with mounting surface (2).
DO
NOT
TIGHTEN
3. Snug spring washer ( 6) and outer nuts (7)
against mounting
plate
(2).
DO
NOT
TIGHTEN
4. Position
jamb
nuts (4) approximately
1/
16" from mounting bracket.
5. Tighten outer nuts (7) completely.