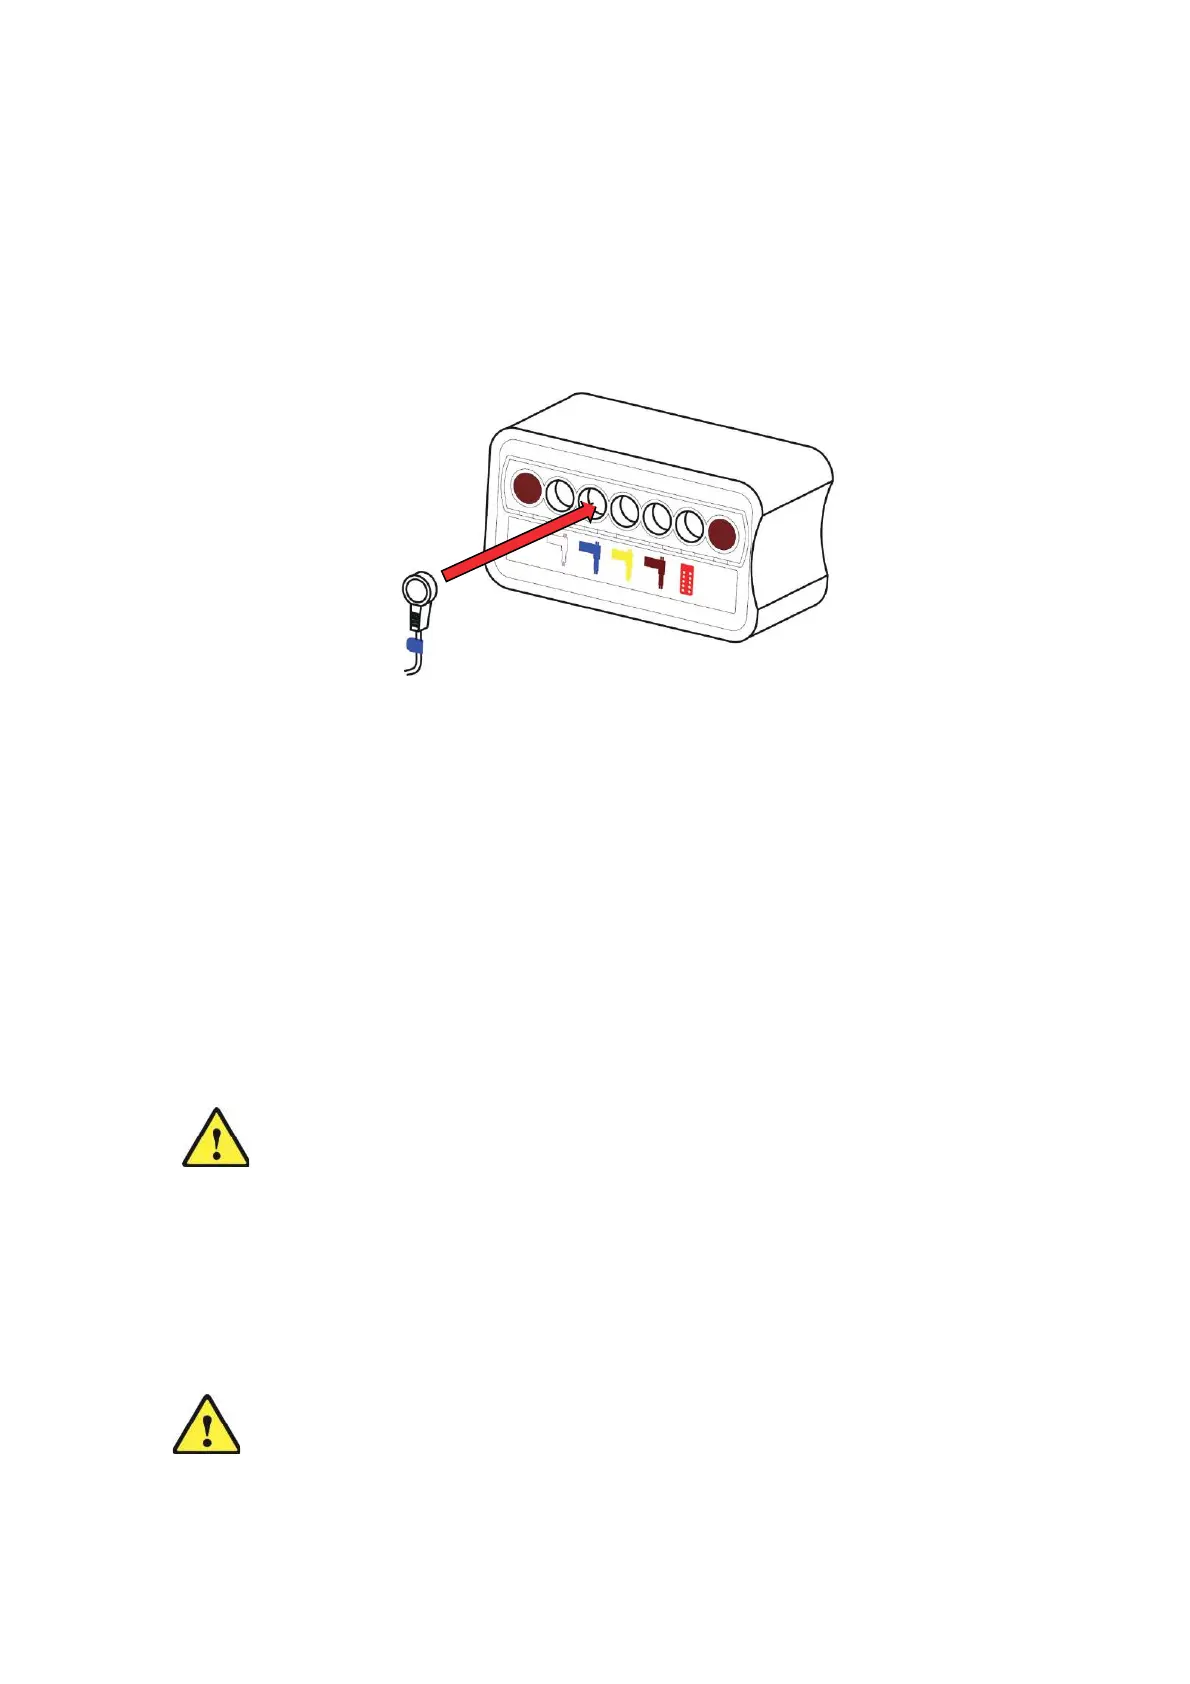
7.2 Connecting the controller
Once the bed is assembled the actuators and the controller can be connected.
1. Ensure all cabling is carefully routed under the bed; avoiding any risk pinching the cables.
2. The connectors to plug into the controller are all colour coded, as are the sockets on the
controller. Plug each connector into the corresponding socket on the controller (Figure
10).
3. Connect the sockets on the actuators.
4. Connect the Handset.
Figure 10: Connecting the controller
7.3 Before using the bed
1. Check all locking collars are locked, i.e. the label is covered.
2. Ensure all retaining straps are released.
3. Check all pins, plastic spacers and R-clips are secure.
4. Check all thumb wheels are tight.
5. Are all cables correctly routed and have sufficient slack to allow for movement of the bed?
6. Check there are no obstructions that may affect the bed movement.
7. Apply the castor brakes.
8. Has a risk assessment been undertaken?
9. Connect the bed to the mains supply and test.
Caution:
Ensure all cables are not under any undue tension when at their most
extended and are free from any moving parts of the bed.
Page 14 of 2
8
Handset Controls are supplied with buttons.
Caution:
Ensure that no person, limbs or objects in any way
interfere with the
desired movement of the bed
.
8. Handset Control
 Loading...