Mounting the Unit
The Thermopod is wall-mounted by the brackets. The Thermopod can also be positioned on a suitable flat surface
where is close to the water cylinder.
Light Duty Finned Anchors
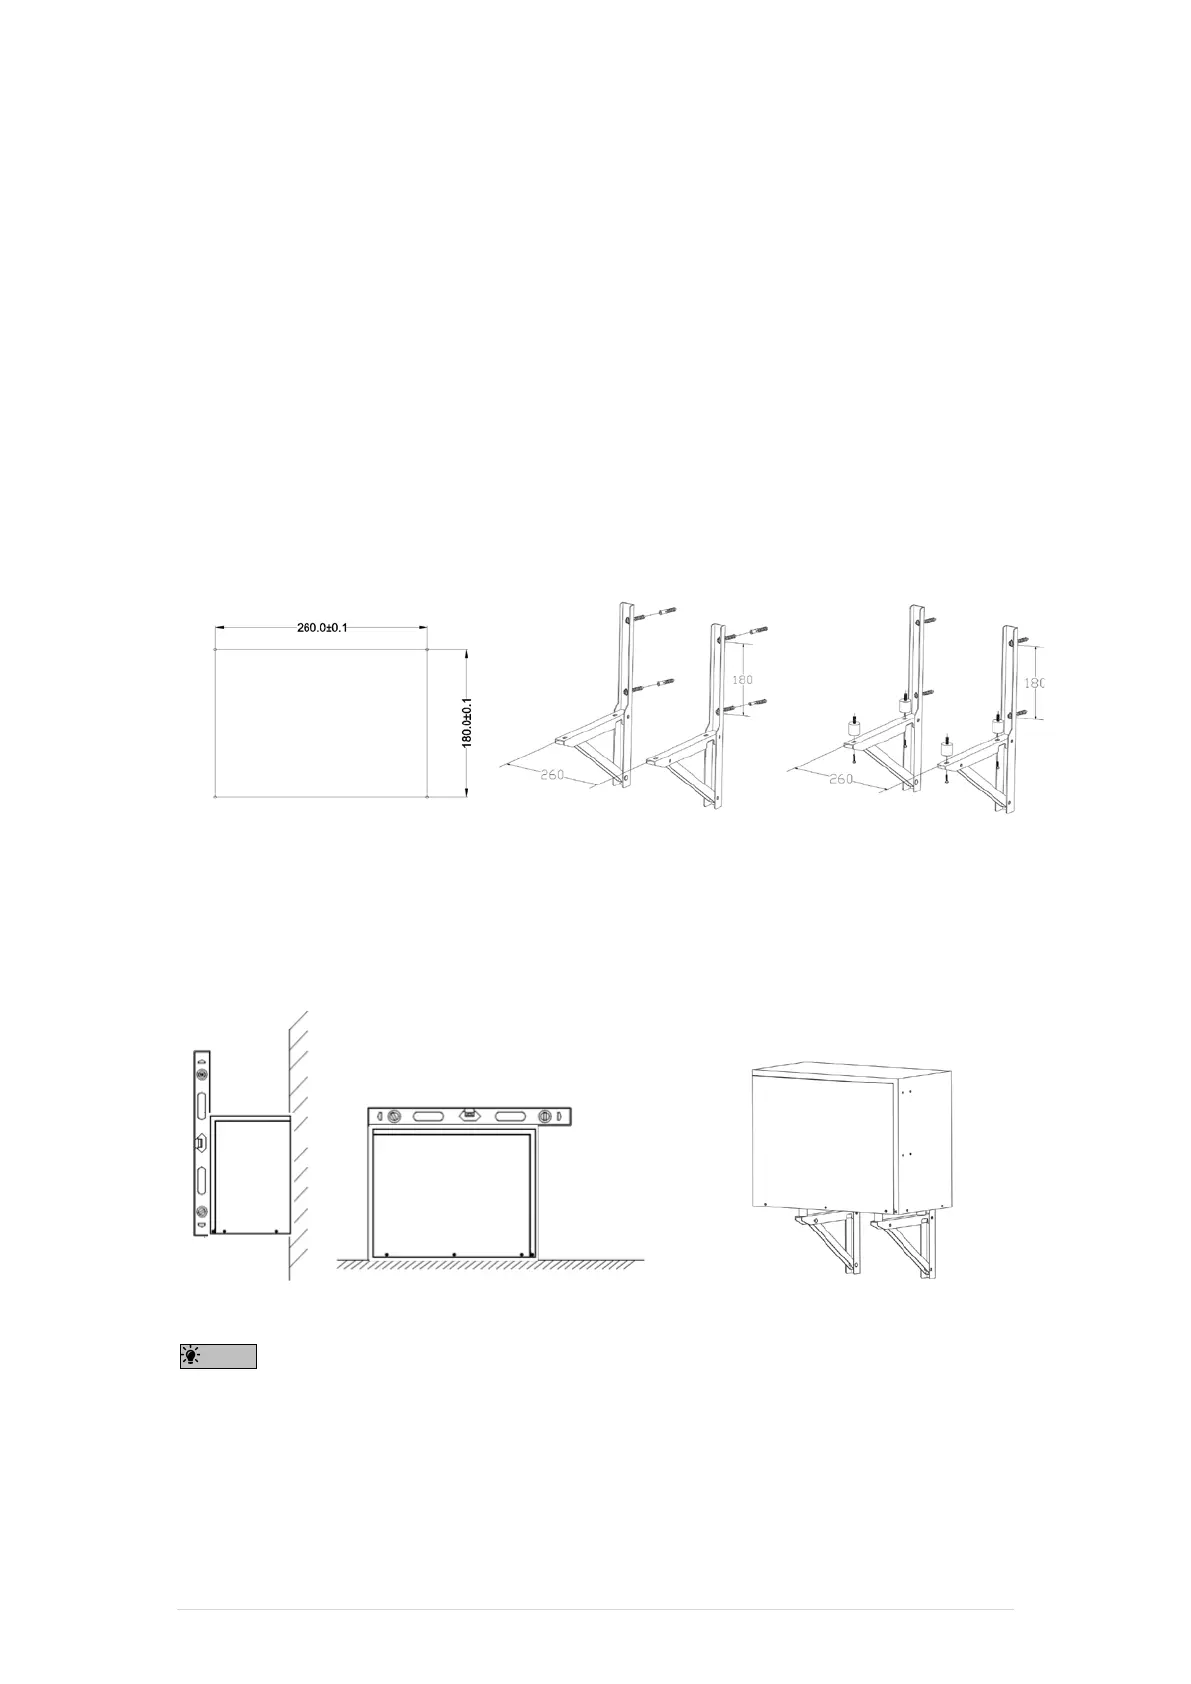
Installing brackets
1. Drill holes on the wall as illustrated.
2. Fit the brackets on the wall with the distance of 260mm by screws and anchors.
3. Install the triangular mounting brackets together by using the screws that the manufacturer supplied.
4. Fit Thermopod into place on the brackets by using the Anti-vibration mounts, screws and nuts that the
manufacturer supplied.
Installing on brackets
1. Install Thermopod on brackets.
2. Connect water and refrigerate pipes.
Note:
Check if the Thermopod was mounted in the applicable grooves on the brackets.
Ensure that the Thermopod is installed horizontally.
Note
The standard pipe-run distance between Thermopod and Thermopod panel is 10 meters.
The Thermopodshould be installed horizontally.
Make sure anti-vibration mount is in no deformation after installation.
Thermopod - Installation Manual 9 | Page