Revision A • 6/06
HARRIS CORPORATION
4-4
4 Linking the NetWave
Refer to the VistaMax or Envoy manual on
using VMCC to set up a VistaMax commu-
nity before continuing with these instructions.
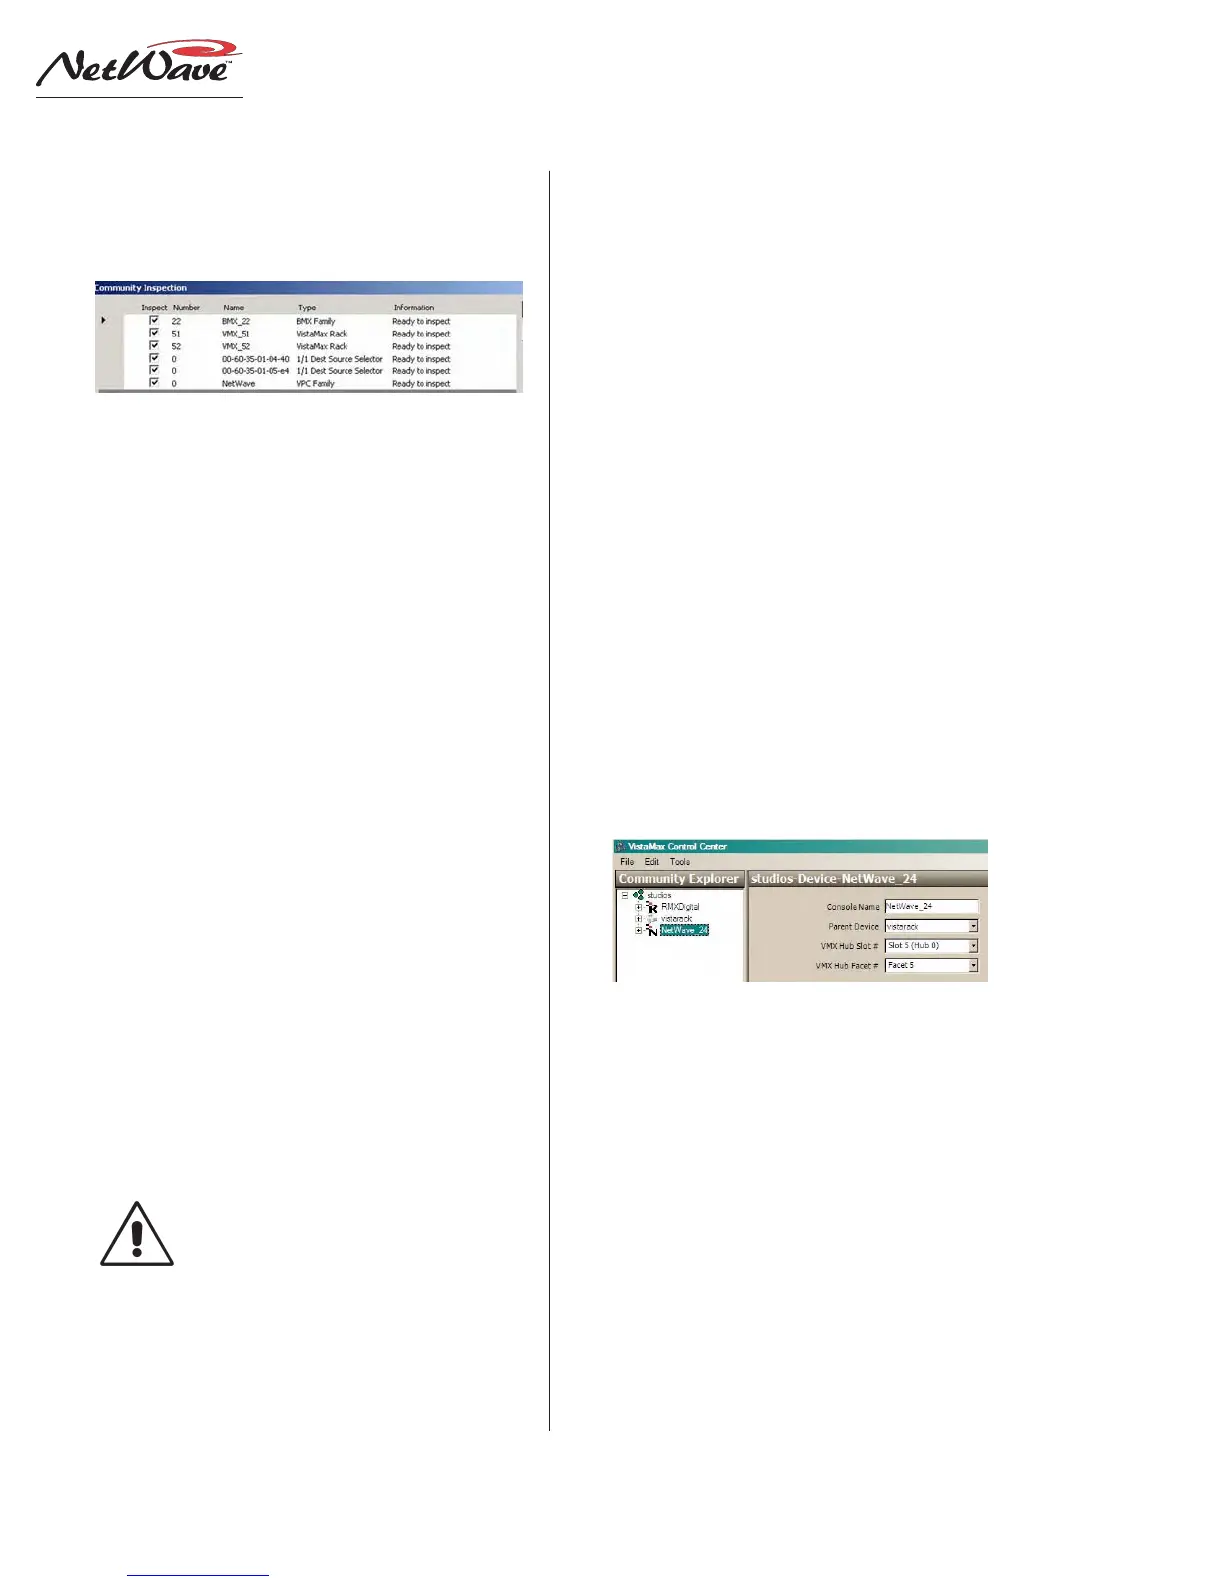
Click the VMCC
File
menu item, then select
Inspect Community
. A community inspection
window opens to show all the VistaMax de-
vices detected—which in this case should be
the new NetWave console, any Dual Router
TINI cards, and the other existing VistaMax
devices (consoles, card frames and edge de-
vices) that were previously set up.
The other community members don’t need
to be reinspected, so uncheck them (double-
click on their Inspect check boxes to remove
the checkmark). The only devices that should
remain checked are the NetWave console and
any TINI cards installed as part of the op-
tional Dual Router kits.
The TINI cards show up in the list with their
MAC address in the Name column and their
Type set as
1/1 Dest Source Selector
(as shown
above). If necessary, widen the Name column
to show the full MAC address (point the mouse
next to the Type heading and click/hold on
the left-right arrow symbol that pops up, drag
right to open up the Name column width).
Note: When the TINI was installed
into a Dual Fader, the console name
and which channels that TINI con-
trols should have been written on the
label on the TINI’s antistatic bag.
These TINI bag labels can be used
to verify each TINI card’s assign-
ments during configuration.
Click
Inspect
to inspect the NetWave and
Dual Router panels. The information line
shows Done when the inspection completes.
Click
Continue
to move to the window show-
ing the inspection results. With a new con-
sole there will be no slot conflicts or critical
issues, so click
Accept
.
After a few seconds (depending upon how
large the community is) the console will ap-
pear as a new community member in the Com-
munity Explorer pane, along the left side of
the window as shown below. This pane shows
each device in the VistaMax community.
3 Edit the Device Settings
After an inspection, the new console should
be selected (if it’s not, click once on the con-
sole name in the Community Explorer pane
to highlight its name). The right side editing
pane shows the device settings for the new
console, as shown below.
Give the console a unique name since each
size frame uses the same default name (i.e.,
NetWave_24). Enter a console name (up to
10 alphanumeric characters or an underline)
in the Console Name entry box.
Verify that the parent device (i.e., Vista
Rack), Hub card (i.e., Slot 5 (Hub 0)) and
Facet (i.e., Facet 5) are correctly listed since
this defines the source and destination signal
numbers assigned to that NetWave console.
If these are incorrectly defined, the console
will not receive the correct signals and sig-
nals from the console will not route correctly.
VMCC Inspection Window
NetWave Parameter Setup Pane in VMCC