1-20 InstallatIon
P/N 0387183_V
U.S. & Canada 1-800-922-1919 • Mexico 1-800-890-2900 • WWW.HUSSMANN.COM
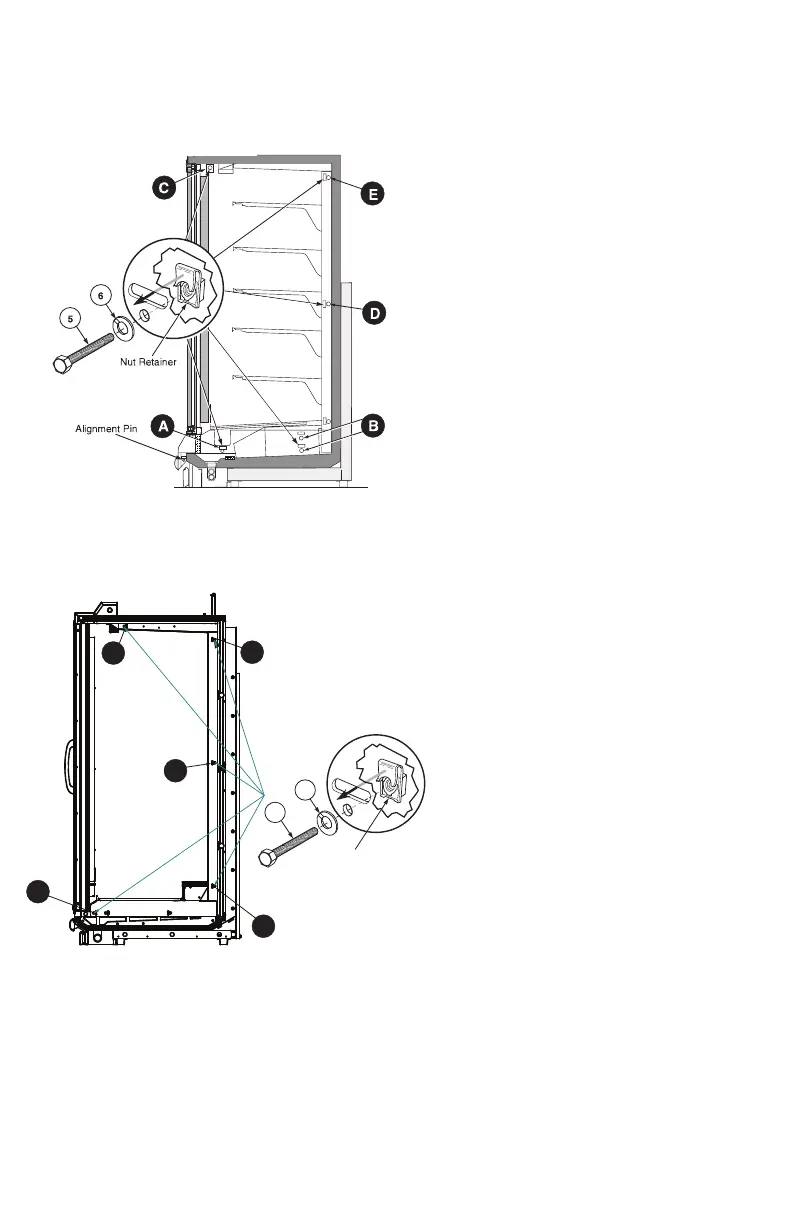
Figure 7A. Joining Sequence
RL, RM, RMF, RLN, RMN
D
E
C
B
A
5
4
Nut Retainer
Figure 7B. Joining Sequence
RLTM / RMTM / RMTD
7
Loosely insert Cap Screw–5 with Lock
Washer – 6 into each nut retainer follow-
ing the sequence shown in Figures 7A and
7B.
Do not tighten fully.
A. Fasten bottom fronts together, but tight-
en only until front panels touch.
B. Move to the bottom back position and
join (2 places).
C. Join at the top front
position.
D. Go to the middle back
wall position and join.
E. Join at the lower back wall.
F. Finally, join at the top back wall posi-
tion.
Following the same sequence, tighten each
cap screw fully until the merchandisers are joined
with a snug fit and gaskets are compressed.
When joining two RLNIE
models, nut retainers and
alignment pins are used on
one case only.
8
Refer to Section 1 of the Reach-In
Installation and Service Manual to install
splashguard brackets and bumpers. Section
3 provides direction for installing splash-
guards, including splashguard
Splice Connector – 8.
shown in Figure 9.
Note that RLTM / RMTM cases have steel
splashguards that do not use a splice con-
nector.