1-8 InstallatIon
P/N 0387183_V
U.S. & Canada 1-800-922-1919 • Mexico 1-800-890-2900 • WWW.HUSSMANN.COM
PARTS LIST
Item
Quantity Description
RL/RM RLN RLNIM RMTM
RM/RMF RMN RLNIE RLTM, RMTD
1. 2 2 4 2 Donut Gasket
2. 1 1 2 2 Gasket, .906 x
1
/2 x 200 in.
3. 1 1 2 1 Gasket,
1
/2 x
1
/4 x 600 in.
4. 8 8 14 6 Cap Screw
5
/16 -18 x 1
1
/4
5. 8 8 14 6 Split Lock Washers
5
/16
6. 1 1 2 1 Joint Molding
7. 5 5 10 5 Binder Post and Screw
8. 1 1 2 1 Splice Connector
Remote Reach-Ins
Joining Instructions
Joining Instructions
NOTE: Be sure first merchandiser has been leveled
according to the main installation instruction.
Carefully unpack and inspect the joining parts listed
above to verify completeness and that there is no
damage.
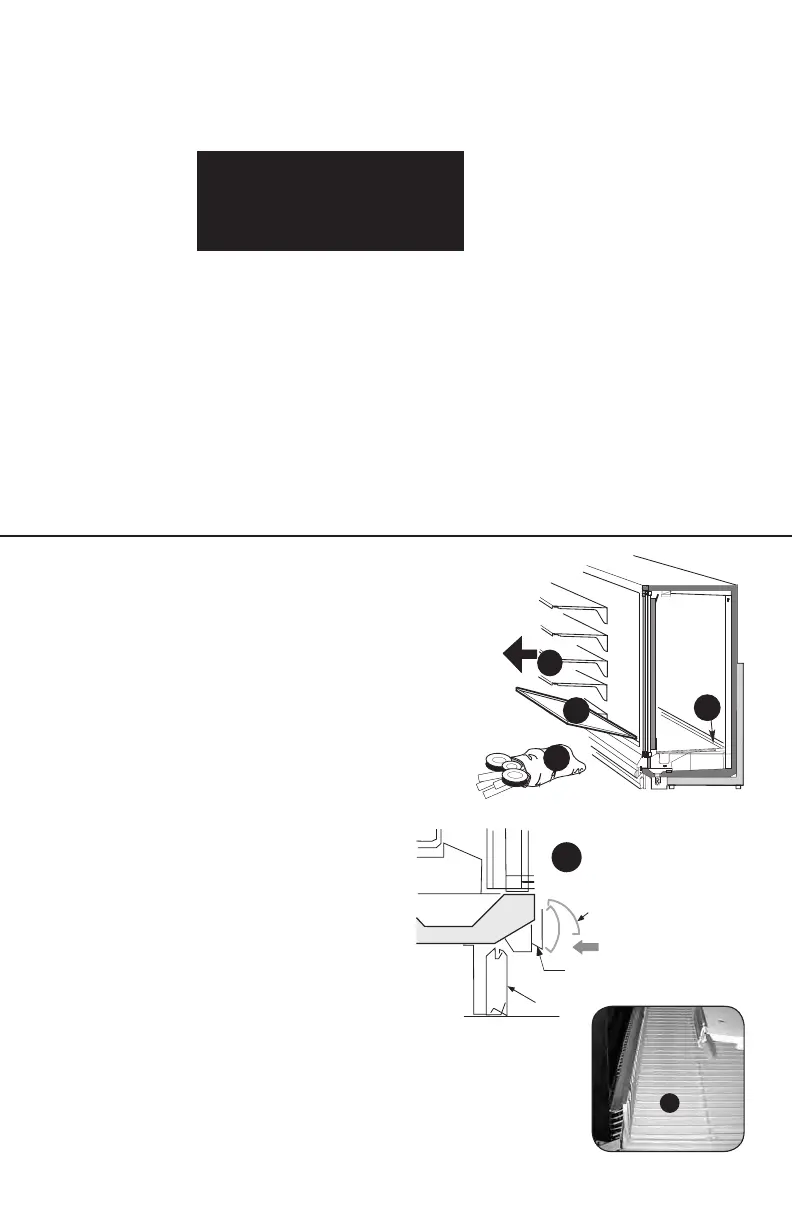
1
Prepare cases for joining (both sides of
islands) as shown in Figure 1.
A. Remove bumpers, rails, packing materials,
and splashguards from the both cases.
B. Remove shelves (if installed).
C. Remove display racks and pans from
ends to be joined.
D. Remove plenum covers.
Splashguard brackets must
be installed before piping or
wiring case.
B
A
C
D
E
Figure 1. Prepare Cases
Bum per
Bum per
Retainer
Splashguard
SIDE VIEW
A
RLTM
C
RLNS
RMNS
RLTIM
4
4
2
12
12
2
10
2