BeltMaintenance
ReplacingtheBladeDriveBelt
RemovingtheBladeDriveBelt
1.Removethecutterdeck;refertoRemovingthe
CutterDeck.
2.Removethepulleycovermountingscrewsandpulley
coversfrombothbladepulleys(Figure44).
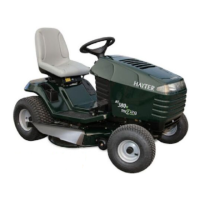
Figure44
1.Pulleycover3.cutterdeckbelt
2.Idlerpulleybeltguide
position
3.Loosen,butdonotremove,theboltandnutthat
securestheidlerpulleyandthebeltguide(Figure44).
4.Removethebladedrivebeltfromthepulleys.
InstallingtheBladeDriveBelt
1.Installthenewbladedrivebeltaroundtheblade
pulleysandunderthebeltguideontheidlerpulley.
2.Positiontheidlerpulleybeltguidesothatitpoints
towardtheleft,90°totheidlerarm(Figure44).
3.Tightenthemountingboltandthelocknutthat
securetheidlerpulleyandthebeltguide.
4.Installtheleftandrightpulleycoverswiththe
mountingscrews(Figure44).
5.Installthecutterdeck;refertoInstallingtheCutter
Deck.
CutterDeckMaintenance
ServicingtheBlades
ServiceInterval:Beforeeachuseordaily
Toensureasuperiorqualityofcut,keeptheblades
sharp.Forconvenientsharpeningandreplacement,
keepextrablades.
Awornordamagedbladecanbreakandapiece
ofthebladecouldbethrownintotheoperator’s
orbystander’sarea,resultinginseriouspersonal
injuryordeath.
•Inspectthebladeperiodicallyforwearor
damage.
•Replaceawornordamagedblade.
InspectingtheBlades
1.Removethecutterdeck;refertoRemovingthe
CutterDeck.
2.Inspectthecuttingedges(Figure45).Iftheedges
arenotsharporhavenicks,removethebladesand
sharpenthem;refertoSharpeningtheBlades.
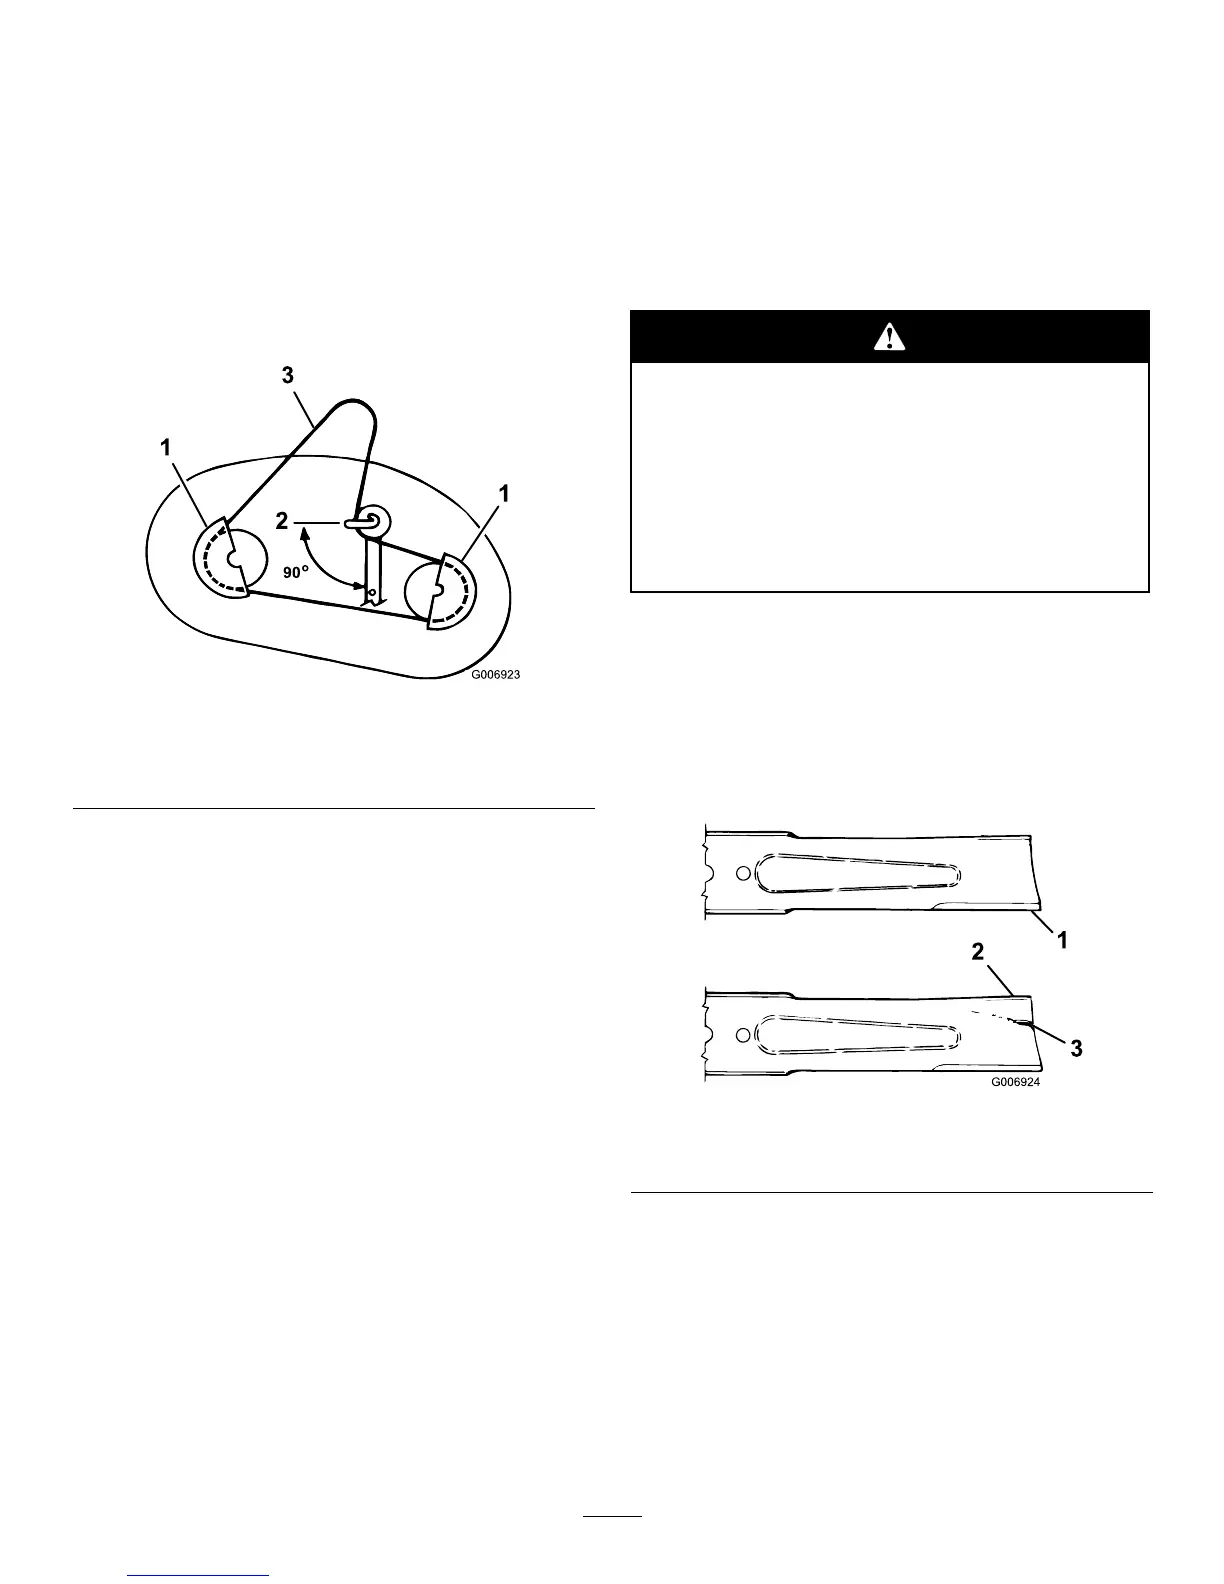
Figure45
1.Cuttingedge3.Wear/slotforming
2.Curvedarea
3.Inspecttheblades,especiallythecurvedarea
(Figure45).Ifyounoticeanydamage,wear,oraslot
forminginthisarea(Figure45),immediatelyinstalla
newblade.
RemovingtheBlades
1.Removethecutterdeck;refertoRemovingthe
CutterDeck.
2.Carefullytipthecutterdeckover.
35