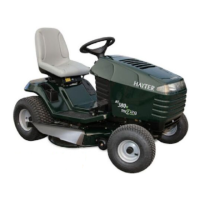
Figure50
1.Idlerspring3.Idlerarm
2.Eye-bolt4.Idlerpulley
8.Removetheboltsandlocknutsandpullthetwo
cutterdeckpivotmountbracketsdownfromthe
frontaxle(Figure51).
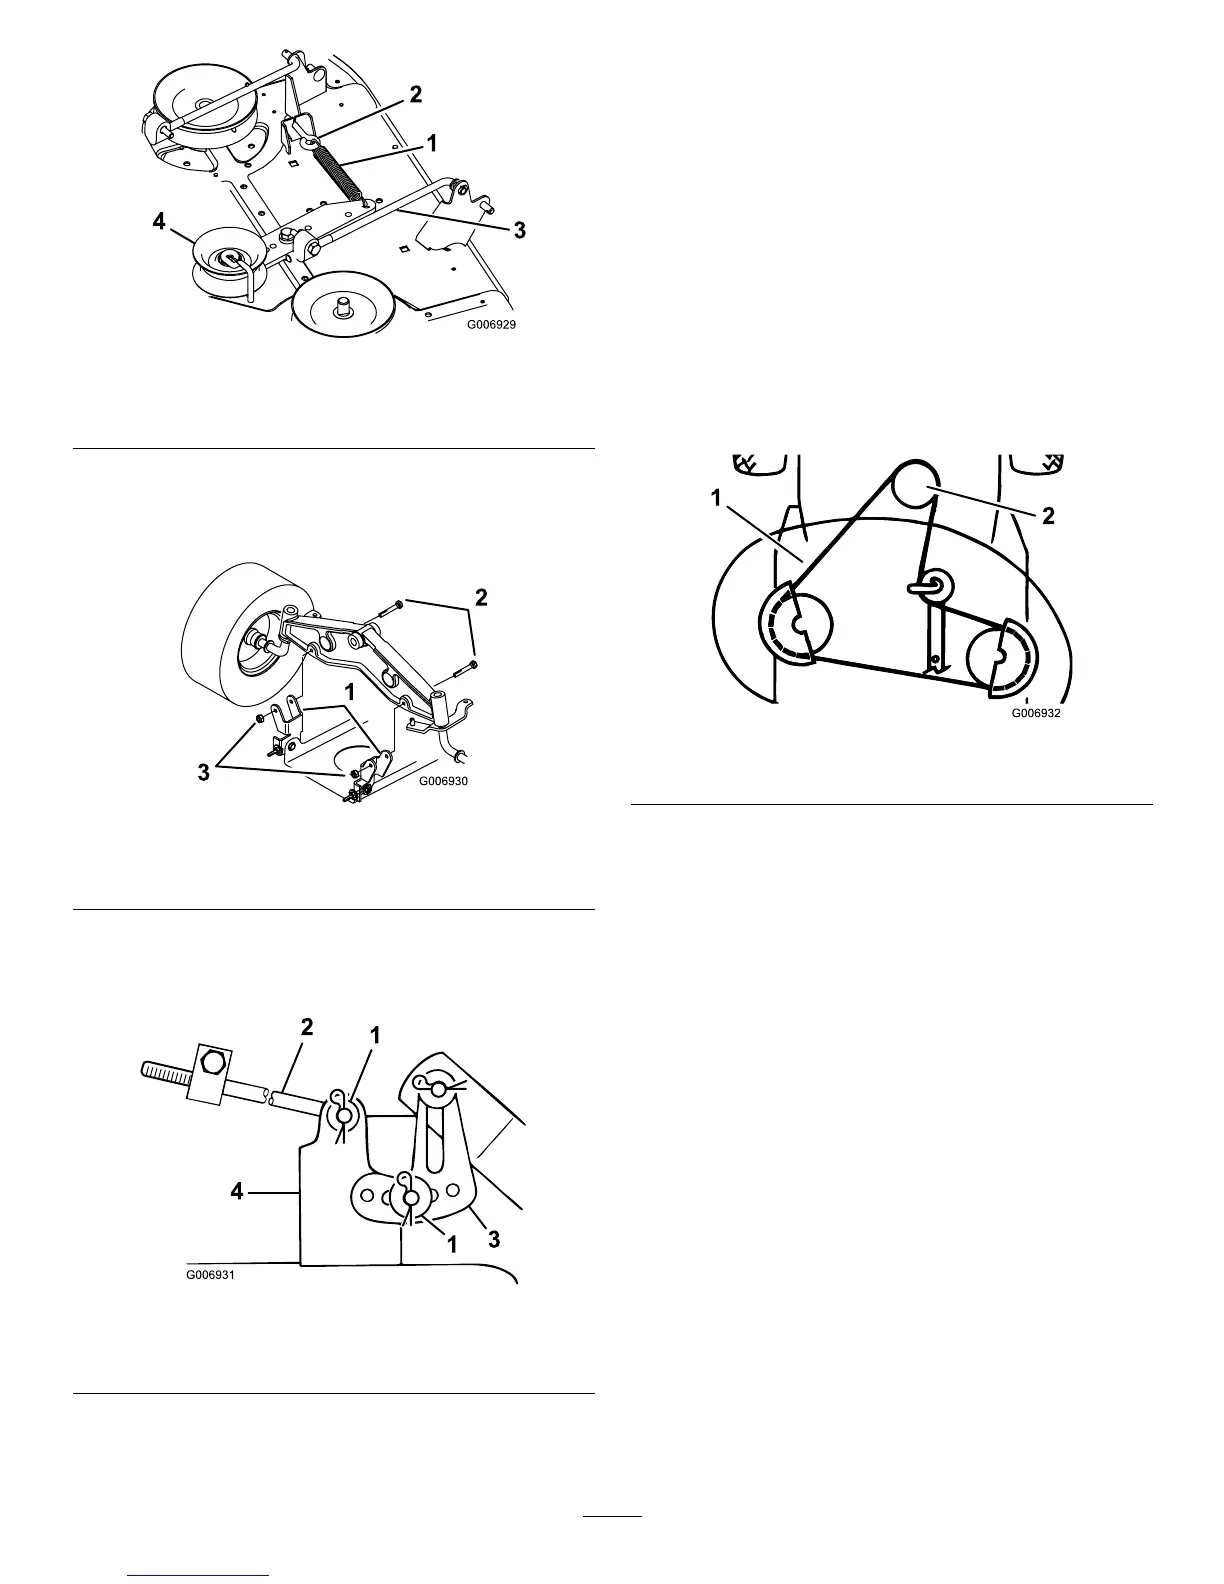
Figure51
1.Pivotmountbracket3.Locknut
2.Bolt(5/16x2-1/2inch)
9.Removethehairpincotterandwasherfromtheend
ofthelongrod(Figure52).Slidetherodoutofthe
cutterdeckmount.
Figure52
1.Hairpincotterandwasher3.Levelingbracket
2.Longrod
4.CutterDeckmount
10.Removethehairpincotterandwasheratthecutter
decklevelingbracket(Figure52).Slidethebracket
offofthemountingpin.Installthewasherand
hairpincotterforstorage.
11.Rotatethelevelingbracketuptowardtheframe,and
hookthelongrodintooneoftheholestostore.
Securethelongrodwiththewasherandhairpin
cotter.
12.Repeat9through11ontheoppositesideofthe
cutterdeck.
13.Movetheheight-of-cutleverintothe“D”notch.
Hooktheliftassistspringontotheretainingbolt
forstorage(Figure49).
14.Removethecutterdeckbeltfromtheelectricclutch
pulley(Figure53).
Figure53
1.CutterDeckbelt
2.Electricclutchpulley
15.Removethecutterdeckbeltfromthelowerengine
pulley(Figure53).
16.Turnthefrontwheelsfullytotheleft.Slidethe
cutterdeckouttotherighttocompleteremoval.
37