Page
28
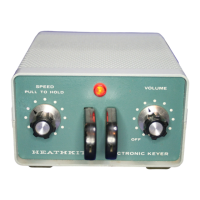
NORMAL USAGE-RECEIVER WITH SPEAKER
After determining that the transmitter will
work with the Electronic Keyer, plug the phone
plug, coming from the Electronic Keyer, intothe
transmitter key jack. See Figure
1.
This Figure also shows the required jumpers
and hookup of the normal use of the Electronic
Keyer. In this application, the receiver speaker
is
used to reproduce the received signal. The
output of the Electronic Keyer will be heard
from its built-in speaker.
With the Electronic Keyer connected
in
this
manner, it will produce continuous dots or
dashes automatically depending on the posi-
tion of the key lever. The rate
is
determined
by the setting of the Speed control. The desired
output level from the speaker
is
set by the
Volume control.
It
is
advisable that the operator practice op-
erating the Electronic Keyer for sometime be-
fore using it "on the air." The Electronic Keyes
will have a different feel from other types of
keying devices.
In
use, the Electronic Keyer should be placed
so the forearm rests on a table to keep the
wrist from becoming tired and tense. It
is
important that the letters and words do not run
together, as this would make copying impos-
sible. It
is
also well to remember that it
is
possible to send much faster with the Elec-
tronic Keyer than many operators can copy.
If
a tape recorder
is
available, it is advisable
to record a few minutes of your sending. Play-
ing back of the tape willpermit you to determine
if
more practice will be required before you
start "on-the-air" sending.
To use the Electronic Keyer as a code practice
oscillator it should be wired as shown
in
Figure
1.
However, do not connect it to the
transmitter.
AUTOMATIC DOT-MANUAL DASH
Figure
2
shows the Electronic Keyer wired for
manual dash operation. When wired
in
this way
a single dash
is
made each time the lever
is
pushed to the dash position, as long as desired.
TO
TRANSMITTER
KEY
JACK
NORMAL
WE
AUTOMATIC DOT
-
AUTOMATIC DASH
Figure
1
PHONES
@
ALTERNATE USE
AUTOMATIC DOT
-
MANUAL DASH
Figure
2