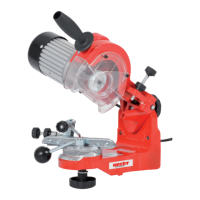
26 / 36
• When installing it on the desk, put the machine on the edge of the desk to the stop (fig. 2)
and screw it to the desk using the holes in the base.
• When mounting on the wall, use the respective holes in the vertical part of the base. Here
a distance from the wall should be kept or spacers should be used for the access to the rear
set screw to be preserved.
• After the desk top installation, fit the arm in the base inserting the pilot pin and securing it
with a hexagonal screw (fig. 3).
ASSEMBLY THE HANDLE AND THE COVER
• Now, it is possible to fit a washer on the rear side screw and screw the setting and screw
the setting wheel on (fig. 4).
• Screw the supporting arm control holder on the screw in the grinding disk body (fig. 5 + 6).
Note: I
When mounting on the wall, take care to mount the machine at a height of 120 –
130 cm from the floor to avoid working at eye height!
• To be able to install the disk, it is necessary to unscrew the auxiliary flange (fig. 7).
• To avoid injuries and accidents only fitting grinding disks free of any defects should be used.
GRINDING DISK CHECK
Check the disk you are about to fit in for damages prior to the assembly.
It may be done by a simple sound test: Hold the disk so that a pencil may be put in the hole and
the disk may swing freely (fig. 8).
Now, knock the disk edge with another pencil carefully.
The disk should give a clear high pitch sound!
If the disk sound damped or blank, it is defective. It should not be used! A deep or damped
sound indicates damage by cracks or similar!
• Do not fit the disk on the hub by force.
• The central bore diameter should not be changed.
• Only use matching disks .
• The smallest grinding disk diameter should not be below 100 mm!
• Any adjusting works should not be done unless the machine is switched off and unplugged.
• No damaged disks should be used!
GRINDING DISK ASSEMBLY
After you have removed the ancillary flange, you can insert the grinding disk in the body from
below. See that the ancillary flange and the disk abut against each other precisely (fig. 9). Do
not tighten the screws too much to avoid any damage to the disk. The grinding disk on the hub
torque is 7 Nm. Where practicable, use a torque spanner.
Now, the grinding disk additional guard should be fitted on (fig. 10). Check the correct bottoming
of the disk: in should not move across and lengthwise.
Now, with the grinding disk properly installed, a trial may be performed. Stand by the machine
from the side and watch out for anybody dwelling in the working area. If the grinding disk is
vibrating or shows otherwise incorrect run, promptly switch off and unplug the machine before
you attempt clearing the fault. The machine has a zero voltage circuit breaker, which is disabled
on outage and will prevent any restarting of the machine after the power supply is restored.
Using the sharpening stone and a clamping plate, it is possible to sharpen the disk to obtain
the required profile. In this case, be careful at work.
HECHT_9230_manual_2020_EN.indd 26HECHT_9230_manual_2020_EN.indd 26 12.10.2021 15:43:1412.10.2021 15:43:14