27 / 36
OPERATION
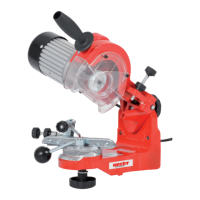
CLAMPING SCREW SET UP
Before the start of grinding, the chain should be conducted between both the attachment
guides Now, the tooth to be sharpened first should be taken against the stop. Watch out
for the sharpening angle to correspond to the guides position. The type of the chain to be
sharpened should be determined using the sharpening block provided or the Setting parameters
for grinding table. Here you can find angles and other parameters of the chain.
Set guides for the chain width by using the set screw (fig. 11
a
), so when the clamping lever
(fig. 11
b
) is tightened, the chain is firmly fixed in the groove. Center and adjust the stop of
the chain by using two set screws (fig11
c
+
11
d
). Set the top plate angle by means of the set
screw (fig. 13
a
) and it may be also read on the scale (fig. 12
a
). The vice angle should be set up
by set screw (fig. 13
b
).
GRINDING
With the clamping screw adjusted and the vice angle set up (Notice: RH and LH teeth to be
differentiated) and preset the top plate angle, lead the grinding disk down to the tooth by soft
pushing the supporting strut. You can limit the depth of grinding to avoid damage of connecting
chain links by the stop screw (fig. 15
a
). With clamping lever loosen (fig. 11
b
), the set screw is
being screwed or unscrewed (fig. 11
c
) until the grinding disk to sharpen will touch the tooth.
During the procedure, pull the chain to the guide (fig. 13
a
) carefully.
WARNING! B
Wear heavy gloves when handling the chain.
Some types of saw-chains require that the clamping screw be tilted by 5° - 10° (cf. Table: space
Tilt angle). Note the notches (fig. 17).
Now, the machine may be switched on and the saw-chain grinding may be started by a careful
thrust on the grinding disk. Adjust the pressure as necessary. Mark the start of grinding e.g. with
a oil-based marker and grind all the teeth in one direction, then turn the clamping screw (mind
the angle) and grind the teeth in opposite direction.
With warn chains, the lateral guide position (fig. 16
a
) shall be set for the grinding disk not
to touch the guide. Avoid to too strong pressure, it could overheat the chain which causes fast
wear and tear.
WARNING! B
Never grind any driven parts!
GRINDING DEPTH DELIMITER
(Fig. 18 + 19)
Find out in Dimensions Table what is the size of the depth delimiter back grinding.
Grinding the depth delimiter, the screw clamp position shall always be 0°. Set the supporting strut
and holder at 90° (fig. 12
a
). The grind depth may be set by set screw (fig. 15
a
). The reduction
shall be measured from the height of the tooth and it is necessary to keep the value specified by
the manufacturer of the chain.
HECHT_9230_manual_2020_EN.indd 27HECHT_9230_manual_2020_EN.indd 27 12.10.2021 15:43:1512.10.2021 15:43:15