8
.0 Commissioning/Decommissioning
8.1 Commissioning the machine
We assume
- that you have read the previous chapters (in particular
Chapter 5, Safety instructions). If not, please do so and
return to this point.
- that the machine is properly assembled, installed and
connected.
- that all tools or workpieces are removed from the
working area.
- that all parts of the machine are undamaged and
correctly mounted.
• Check whether the saw blade fitted is straight.
A bent saw blade is unusable and must be replaced
with a new one.
⇒9. Changing the saw blade.
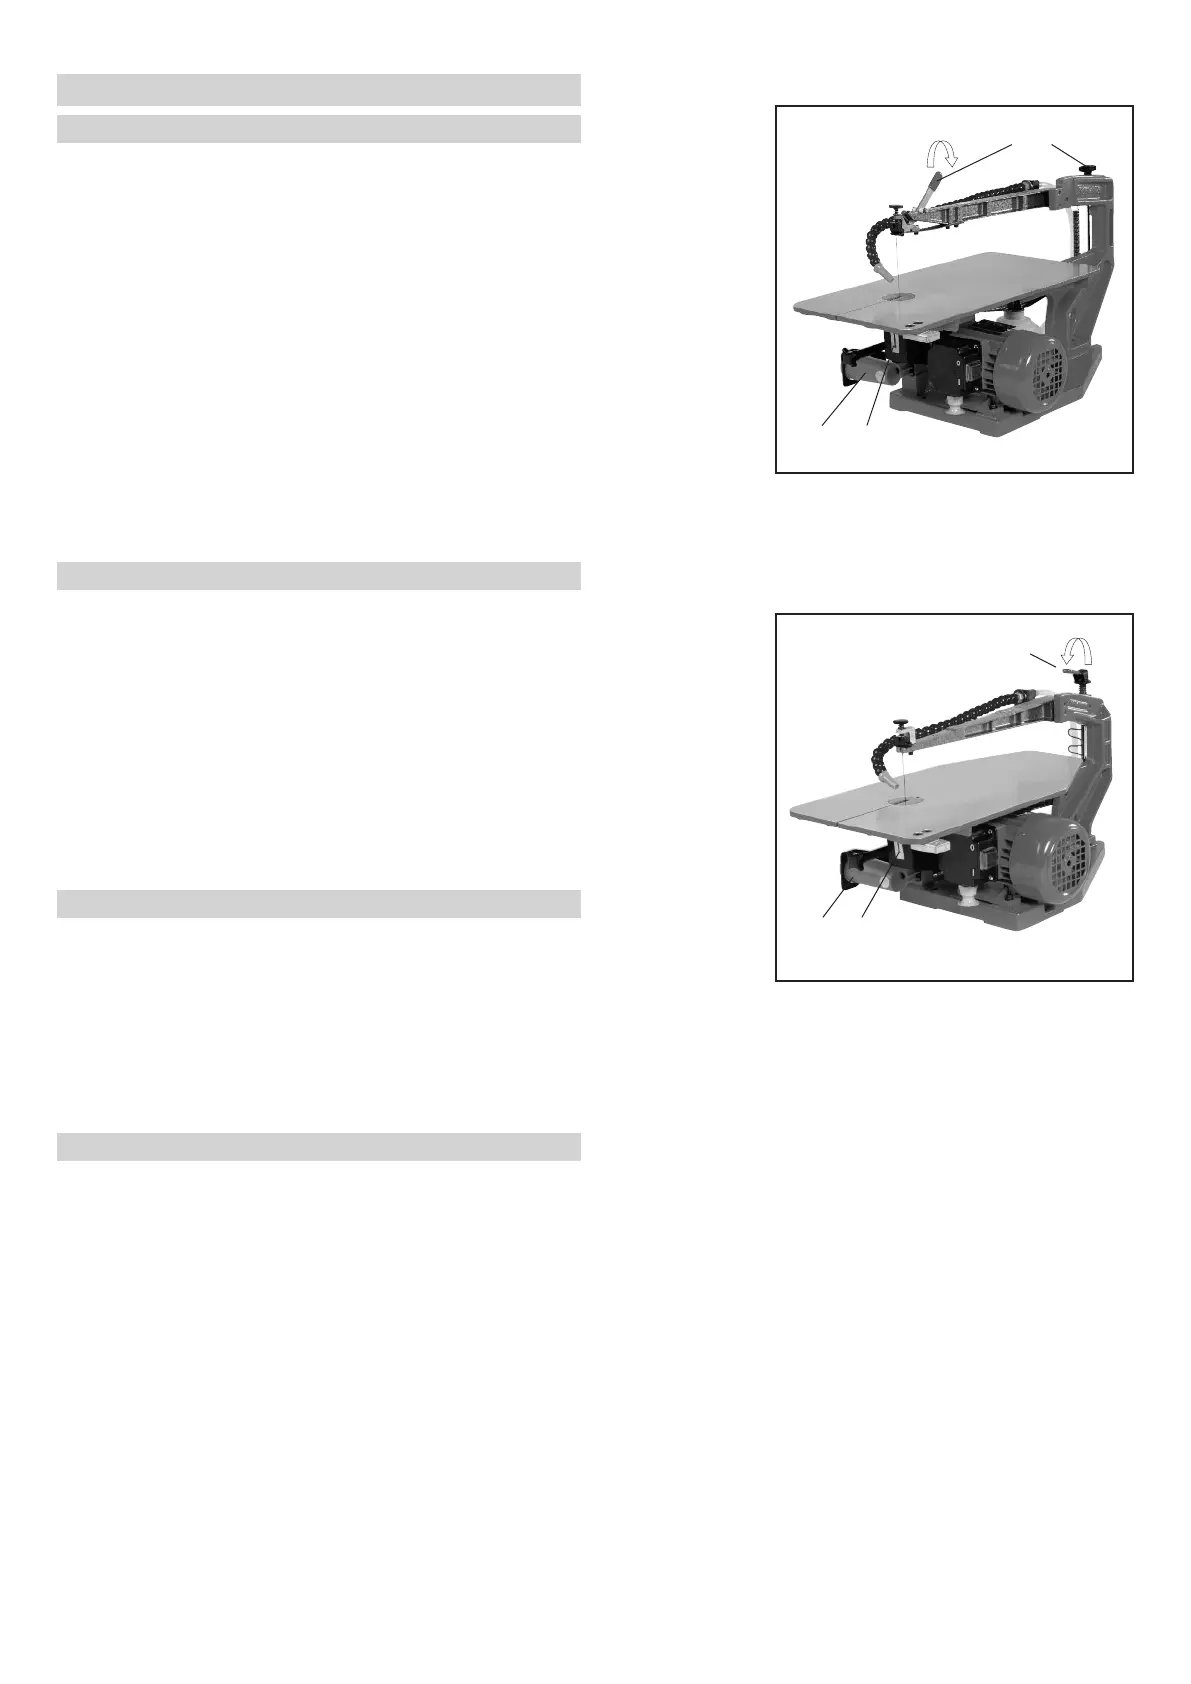
8.1.1 Tensioning the saw blade
⇒ Fig. 8-1 and 8-2
• Check that the clamping lever (1) is in the clamping
position.
• Tensing the saw blade using the cross-handled
screw (2) (Multicut 2S / SE / Quick).
On Multicut 1, tighten the saw blade with the clamping
lever (1).
• To do this turn the cross-handled screw or clamping
lever (Multicut 1) clockwise until the saw blade emits
a high note when tapped with the finger.
8.1.2 Releasing the saw blade
⇒Fig. 8-1 and 8-2
• Ensure that the machine is switched off before
releasing the saw blade.
• Release the saw blade by pulling the quick release
lever (1) forward (Multicut SE / Quick).
On Multicut 1, push the clamping lever up.
8.1.3 Connect vacuum cleaner
⇒ Fig. 8-1 and 8-2
• Connect the suction nozzle of the vacuum cleaner to
the opening provided (3).
• Make sure that the protective cover (4) is lifted up
☞
5
F
ig. 8-1
Fig. 8-2
M
ulticut 2S/ SE / Quick
Multicut-1
21
1
34
34