Do you have a question about the HELIX V EIGHT DSP and is the answer not in the manual?
Crucial safety and installation advice to prevent damage or injury during setup.
Instructions for connecting the amplifier to the vehicle's electrical system.
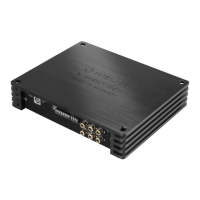
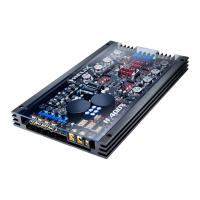
Details USB, Control, Optical, Highlevel, and Line inputs.
Explains the Control pushbutton, Status LED, and Clipping LED.
Covers speaker outputs, GND, +12V, REM, Line Out, and Rem Out.
Explains USB, Control, Optical, Highlevel, and Line input functionalities.
Details the Status LED, Control pushbutton, and Clipping LED operation.
Guide to setting input sensitivity for optimal gain.
Covers +12V, GND, REM, Line Output, and Remote Output.
Details connecting speaker systems and impedance requirements.
Connecting pre-amplifier and highlevel inputs to the car radio.
Crucial step for adapting input sensitivity to the signal source.
Information on internal jumpers for adjusting input sensitivity ranges.
Connecting digital sources and the main power supply.
Connecting REM for turn-on and configuring auto turn-on features.
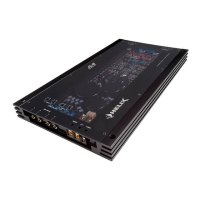
Initial DSP setup via PC and connecting loudspeaker outputs.
Using Rem Out to control external amplifiers.
Simplified connection method using the optional Easy Plug Cable.
Steps to download and install the DSP PC-Tool software.
How to connect the amplifier to the computer via USB.
Performing initial settings using the DSP PC-Tool software.
Procedure for inserting optional HELIX Extension Cards.
Discusses Pure Class GD technology and smart highlevel input.
Details Power Save Mode and Automatic Digital Signal Detection.
Lists RMS power, input/output types, and voltage specifications.
Covers frequency response, DSP resolution, S/N ratios, and distortion.
Specifies input impedances and the required operating voltage.
Lists extra features and the physical dimensions of the device.
Details the limited warranty terms and conditions.
| Channels | 8 |
|---|---|
| Amplifier Class | Class D |
| Signal-to-Noise Ratio | >100 dB |
| DSP Power | 295 MHz |
| Signal-to-Noise ratio @ 4 Ohms | >100 dB |
| Damping factor @ 4 Ohms | >100 |
| Crossover | Yes |
| DSP Processing | 64 Bit |
| Dimensions | 50 x 230 x 170 mm / 1.97 x 9.06 x 6.69" |
| DSP Resolution | 64 Bit |
| DSP type | AUDIO DSP |
| Input Sensitivity | 5 - 10 Volts |