AR2 Conversion from RT•RTE 66 17730-241
AR2
™
3. Mount the linkage in a vertical position. back out the studs from the height control
valve body. Loosening the studs may cause the height control valve to leak.
4. The arm on the height control valve requires enough clearance to allow for 45 degrees of
travel without contacting any chassis components. The lower mounting bracket MUST be
positioned on the rear of the trailing arm top surface.
5. Weld the lower mounting bracket into position.
6. Recheck the height control valve bracket and linkage for proper operation when installed.
7. Verify ride height, refer to the Alignment & Adjustment section of this publication.
When installing an AR2 suspension conversion kit, it is required that a height control valve with a
dump feature be installed as part of the suspension air system. Contact the vehicle manufacturer
for the proper dump switch and follow their dump switch installation instructions. Refer to the
Parts List section of this publication.
Hendrickson recommends when installing an AR2 suspension conversion kit, to have two (2) in-
dash air pressure gauges installed. These gauges will help determine equal loading of the vehicle
as well as indicate any potential suspension air system problem. If in-dash air pressure gauges
are installed, follow the air pressure gauge manufacturer’s installation instructions.
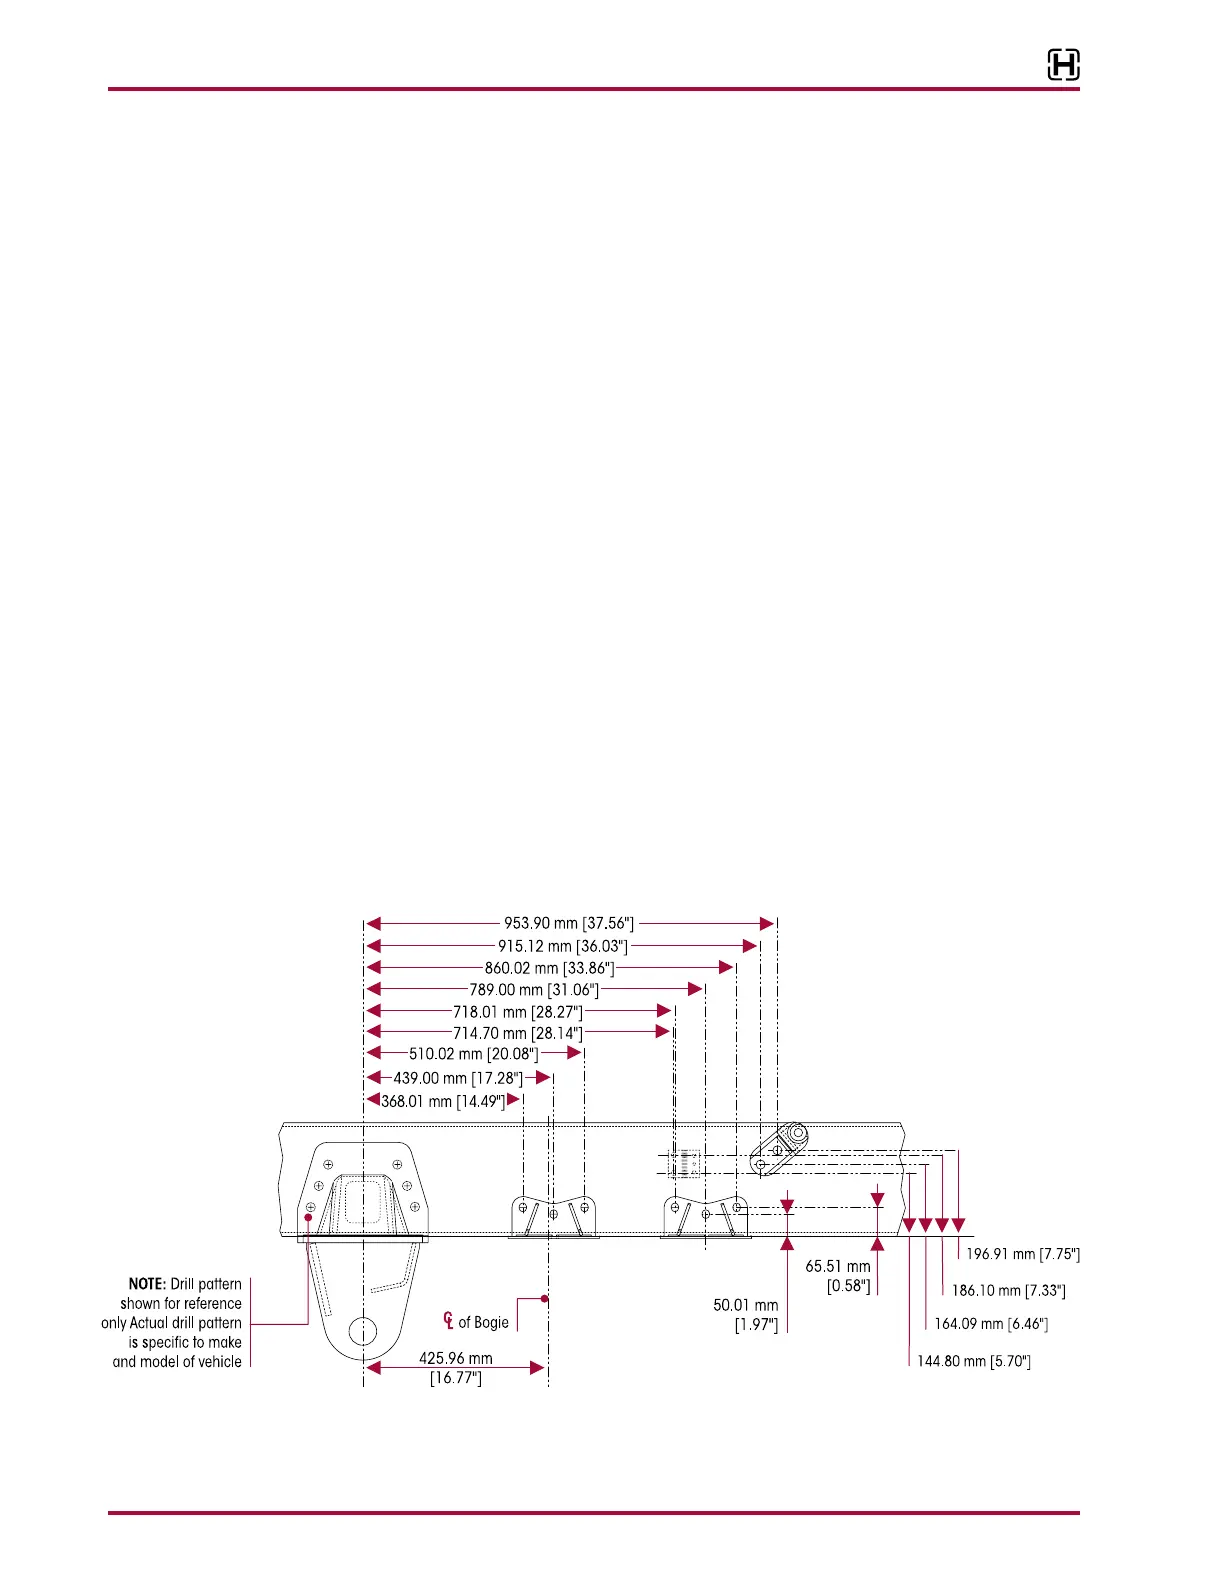
The AR2 frame hangers will be supplied in the suspension kits as blanks. Therefore, it is necessary
to drill the hanger mounting holes in the blank hangers, see Figure 9-5. The procedure to drill
the mounting holes in the hangers can be accomplished by two different methods. Whichever
method is used (1 or 2), it is important to use a sharp drill bit and keep the bit cool and lubricated
while performing the drilling operation.
■
Method 1 — is to clamp the blank hanger to the frame and line up the existing holes in the
frame from the RT hanger. Back drill the AR2 blank hanger using the existing holes as a guide.