17730-241 67 AR2 Conversion from RT•RTE
AR2
™
■
Method 2 — is to clamp the blank hanger to the frame and line up the existing holes in the
frame from the RT hanger. Center punch the holes in the blank hanger and remove the hanger
from the frame. Drill the holes in the hanger.
1. All sharp edges should be removed from the hanger once the drilling operation is complete.
2. Install the fasteners that attach the frame hanger to the vehicle per vehicle manufacturer’s
specifications.
3. Install frame hanger and spacer plate (supplied by vehicle manufacturer) located between
the frame hanger and lower cross member flange.
4. Clamp the bottom of the front hanger to the frame flange.
FAILURE TO CLAMP THE FRAME HANGER AGAINST THE UNDERSIDE OF THE FRAME WHILE TIGHTENING THE
FRAME BOLTS CAN RESULT IN COMPONENT DAMAGE AND PERSONAL INJURY OR PROPERTY DAMAGE.
5. Snug the frame bolts.
6. Snug the cross member flange bolts.
7. Tighten all frame hanger bolts to the required torque specification.
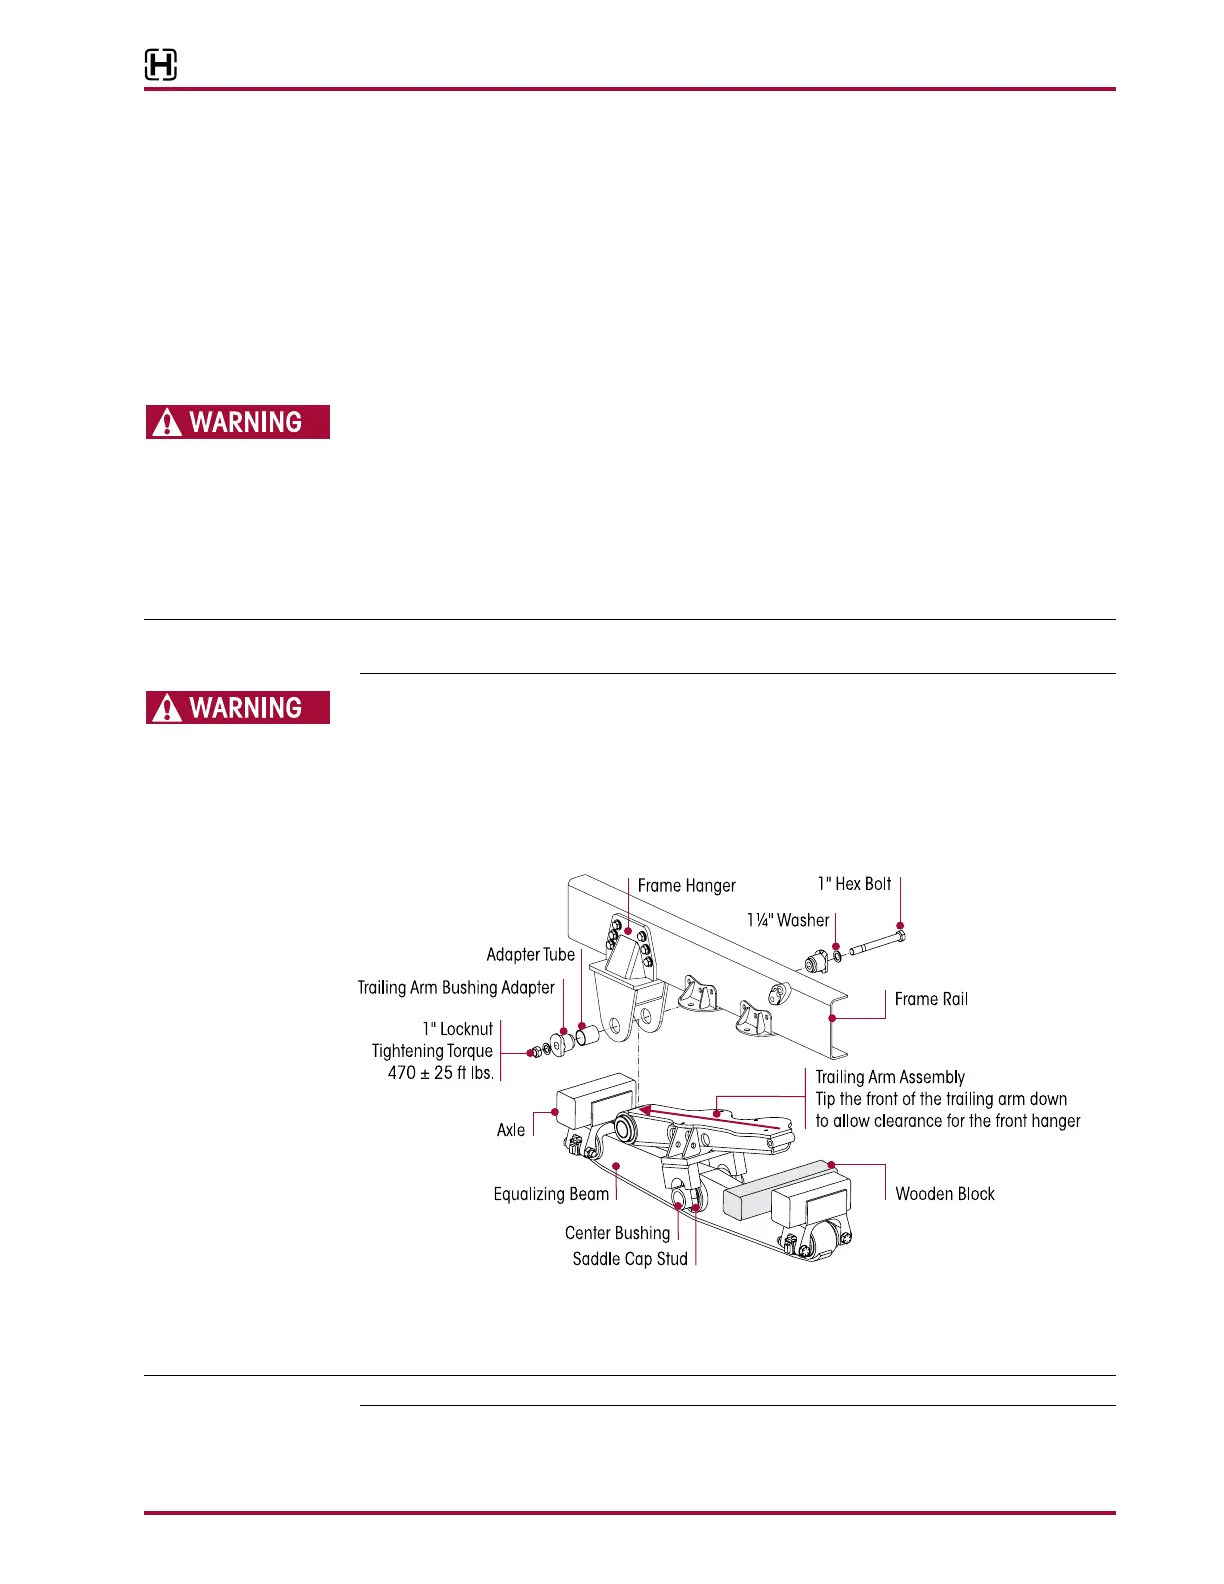
Prior to installing the trailing arm it may be necessary to raise the frame to provide additional clear-
ance for the saddle studs to go over the center bushings on the equalizing beams, see Figure 9-6.
THE WEIGHT OF THE TRAILING ARM ASSEMBLY IS APPROXIMATELY 225 POUNDS (102 KILOGRAMS).
CARE SHOULD BE TAKEN AT REMOVAL AND INSTALLATION TO PREVENT PERSONAL INJURY OR DAMAGE
TO COMPONENTS.
1. Raise frame high enough to allow adequate clearance between the frame flange and the
center bushing.
2. Tip the front of the trailing arm down to allow clearance for the front hanger, see Figure 9-6.
3. Position the trailing arm between the frame and the equalizing beam center bushing.
4. Carefully lower the trailing arm until it is seated on the equalizing beam center bushing.
5. Install the trailing arm saddle caps. tighten at this time.
It may be necessary to install a block of wood behind the trailing arm to keep it from tipping backwards.
6. Install the trailing arm bushing into the front hanger.
7. Install the trailing arm bushing adapter and fasteners. tighten at this time.