Do you have a question about the Henny Penny PFE-591 and is the answer not in the manual?
Warranty terms for new appliances and replacement parts, excluding specific items.
Frypot warranty terms covering 0-3 years (parts, labor, freight) and 3-7 years (parts only).
Sets forth sole remedy and excludes other warranties or damages.
General description, and explanation of Pressure, Heat, and Time operational principles.
Emphasizes regular care and provides contact information for support.
Explains DANGER, WARNING, CAUTION, and NOTICE symbols and their meanings.
Overview of installation section; must be by qualified technician.
Step-by-step unpacking and warnings for counterweights and moving.
Optimal placement, fire hazards, and burn risks.
Failure to level can cause overflow, burns, fire, or damage.
Fryer requires adequate ventilation; consult local codes.
Fryer must be grounded; external circuit breaker required for shock prevention.
Requirements for cable restraint and flexible conduit during installation.
Notes on wiring for units outside the US and CE unit requirements.
Steps for power cord installation and filter drain pan warning.
Instructions to prevent shortening overflow and associated dangers.
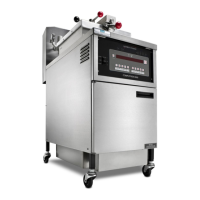
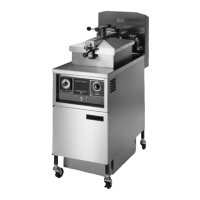
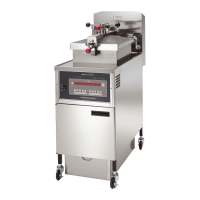
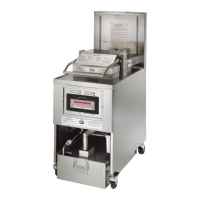
Description of major fryer components like frypot, carrier, and lid gasket.
Details deadweight assembly, safety relief valve, and related warnings.
Severe burns can result from hot steam.
Components for pressure indication, control, and draining.
Do not open drain valve under pressure; risk of severe burns.
Components for condensation collection, shortening mixing, and lid securing.
High temp limit, air valve, filter drain pan, and union described.
Use care with hot shortening in the filter drain pan.
Protective device for electrical circuits.
Step-by-step instructions for proper lid closure and locking.
Danger of escaping steam/shortening if lid is not latched.
Step-by-step instructions for safely opening the lid.
Do not open lid before pressure gauge reads zero; risk of severe burns.
Caution when lowering handle to avoid lid damage.
Explains HEAT ON, PRESSURE ON, WAIT, READY indicators.
Shows functions, modes, alarms; button accesses fryer information.
PROG, INFO, UP, DOWN buttons for mode selection and adjustment.
Displays product names; selects products for cooking.
Controls fryer operation, filter pump, and cleaning modes.
Step-by-step guide to set date, time, clock mode, with notices.
Maintain level above elements; handle hot shortening with care.
Do not overfill or overload to prevent overflow and injury.
Recommendations for rack placement based on load size for optimal heating.
Steps for initial startup and bringing fryer from cold state.
Warnings regarding overloading, moisture, and improper stirring.
Explains heating status, ready indicator, and melt cycle bypass options.
Procedures for loading product into racks and selecting products.
Wait for zero pressure before opening lid; risk of severe burns.
Removing cooked product and using the hold timer.
Notices regarding filter suggestions and filter lockout conditions.
Checks pot status after filtering; use Idle Mode when not in use.
Instructions for care, overflow prevention, and filtering frequency.
Warning about fire hazard from prolonged use; discard if smoking/foaming.
Pan placement, operation, and overflow risk during filtering.
Steps for draining, cleaning, and using optional rinse hose.
Brush cracklings to prevent overflow and damage.
Safety procedures for connecting/disconnecting rinse hose with power off.
Pump operation after filtering; warning for air bubbles indicating loose union.
Steps to change filter envelope, clean parts, and reassemble.
Safety precautions when disconnecting filter union.
Cleaning filter screens and drain pan with soap and water.
Ensure components are dry before assembly to prevent damage.
Procedure to reset the motor protector if it overheats.
Turn off power before resetting the protector to prevent burns.
Steps for thorough cleaning after installation and before shortening changes.
Avoid moving fryer with hot shortening; risk of splash and burns.
Lists Henny Penny approved cleaners.
Wear PPE; solution is alkaline, can cause severe burns/blindness.
Do not close lid with water/cleaner; superheated steam causes severe burns.
Watch cleaning solution to prevent boiling over and damage.
Turn off power immediately if solution foams/boils over.
Ensure frypot interior and drain are dry before adding new shortening.
Table summarizing daily, as required, and periodic maintenance tasks.
Procedure for lubricating lid rollers annually for smooth movement.
Steps for daily cleaning of deadweight assembly to prevent overpressure.
Do not remove deadweight cap while fryer is operating; risk of severe burns.
Deadweight cap may be hot; use protective cloth or glove.
Steps to reverse gasket; warning about lid arm position.
Check gasket for damage, replace if needed; installation notice.
Annual cleaning procedure; warnings about removal and tampering.
Do not remove safety valve while fryer is operating; risk of severe burns.
Do not disassemble or modify safety valve; voids warranty and risks injury.
Steps to enter programming, select, and name products.
Notice on how to exit the program mode.
Setting cook time, temperature, pressure, and alarms.
Notices regarding programming steps and limits.
Setting quality timer and adjusting load compensation value.
Setting reference temperature and how to exit program mode.
Option for idle mode after cooking; setting filter cycle mode.
Notices regarding mixed filter setting.
Procedures for copying, erasing, and presetting products.
Notice on how to exit the options menu.
Steps to erase all programmed products and reset to empty values.
Overview of modes; setting temperature units (F/C).
Notice for incorrect code entry and control reversion.
Setting language, initializing controls, and adjusting audio volume/tone.
Setting melt type for shortening and configuring idle mode.
Caution regarding matching heat to shortening type to prevent issues.
Enabling filter tracking and setting mixed mode.
Setting filter schedule and warnings for lockout mode.
Configuring product buttons, clean-out minutes, and temperature.
Procedures for changing manager and usage codes.
Setting alerts for shortening changes based on cycles or hours.
Notices regarding feature operation and usage data reset.
Overview of advanced modes for Henny Penny use.
How to enter mode and view error logs.
Notice on how to exit Information Mode.
Displays data from the last cook cycle and daily statistics.
Viewing accumulated usage data and component/input status.
Interpreting input signals and viewing output status (heat, pressure).
Checking pump, air valve, oil, PC board, and analog converter status.
Notice on how to exit Information Mode.
Lists common problems, causes, and corrections.
Critical warning about high pressure and notice for more help.
Lists error codes (E4, E5, etc.), their causes, and panel board corrections.
Covers error codes related to programming and board failures.
Definitions of terms from Air Valve to Counterweight.
Definitions of terms from Counterweight Assembly to Drop Temperature.
Definitions of terms from Filter Drain Pan to Level Indicator Lines.
Definitions of terms from Lid Assembly to Shipping Spacer.
Definitions of terms starting with S, such as Sift Breading and Solenoid Valve.
| Brand | Henny Penny |
|---|---|
| Model | PFE-591 |
| Category | Fryer |
| Language | English |