Page 12 of 21 Digilance V 26 November 2018
File name: Digilance V_1.01
Version: 1.01
4.3 Performing Measurements
• The instrument will activate automatically when moved.
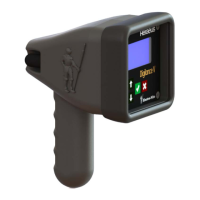
• Place a thermocouple onto the lance. The Green LED indicates that the system is Ready to measure.
• Dip the thermocouple tip into the molten metal:
o The Yellow LED indicates that the measurement is Active.
o The Red LED and a Buzzer indicate that the measurement is Complete.
• The measurement result is shown on the display.
• The instrument will shut down automatically, depending on the Power Management Settings (See
Section ‘Power Management’.
4.3.1 Measurement Evaluation
If Evaluation Window Criteria is not met, the Measurement will end after
the Measuring Time
Measurement Starts when the Measured Temperature exceeds this value
See Measurement Mode ‘MULTI’
Controls the length of time that the Buzzer and Red Light will signal the
end of the measurement
Temperature Result will be selected when the Measured Temperature
stays within the Window Height for the Window Length time
The Evaluation is not started until after the Window Delay time
Temperature Result can be calculated as either the Mean (Average) or the
Mid-Point ((Min+Max)/2) of the Temperature Values in the Evaluation
Window by selecting the Window Mode
The Measurement Cycle is Reset dependent on the Measurement Mode
• DIP: Reset after the Thermocouple is replaced – For use with Single-
Use Probes
• MULTI: Reset when the Temperature drops by the amount of the
Stop Difference below the Start Condition – For use with Multi-Use
Measurement Results are evaluated with one-tenth of a degree precision.
Setting this parameter to ‘No’ will cause the result to be displayed to the