Page 9For technical questions, please call 1-888-866-5797.Item 59615
Template Guide Installation
NOTICE! The Template Guide is for use
with a template on the workpiece only.
Remove the Template Guide when using
this product for any other application.
1. Remove the four screws from the bottom of
the Sub-Base, then remove the Sub-Base.
2. Place the Template Guide in the opening of the
Base with its collar facing away from the Base.
3. Reassemble the Sub-Base to the
Base with its four screws.
4. Secure the template to the workpiece:
a. Determine the template offset by subtracting
the Router Bit diameter from the Template
Guide outside diameter and divide by two.
Example: Template Guide outside diameter
is 5/8", minus the Router Bit diameter of 3/8"
equals 1/4", divide by two equals 1/8" offset.
b. Secure the template to the workpiece using the
appropriate offset from the desired cut line.
Note: If clamps are used to secure
the workpiece, make sure they do not
interfere with the Router while cutting.
5. Place the Router on the template with the collar
of the Template Guide against the edge of the
template. Apply light pressure to keep the
Template Guide flat against the template edge.
Cut the material along the desired cut line.
Sub-Base
Template
Guide
1
2
Template
Guide
Template
Workpiece
Router Bit
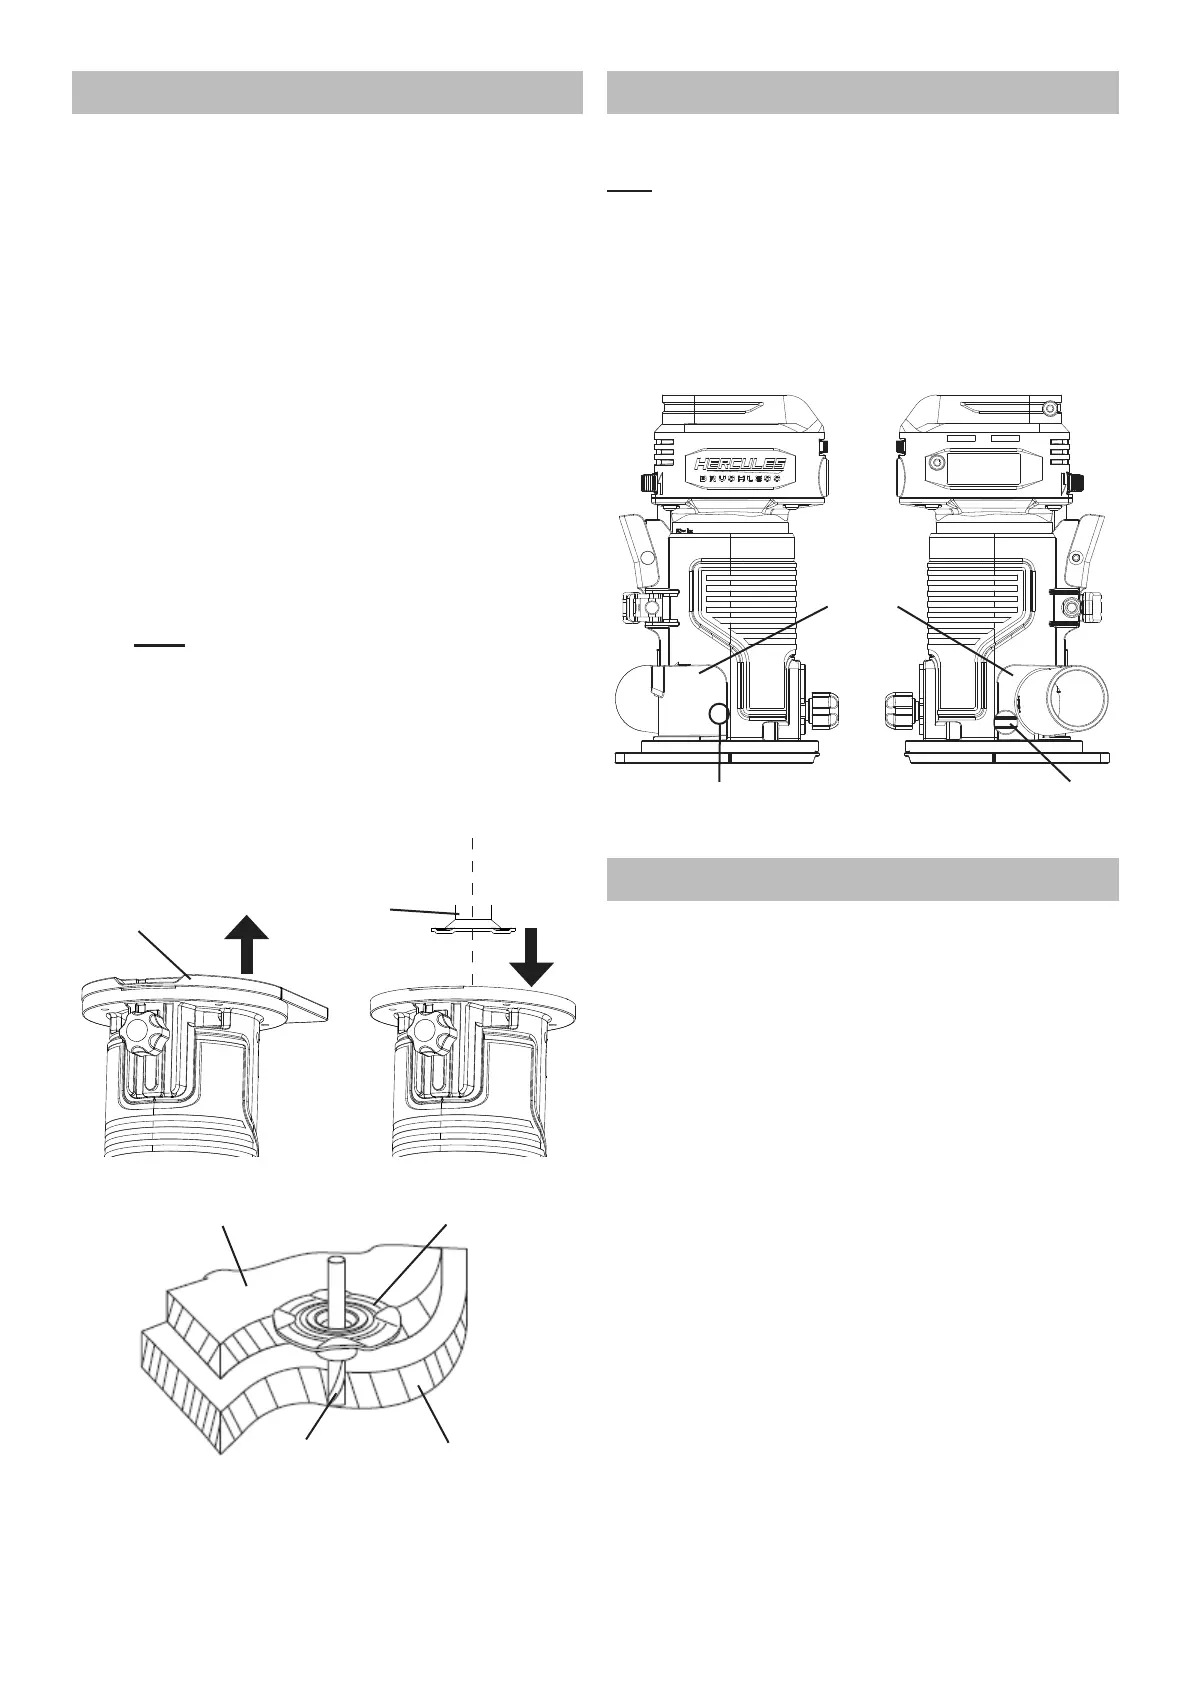
Dust Port Installation
The Router is supplied with a Dust Port
to connect to a dust collector.
Note The Dust Port has a raised bump on one side,
and a hole for a Thumb Screw on the other side.
1. Insert the Dust Port’s raised bump into
the hole on the outer housing.
2. Insert the Thumb Screw into the other hole
and secure the Dust Port to the Router.
3. Make sure Dust Port is secure
before using the router.
Dust
Port
Thumb
Screw
Raised Bump
(Inner Side of Dust Port)
Battery Charging
Charge battery after unpacking and before using the tool.
Follow instructions included with the battery charger.