C. ODIN 2K & CYCLOPS 3K
AMPLIFIER APPLICATIONS
Interconnect cable checklist:
A MONO signal source is suggested, such as would be available from the mono – sub bass output of an
active crossover, whether stand alone, or built into a head unit or equalizer.
IMPORTANT: Do not be tempted to connect the hot, or positive outputs, from any source together
to obtain a mono signal, as this could very well damage the output stage of that source. It is not
necessary, but recommended, to feed the SAME signal to both left and right inputs via a Y-adapter
RCA cable. Connect the mono speaker positive terminal to the RIGHT +, and its negative terminal
to LEFT -.
Control setting checklist:
» LEVEL: Minimum (7 oclock)
» PHASE: 0
o
(7 oclock)
» BOOST: 0 (7 oclock)
» WIDTH: Half (12 oclock)
» CENTER: 45Hz (10 oclock)
» SUBSONIC: 25Hz (12 oclock)
» LPF: 80Hz (11 oclock)
» MODE: MST
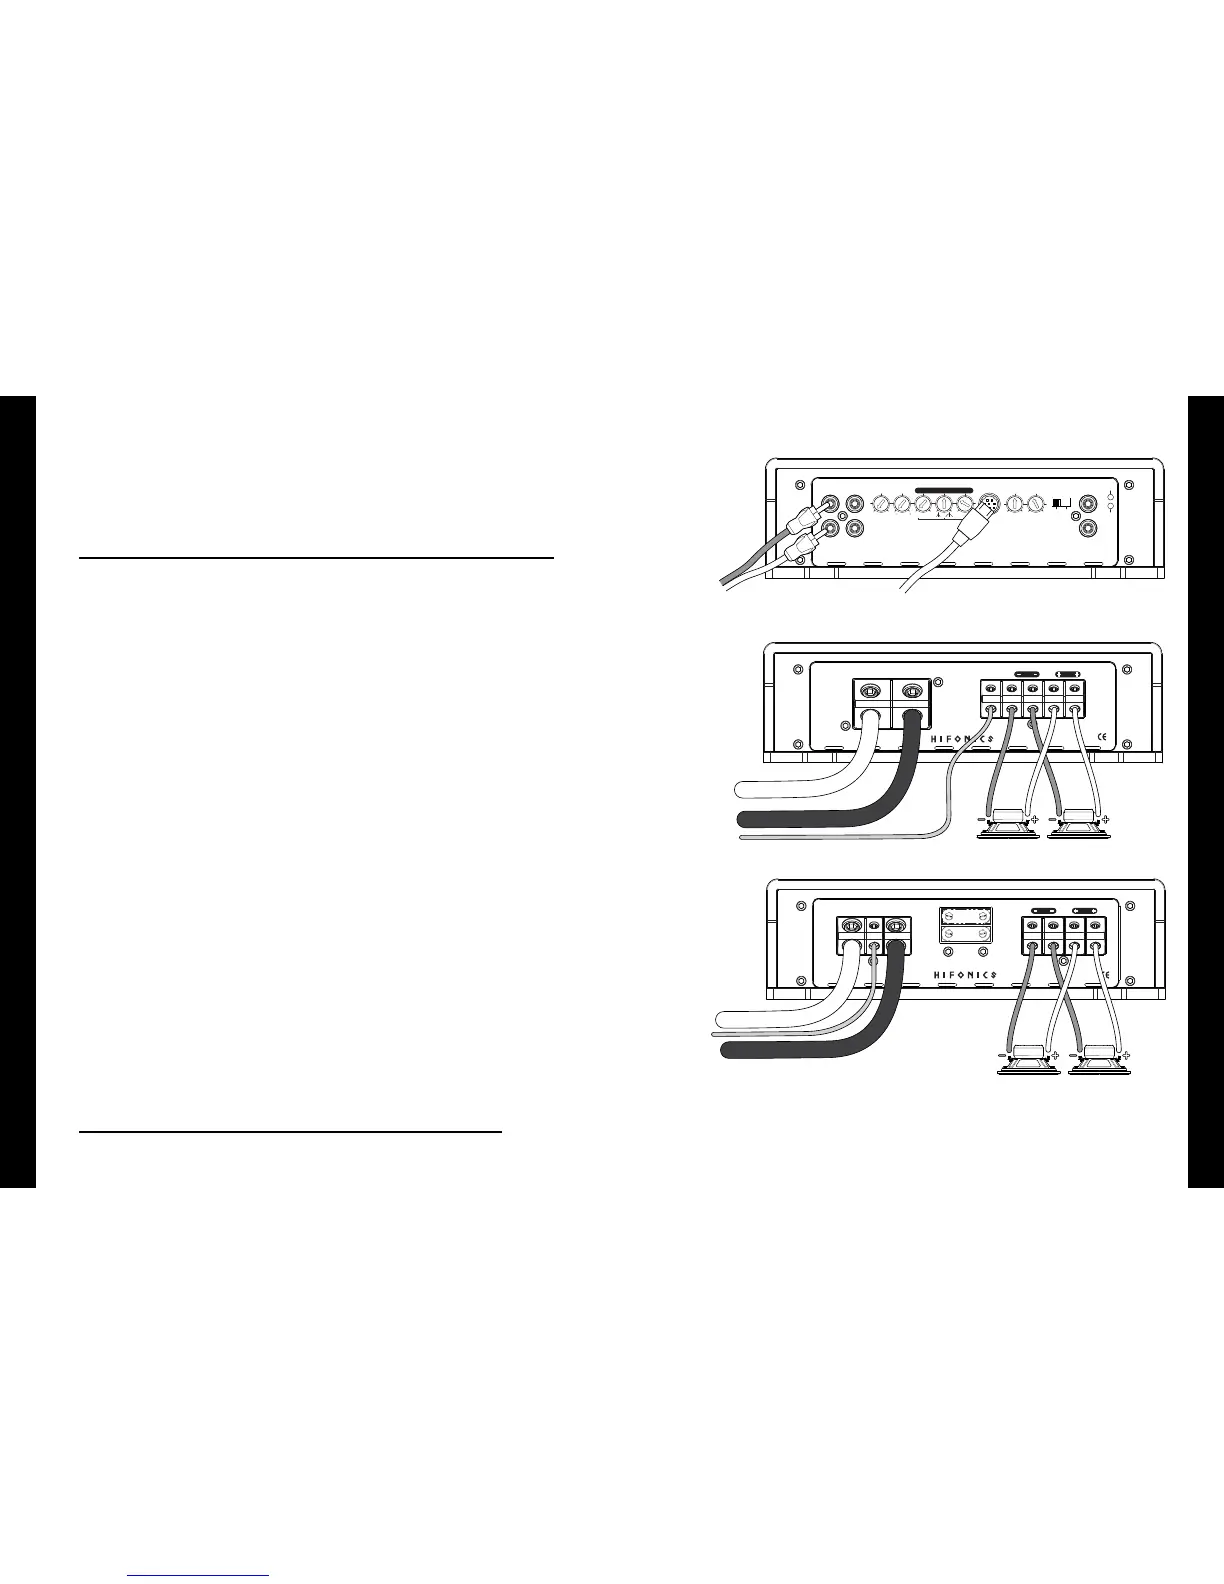
SINGLE AMP INSTALLATION PROCEDURE
1. Connect the amp LINE INPUTS to the Radio/CD player full range or mono line outputs with good quality
RCA interconnect cables.
2. Plug the HFR-G1 remote module into the amp remote input DIN connection.
3. Route a power cable (4-gauge for Odin 2K / 0-gauge for Cyclops 3K) directly to the vehicle battery with
an in-line fuse.
4. Connect a ground (4 or 0-gauge) cable directly to chassis ground within 18” of the amplier.
• Be sure to remove any paint or primer from the ground point.
• Use a nut, bolt and lock washer to secure the ground cable to the chassis ground.
5. Connect the subwoofer(s) in accordance to the diagrams below.
6. Make sure the MASTER/SLAVE switch is in the MST position.
NOTE: The amplier will not work if the MASTER/SLAVE switch is in the SLV position
ODIN 2K
ODIN 2K, CYCLOPS 3K
CYCLOPS 3K
Minimum nal loudspeaker impedance: 1 Ohms mono
 Loading...