102
● Set the device IP address, subnet mask, gateway and DNS server in the LAN.
Steps
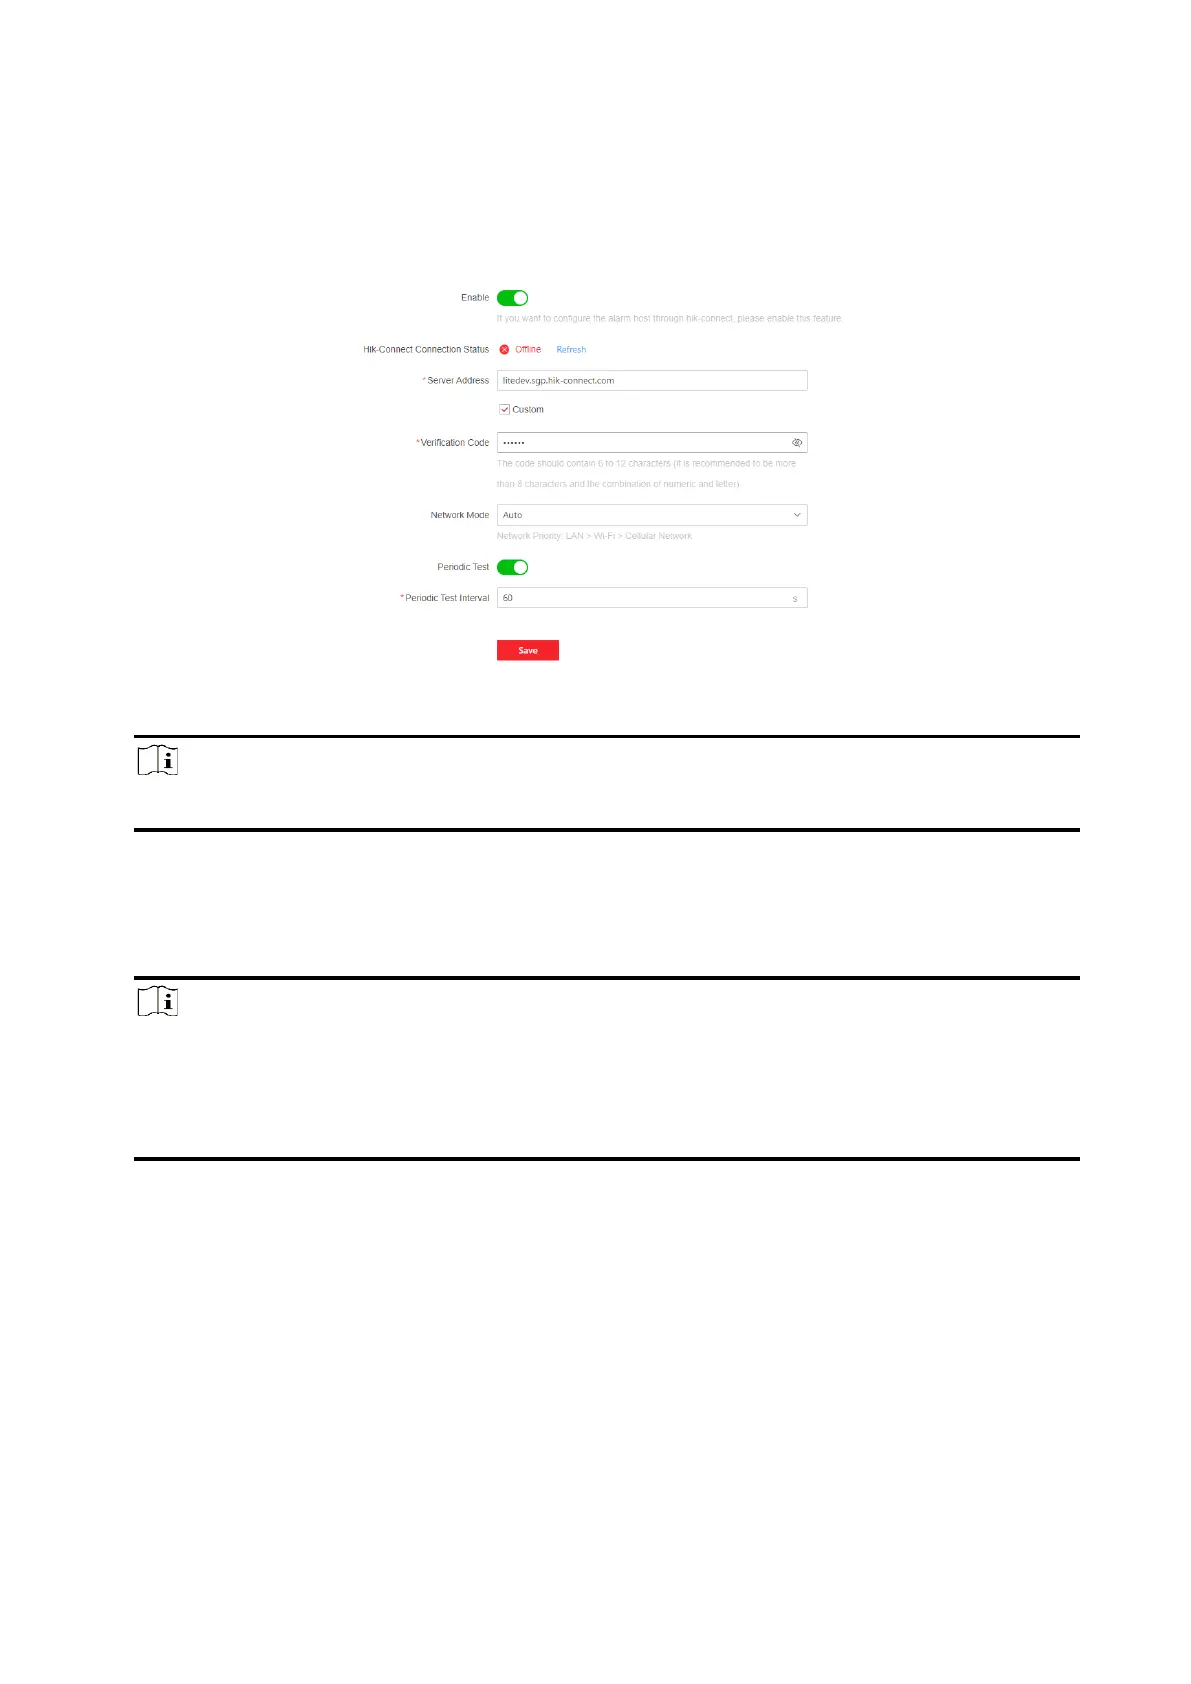
1. Click Configuration → Network → Device Access to enter the page.
Figure 5-29. Device Access
2. Drag the slider to enable the function.
Note
By default, the device Hik-Connect service is enabled.
You can view the device status in the Hik-Connect server (www.hik-connect.com).
3. The server address is already displayed in the Server Address box, or you can check Custom to
edit it.
4. Optional: Change the verification code.
Note
● By default, the verification code is displayed in the text box.
● The verification code should contain 6 to 12 letters or digits. For security reasons, an 8-
character password is suggested, which containing two or more of the following character
types: uppercases, lowercases, and digits.
5. Select a network mode from the drop-down list according to the actual needs.
Auto
The connection priority order from high to low is: wired network, Wi-Fi, cellular data
network.
Wired &Wi-Fi
The system will select wired network first. If no wired network detected, it will select Wi-Fi
network.
Cellular Data Network
 Loading...