User Manual of Embedded Net DVR
Page 71 Total 113
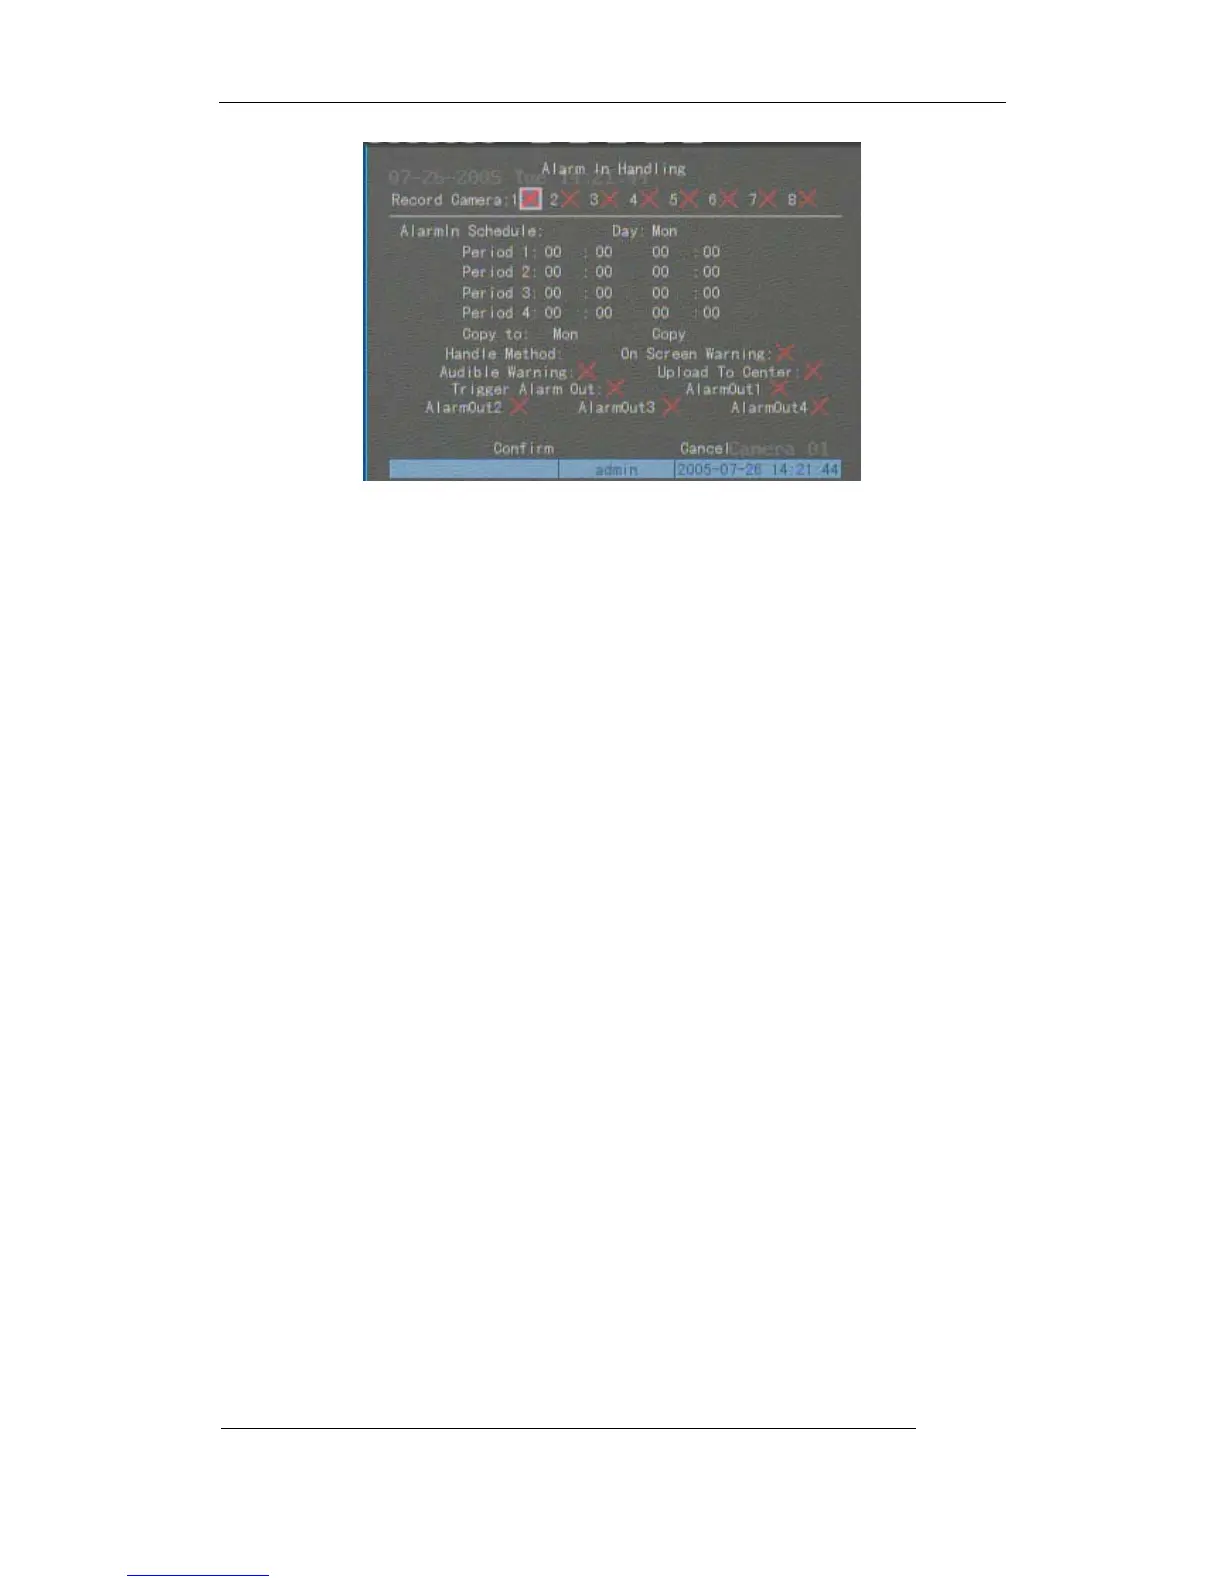
Step 4: Alarm trigger record channel setup
You can select channels to record for each alarm input. In the sub menu, you can useENTER
orEDITkey to enable record channel. “×” means disable and “9 means enable.
Note: In order to trigger the channel to record, in “Recording” menu, you must enable
recording and select record type as “Alarm” or other related type. Please refer to chapter 5.12.
Step 5: Schedule for alarm handle method
When there is external alarm happened in the schedule, DVR will response according to the
handle methods.
Step 6: Alarm handle method
You can select one or more handle method: “On Screen Warning”, “Audible Warning”,
“Upload to Center” and “Trigger Alarm Output”.
Description: If “On Screen Warning” is enabled, when there is external alarm happened and
DVR is in preview mode, DVR will pop-up the related camera. If you trigger more than one camera,
DVR will pop-up them one by one every 10 seconds. When the external alarm is disappeared, DVR
will restore preview mode.
Step 7: Save setup
In “Alarm in Handling” sub menu, press “Confirm” button and return “Alarms” menu. In
“Alarms” menu, press “Confirm” button to save the parameters.
Step 8: PTZ Linkage
Move “Active Frame” to “PTZ Linkage” button, pressENTERkey to enter into “PTZ
Linkage” setup menu:
 Loading...