EasyManuals Logo

HIKVISION HiLook Series User Manual

HIKVISION HiLook Series
17 pages
To Next Page IconTo Next Page
To Previous Page IconTo Previous Page
Page #10 background imageLoading...
Page #10 background image
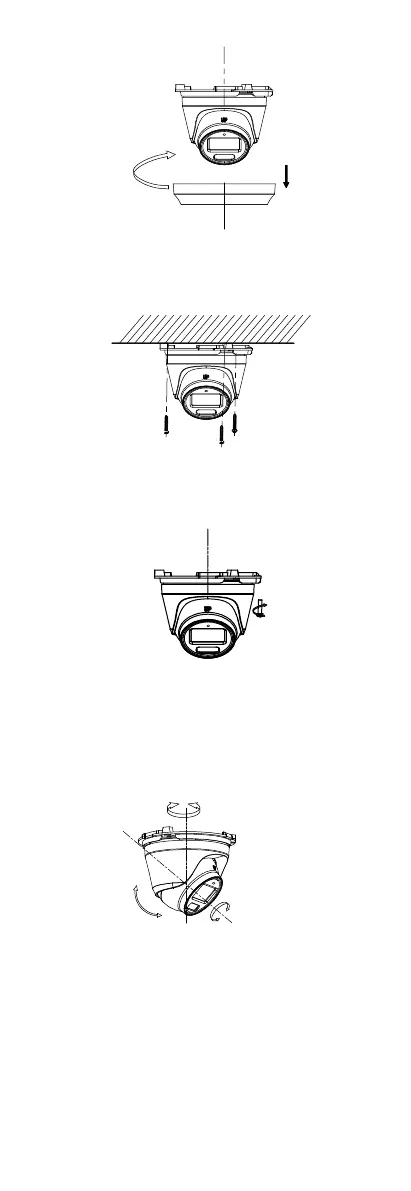
Figure 2-14 Remove the Trim Ring
5. Secure the camera to the ceiling with three PA4 × 25
screws (supplied).
Figure 2-15 Secure the Camera to the Ceiling
6. Connect the cables.
7. Loosen the screw and the clip plate.
Figure 2-16 Loosen the Screw and Clip Plate
8. Power on the camera to check whether the image
on the monitor is gotten from the optimum angle. If
not, adjust the camera according to the figure
below.
Figure 2-17 3-Axis Adjustment
1). Rotate the enclosure to adjust the pan position
[0° to 360°].
2). Move the main body up and down to adjust the
tilt position [0° to 75°].
3). Rotate the main body to adjust the rotation
position [0° to 360°].
9. Fasten the screw and the clip plate.
10. Install the trim ring back.

Other manuals for HIKVISION HiLook Series

Questions and Answers:

Question and Answer IconNeed help?

Do you have a question about the HIKVISION HiLook Series and is the answer not in the manual?

HIKVISION HiLook Series Specifications

General IconGeneral
Power Supply12 VDC
Video CompressionH.264/H.265
Analog Video InputDepends on model
CVBS InputDepends on model
Video OutputHDMI/VGA
Audio CompressionG.711
Audio InputDepends on model
Audio OutputDepends on model
Two-Way AudioDepends on model
Hard DiskSATA
CapacityUp to 10TB (depends on model)
Network InterfaceRJ45 10M/100M
USB InterfaceUSB 2.0
ConsumptionDepends on model
Working Temperature-10 °C to 55 °C (14 °F to 131 °F)
DimensionsDepends on model
WeightDepends on model
HDTVI InputDepends on model
AHD InputDepends on model
HDCVI InputDepends on model
IP Video InputDepends on model

Related product manuals