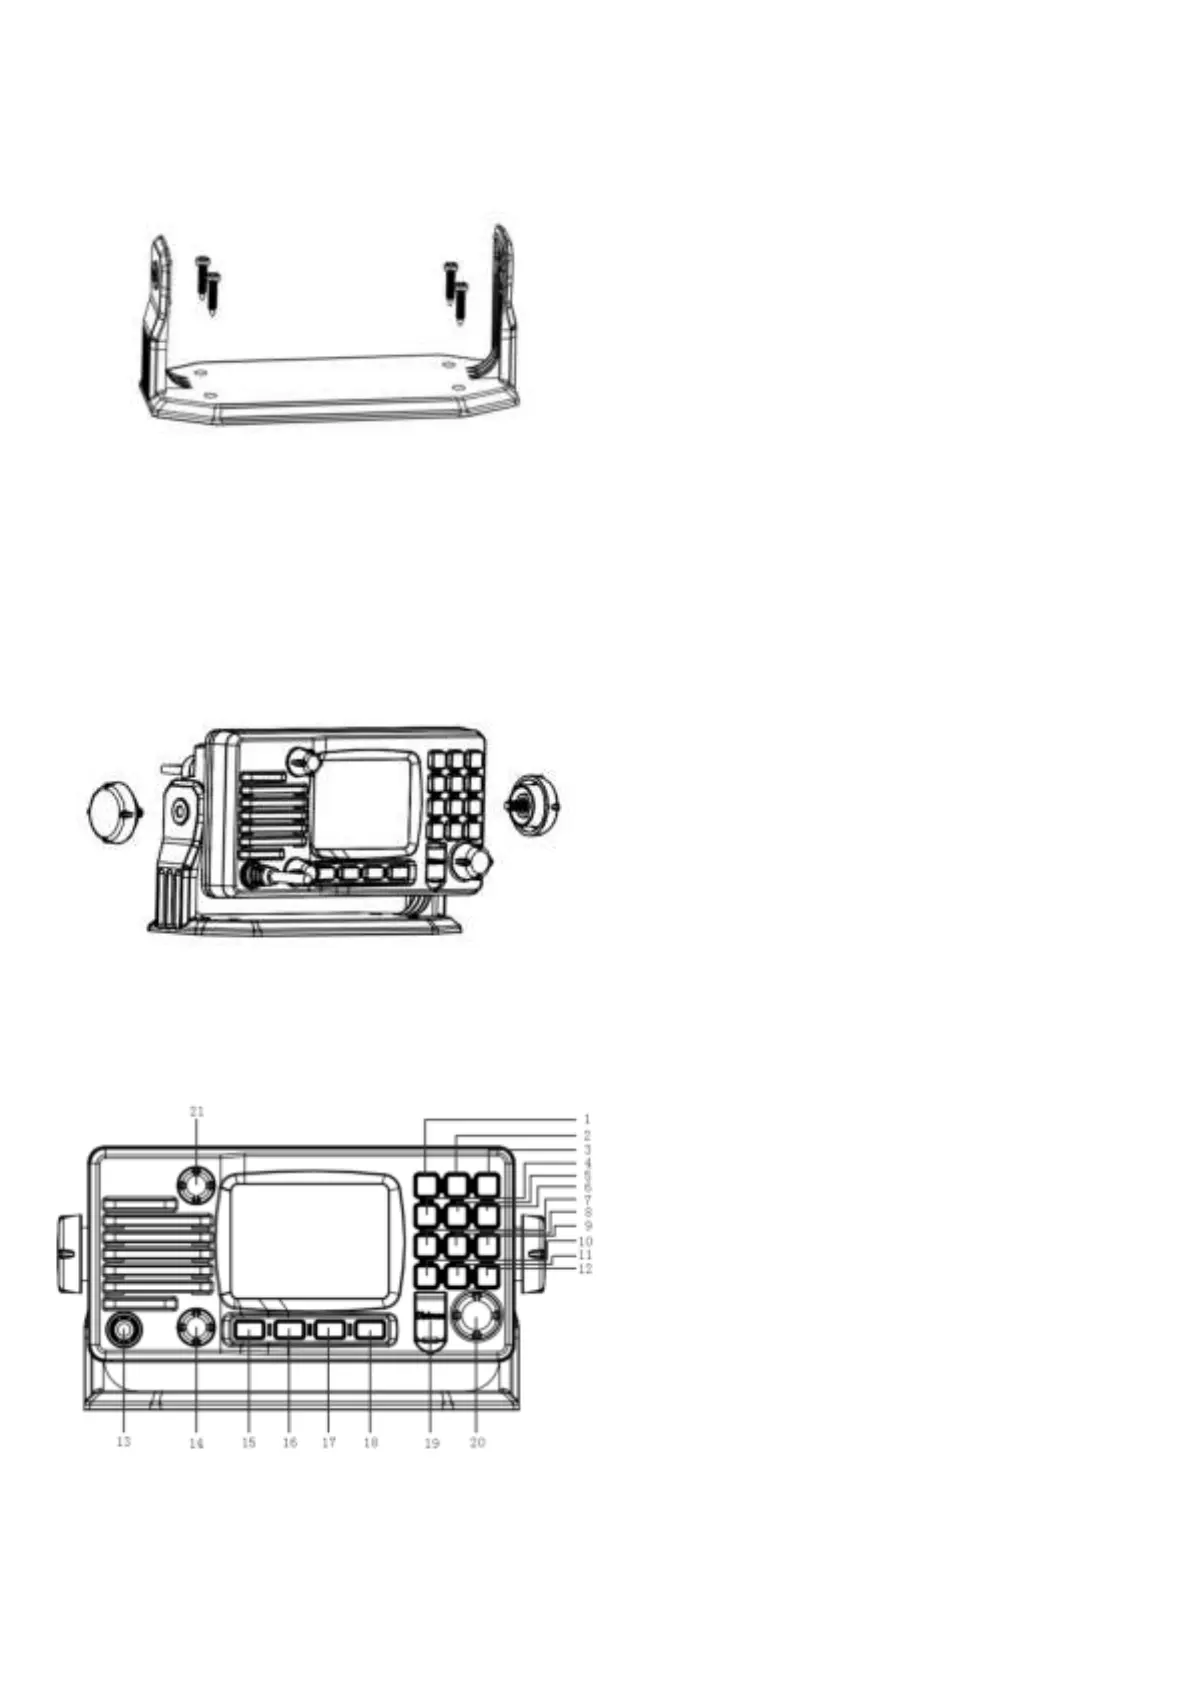
1. Installation
Yoke Mount Installation:
1. Place and fasten the mounting bracket on the
console by 4 screws;
2. Mount the radio onto the bracket;
3. Attach the supplied mounting knobs from two
sides of the bracket to fix the base radio securely
in the mounting bracket (as shown above).
Note. Mounting bracket, mounting knobs and 4
screws M4x20 are in a radio’s package.
2. Front Panel/Back Panel
Front Panel
1. CH/*/WX—short press to enter private channel,
long press to enter weather channel ( only
available in US and CAN)
2. Back Light On/Off—short press to back light On/Off.
3. Call/MENU—short press to enter “DSC Menu”, long
press to enter “Main Menu”.
4. 16/9—short press to enter channel 16 or press this
button to quit all other modes and back to the priority
channel quickly, long press will get second-priority
channel 09 or any channel that you’ve set as
second-priority channel.
5. LOC/DX—short press to get conversion between
local and distance mode (DX allows normal receive
sensitivity; and “LOCAL” eliminates receiver noise,
but degrades receiver sensitivity meanwhile
“LOCAL” icon display on LCD).
6. HI/LO—short press to toggle between 25w and 1 watt
output.“HI”or“LO”icon appears on LCD display to
indicate setting.
7. SCAN—short press to enter all scan/all memory scan,
long press to enter priority all/memory scan.
8. MEM—short press to enter memory mode, long press
to save/delete memory channel.
9. DW/FOG—short press to enter Dual Watch Mode,
long press to enter “Foghorn Menu”.
10. GPS/MOB—short press to get GPS activated,Long
press MOB.
11. TRIW/HAIL—short press to enter Tri Watch Mode,
long press to enter “HAILER LISTEN MODE” and
set volume as you wish.
12. UIC/AIS—short press to switch UIC band, long press
to enter AIS (Automatic Identification System)
13. Standard Handset.
14. VOL-The VOL will becomes larger while turning rota
ry knob by clockwise and vice versa.
15. Soft key 1
16. Soft key 2
17. Soft key 3
18. Soft key 4
19. DISTRESS—Pull up key cover and press hold on to
start Distress Alert Calling if you programmed your
radio with an MMSI Number.
20. Power on/off—short press to turn it on, long press to
turn it off. Rotate knob to get up/down function when
radio is on.
21. SQL-The SQL will becomes larger while turning rotar
y knob by clockwise and vice versa. Handset PTT key
—remote command microphone push this key to sent
out radio frequency signals.