37
2.16 Sub Picture Signal Amplitude Adjustment
Adjustment preparation
(1) Sub-brightness adjustment should be finished.
(2) Start adjustment about 20 minutes after the power
switch is turned on.
(3) Condition should be as follows:
Contrast : Max
Brightness : Center
(4) Press PIP button of R/C unit.
(5) The previous selected PinP will appear on the
screen.
(6) Select SINGLE mode and receive NTSC white signal
(amplitude 2.0Vp-p=Open), main-picture and sub-
picture (Do not use component signal).
(7) Connect probe on the P852 (CPT PWB- Green) to
check sub-picture amplitude.
Adjustment procedure
(1) Display PIP SINGLE picture.
(2) Go Into I
2
C service mode and press MENU button
until TA1270-M is displayed on screen.
(3) Press “PIP CH” button of R/C, “TA1270-M” change to
“TA1270-S”.
(4) Observe P852 on the CPT PWB and change the
“TA1270-S SUB CNT” I
2
C data so that the amplitude
of the sub-picture is the same level as that of the
main picture.
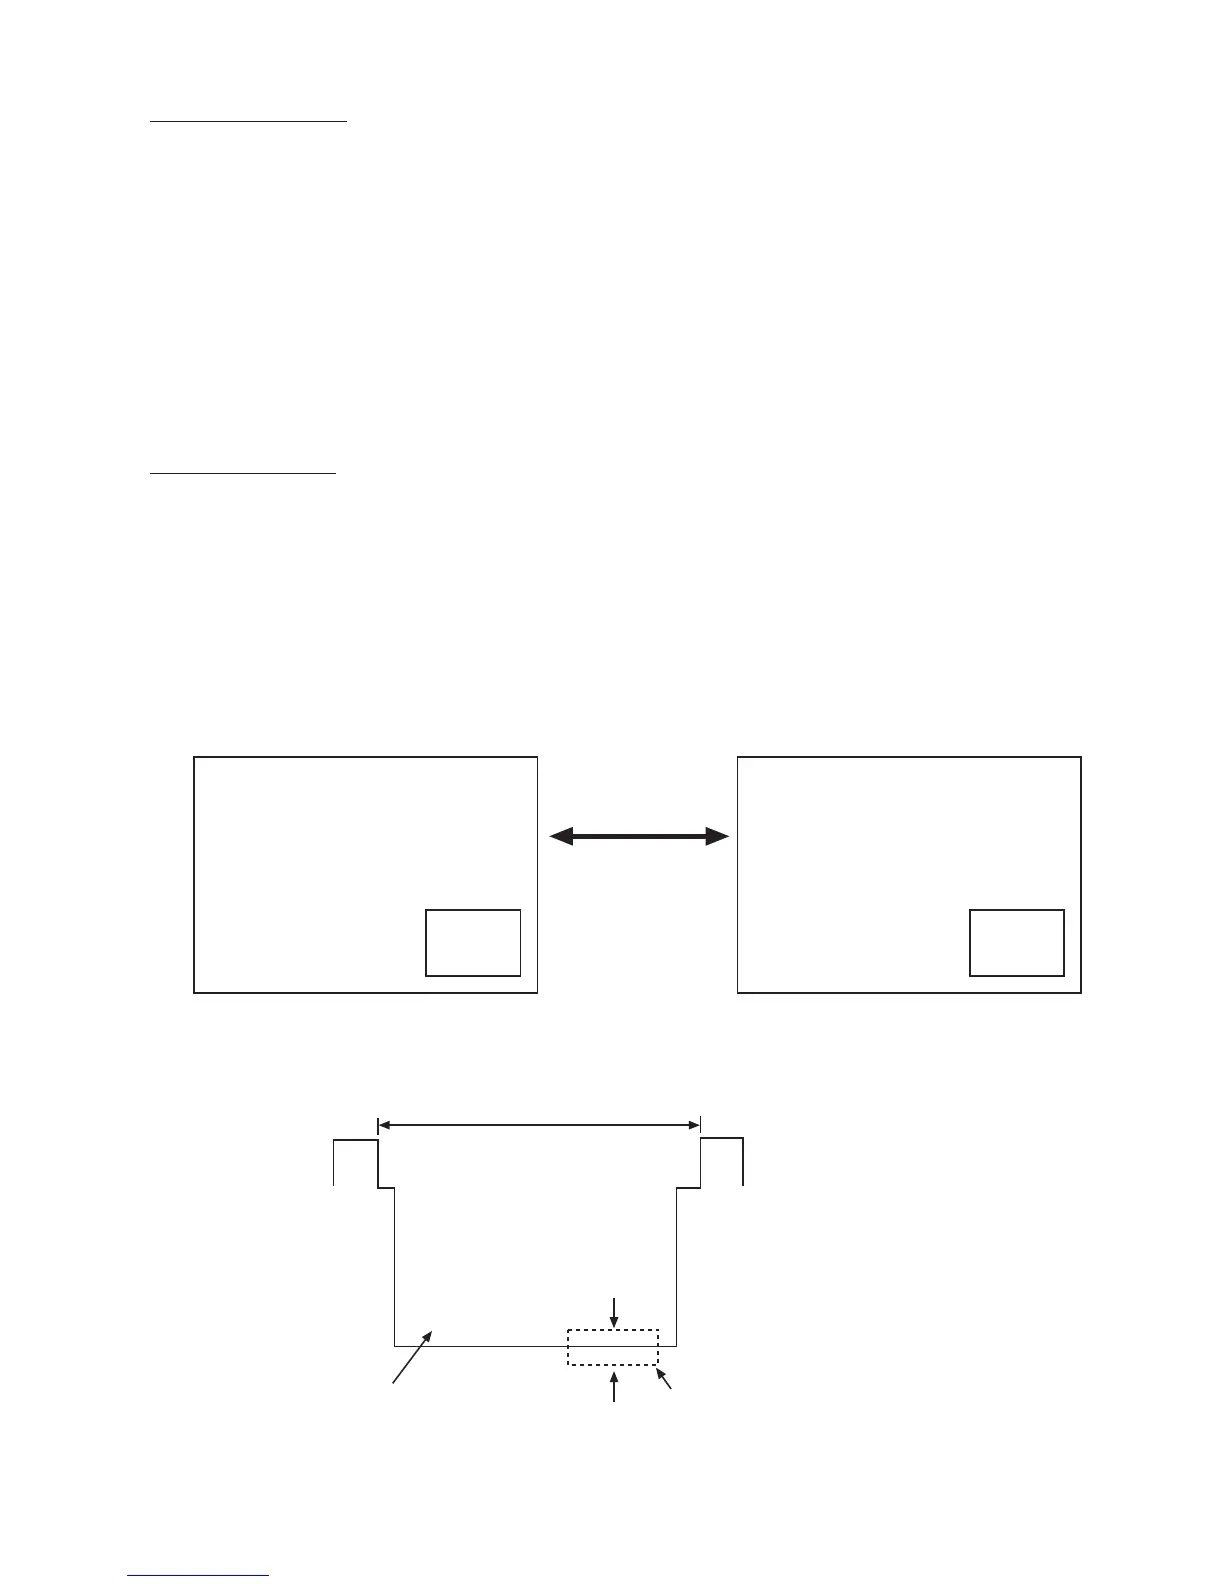
ADJUST MODE
TA1270-S
TINT (TV) 3C
TOFFO (TV) 00
TOFQ 00
SUB CNT 0F
SUB CLR
Sub-
Picture
Main Picture
Press “PIP CH” button
to select TA1270-M/
TA1270-S
ADJUST MODE
TA1270-M
TINT (TV) 3C
TOFFO (TV) 00
TOFQ 00
SUB CNT 0F
SUB CLR
Sub-
Picture
Main Picture
Main Picture
(WHITE)
Sub Picture
1H
Sub-picture leve compared
with main-picture level.)
(osilliscope range: 10V/5usec)
Adjustment specification: ±1V
Quality control specification: ±3V