10
Connecting with your devices (continued)
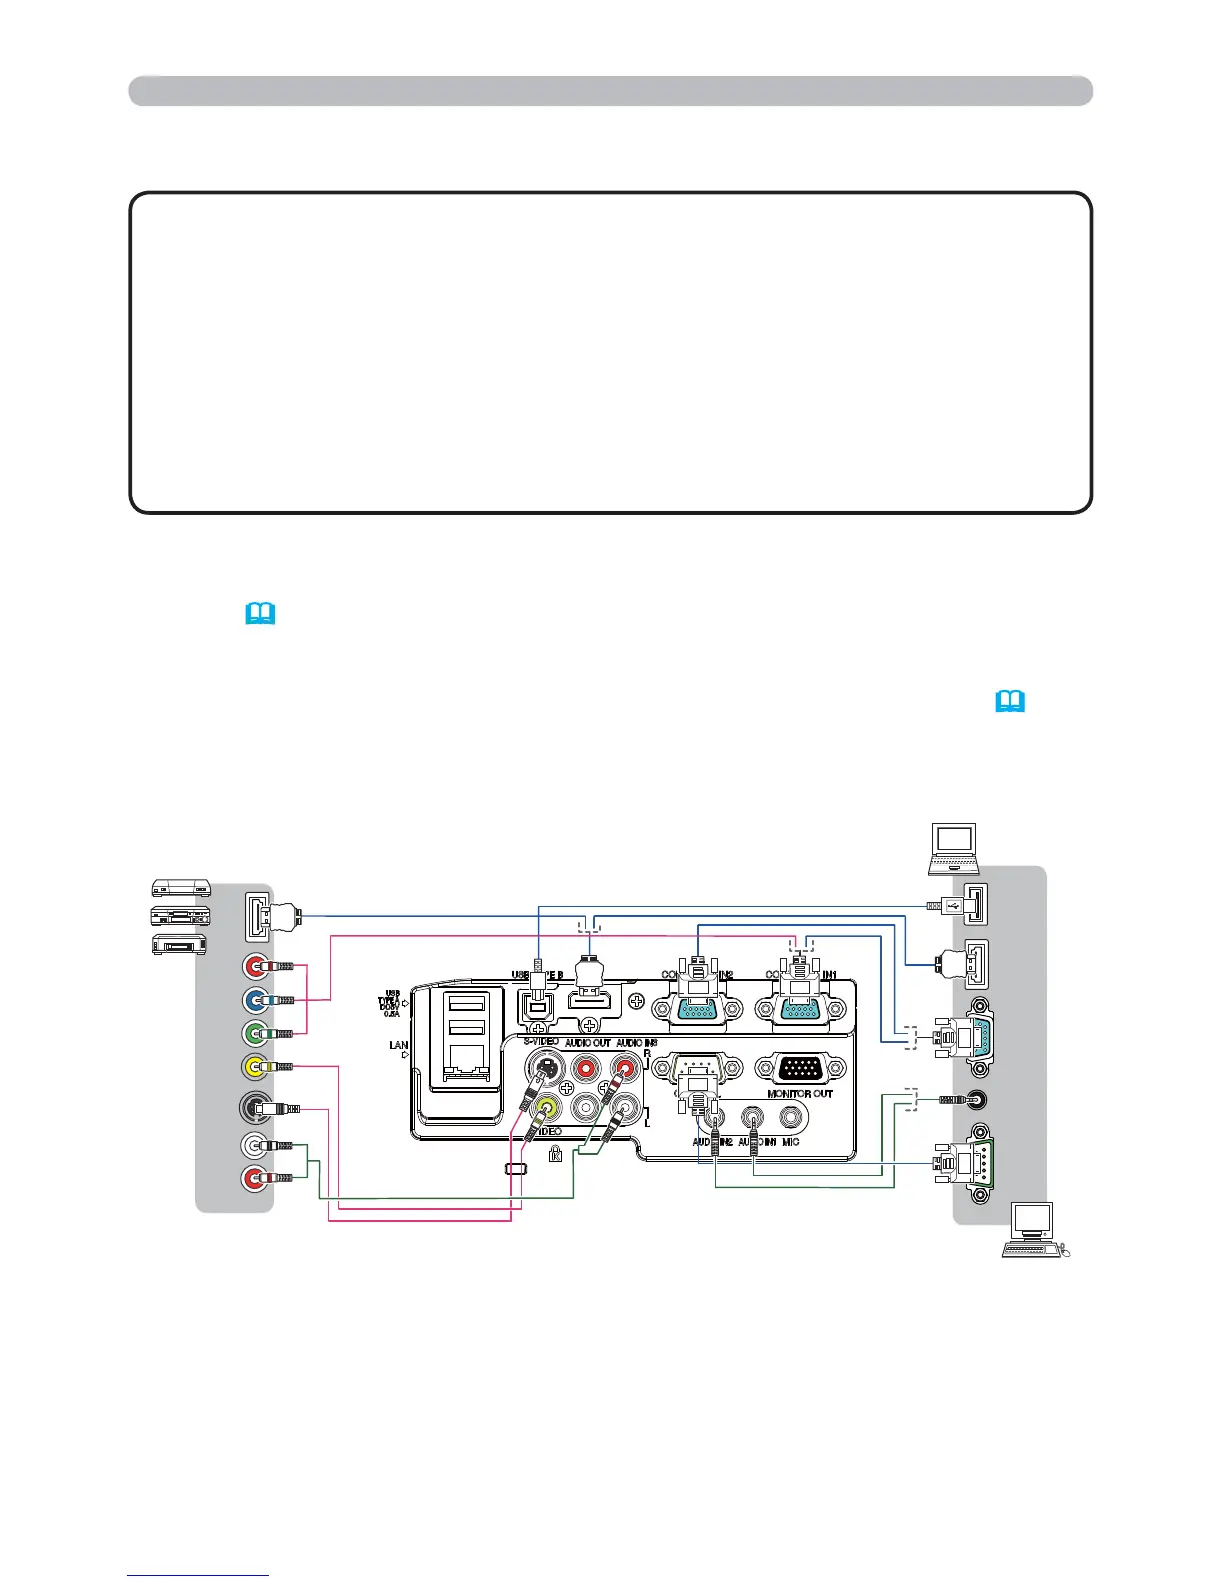
• When AUTO is selected for the COMPUTER IN1 or COMPUTER IN2 port in
COMPUTER IN of the INPUT menu, that port will accept component video
signals (
42).
•
When the USB TYPE B port and the computer's type A USB port are connected,
you can use the USB TYPE B port as a picture input port from the computer, or
use the remote control as a simple mouse and keyboard of the computer. (
18).
Setting up
(continued on next page)
• Plug-and-Play is a system composed of a computer, its operating system
and peripheral equipment (i.e. display devices). This projector is VESA DDC
2B compatible. Plug-and-Play can be used by connecting this projector to a
computer that is VESA DDC (display data channel) compatible.
- Take advantage of this feature by connecting a computer cable to the
COMPUTER IN1 port (DDC 2B compatible). Plug-and-Play may not work
properly if any other type of connection is attempted.
-
Please use the standard drivers in your computer as this projector is a Plug-and-
Play monitor.
About Plug-and-Play capability
COMPONENT
Cb/Pb
Y
Cr/Pr
HDMI
R
L
VIDEO
S-VIDEO
AUDIO
OUT
AUDIO
OUT
USB
(A)
DISPLAY
RS-232C
HDMI
VCR/DVD/Blu-ray Disc
player
Computer
 Loading...