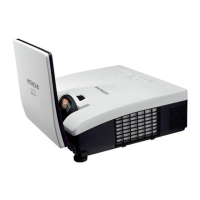
EasyManua.ls Logo

Hitachi CP-AX2505 User Manual

Hitachi CP-AX2505
116 pages
To Next Page IconTo Next Page
Page #1 background imageLoading...
Page #1 background image
1
Projector
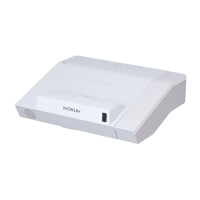
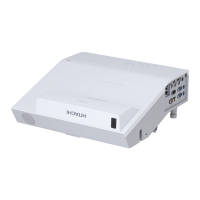
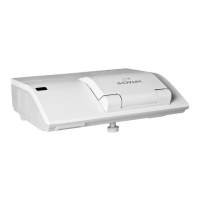
CP-AX2505/CP-AX3005/CP-AX3505
CP-AW2505/CP-AW3005
User's Manual (detailed)
Operating Guide
Thank you for purchasing this projector.
Ź%HIRUHXVLQJWKLVSURGXFWSOHDVHUHDGDOOPDQXDOVIRUWKLV
SURGXFW%HVXUHWRUHDG³Safety Guide´¿UVW$IWHUUHDGLQJWKHPVWRUHWKHPLQD
VDIHSODFHIRUIXWXUHUHIHUHQFH
WARNING
7KHLQIRUPDWLRQLQWKLVPDQXDOLVVXEMHFWWRFKDQJHZLWKRXWQRWLFH
7KHLOOXVWUDWLRQVLQWKLVPDQXDODUHIRULOOXVWUDWLYHSXUSRVHV7KH\PD\GLIIHU
VOLJKWO\IURP\RXUSURMHFWRU
7KHPDQXIDFWXUHUDVVXPHVQRUHVSRQVLELOLW\IRUDQ\HUURUVWKDWPD\DSSHDULQ
WKLVPDQXDO
7KHUHSURGXFWLRQWUDQVIHURUFRS\RIDOORUDQ\SDUWRIWKLVGRFXPHQWLVQRW
SHUPLWWHGZLWKRXWH[SUHVVZULWWHQFRQVHQW
NOTE
9DULRXVV\PEROVDUHXVHGLQWKLVPDQXDO7KHPHDQLQJVRIWKHVHV\PEROVDUH
GHVFULEHGEHORZ
$ERXWWKLVPDQXDO
WARNING
CAUTION
7KLVV\PEROLQGLFDWHVLQIRUPDWLRQWKDWLILJQRUHGFRXOGSRVVLEO\
UHVXOWLQSHUVRQDOLQMXU\RUHYHQGHDWKGXHWRLQFRUUHFWKDQGOLQJ
7KLVV\PEROLQGLFDWHVLQIRUPDWLRQWKDWLILJQRUHGFRXOGSRVVLEO\
UHVXOWLQSHUVRQDOLQMXU\RUSK\VLFDOGDPDJHGXHWRLQFRUUHFW
KDQGOLQJ
3OHDVHUHIHUWRWKHSDJHVZULWWHQIROORZLQJWKLVV\PERO
NOTICE 7KLVHQWU\QRWLFHVRIIHDURIFDXVLQJWURXEOH

Questions and Answers:

Hitachi CP-AX2505 Specifications

General IconGeneral
RS-232CYes
RS-232 ports1
CompatibilityComputer Native: XGA Composite/S-Video: NTSC, PAL, SECAM, PAL-M, PAL-N, NTSC4.43 Component Video/HDMI Video 525i(480i), 525(480p), 626i(576i), 1125i(1080i@50/60), 750p(720p@50/60), 1125p(1080p@50/60)
Lamp-door protection-
Lamp power310 W
Light source typeLamp
Lamp power (economic mode)225 W
Service life of light source5000 h
Service life of light source (economic mode)8000 h
3DNo
Video processing8 bit
Supported video modes480i, 480p, 525i, 576i, 625i
Analog signal format systemNTSC, NTSC 4.43, PAL, PAL M, PAL N, SECAM
Supported graphics resolutions1024 x 768 (XGA)
Digital zoom1.35 x
PlacementWall
Product typeUltra short throw projector
Product colorWhite
Other operating systems supportediOS
Number of colors16.78 million colors
Native aspect ratio4:3
Projection technology3LCD
Contrast ratio (typical)10000:1
Projector native resolutionXGA (1024x768)
Projector brightness (economic mode)2214 ANSI lumens
Power sourceAC
Power consumption (standby)0.35 W
Noise level34 dB
Password protection typePower on
Noise level (economic mode)28 dB
RMS rated power16 W
Weight and Dimensions IconWeight and Dimensions
Weight4300 g

Summary

Introduction

Features

Details the projector's broad use and unique features for various business scenes.

Checking the contents of package

Instructs users to verify package contents against the User's Manual (concise).

Part names

Projector Parts Identification

Labels the different parts of the projector with corresponding numbers for easy reference.

Safety Warnings and Cautions

Provides critical safety warnings and cautions for operating the projector.

Part names (continued)

Control Panel Overview

Identifies and describes the buttons and indicators on the projector's control panel.

Input/Output Ports

Lists and describes the various input and output ports available on the projector.

Part names (continued)

Remote Control Layout

Identifies and describes all the buttons on the projector's remote control.

Remote Control Notes

Provides important notes regarding remote control functionality and unsupported buttons.

Setting up

Arrangement Guidelines

Provides guidance on arranging the projector for optimal viewing and performance.

Placement Safety Precautions

Critical safety advice for placing the projector in a stable horizontal position.

Setting up (continued)

Placement and Ventilation Warnings

Safety warnings regarding placement, ventilation, and avoiding certain environments.

Environmental Cautions

Cautions about placing the projector in specific environments like dusty or smoky areas.

Setting up (continued)

Connecting Devices Overview

General instructions for connecting external devices to the projector.

Connection Safety and Cautions

Safety warnings and cautions for connecting devices to the projector.

Connecting with your devices (continued)

Plug-and-Play Capability Explanation

Explains the Plug-and-Play feature and its compatibility with VESA DDC 2B.

Connecting with your devices (continued)

Computer Connection Notes

Notes regarding connecting to a computer, synchronization, and resolution compatibility.

Connecting with your devices (continued)

USB Storage Device Usage

Information on using USB storage devices and connecting microphones.

Connecting with your devices (continued)

Network Connection Cautions

Cautions regarding network connection, consent, and USB storage devices.

Connecting with your devices (continued)

HDMI and USB Storage Notes

Notes on USB storage blocking LAN port and HDMI compatibility with HDCP.

Connecting to a power supply

Power Connection Safety Warnings

Critical safety warnings related to connecting the projector's power cord.

Security Bar and Slot Usage

Instructions for using the security bar and slot for theft prevention.

Using the cable cover

Cable Cover Cautions

Cautions about pinching cables and using the correct cable cover.

Remote control

Installing the batteries

Step-by-step instructions for installing batteries in the remote control.

Battery Safety Warnings

Important safety warnings regarding battery handling, usage, and disposal.

Remote control (continued)

Remote Control Signal Operation

Explains the remote sensor's range and how it operates.

Changing Remote Signal Frequency

Instructions on how to change the frequency of the remote control signal.

Remote control (continued)

Using as PC Mouse/Keyboard

Explains how to use the projector as a PC mouse and keyboard.

Mouse/Keyboard Function Notices

Notices regarding improper use of mouse/keyboard functions and compatibility.

Power on/off

Turning on the projector

Step-by-step guide for turning on the projector and checking indicators.

Power on/off (continued)

Projection Window Safety Warnings

Safety warnings about looking into the projection window and potential damage.

Power on/off (continued)

Turning off the projector

Instructions for turning off the projector and confirming status.

Power Off Safety Warnings

Safety warnings related to touching hot parts after turning off.

Operating

Adjusting the volume

How to adjust the volume using the remote control's VOLUME buttons.

Muting Screen and Audio Output

How to temporarily mute the screen and audio output using AV MUTE.

Muting Function Safety Warnings

Safety warning about blank screens and potential damage when using AV MUTE.

Operating (continued)

Selecting an input signal

Guide on how to select the input signal source for the projector.

Selecting an aspect ratio

Instructions for selecting the desired aspect ratio for displayed images.

Operating (continued)

Adjusting projector's elevator

How to adjust the projector's tilt angle using the rear feet.

Elevator Adjustment Safety Notes

Safety notes regarding keeping spacers away from children.

Adjusting zoom and focus

Instructions for adjusting the zoom and focus of the projected image.

Operating (continued)

Automatic adjustment feature

How to use the automatic adjustment feature for image optimization.

Operating (continued)

Using the TEMPLATE feature

Details on how to use the TEMPLATE feature for test patterns.

Other Remote Control Buttons

Explanation of HDCR and ACCENTUALIZER buttons.

Operating (continued)

Adjusting image position

How to adjust the projected image's position using the remote control.

Correcting keystone/perfect fit distortions

Steps to correct keystone and perfect fit distortions on the projected image.

Operating (continued)

Using the magnify feature

Instructions on how to use the magnify feature for zooming into the image.

Operating (continued)

Temporarily freezing the screen

How to freeze the projected image on the screen using the FREEZE button.

Operating (continued)

Using the menu function

Guide on navigating and using the projector's menu system.

EASY MENU Navigation

Instructions for navigating and selecting items within the EASY MENU.

ADVANCED MENU Navigation

Instructions for navigating and selecting items within the ADVANCED MENU.

Operating (continued)

Menu Function Details

Further details on menu functions, including exit and reset operations.

OSD Indication Meanings

Explains the meaning of various indications shown on the On-Screen Display (OSD).

EASY MENU

ASPECT Adjustment

Adjusts the aspect ratio of the displayed image.

D-ZOOM Adjustment

Adjusts the magnification ratio of the projected image.

KEYSTONE Correction

Corrects vertical and horizontal keystone distortions.

PERFECT FIT Adjustment

Adjusts the shape of the projected image for corners and sides.

EASY MENU (continued)

PICTURE MODE Selection

Selects the picture mode for optimal viewing conditions.

ECO MODE Settings

Adjusts eco mode settings for power saving and brightness.

INSTALLATION Settings

Configures installation settings for different mounting options.

RESET EASY MENU Items

Resets all EASY MENU items to their default values.

FILTER TIME Settings

Displays and resets the filter usage time.

EASY MENU (continued)

LANGUAGE Settings

Changes the display language of the OSD menu.

ADVANCED MENU Access

Provides access to the ADVANCED MENU for further settings.

EXIT Menu Option

Option to exit the OSD menu.

PICTURE menu

BRIGHTNESS Adjustment

Adjusts the brightness level of the projected image.

CONTRAST Adjustment

Adjusts the contrast level of the projected image.

HDCR Function

Improves picture clarity in bright rooms by enhancing contrast.

ACCENTUALIZER Function

Enhances the legibility and sharpness of the projected image.

PICTURE menu (continued)

GAMMA Adjustment

Adjusts the gamma mode and displays test patterns for fine-tuning.

PICTURE menu (continued)

COLOR TEMP Adjustment

Adjusts the color temperature and gain for optimal color balance.

COLOR Adjustment

Adjusts the intensity or saturation of colors in the image.

TINT Adjustment

Adjusts the tint of the image, shifting colors towards green or magenta.

PICTURE menu (continued)

SHARPNESS Adjustment

Adjusts the sharpness of the projected image.

ACTIVE IRIS Adjustment

Controls the active iris for image quality based on lighting conditions.

MY MEMORY Settings

Allows saving and loading of custom adjustment settings.

IMAGE menu

ASPECT Ratio Settings

Adjusts aspect ratio for various input signal types.

OVER SCAN Adjustment

Adjusts the over-scan ratio for video and component signals.

IMAGE menu (continued)

V POSITION Adjustment

Adjusts the vertical position of the projected image.

H POSITION Adjustment

Adjusts the horizontal position of the projected image.

IMAGE menu (continued)

H PHASE Adjustment

Adjusts horizontal phase to eliminate flicker in the image.

H SIZE Adjustment

Adjusts the horizontal size of the projected image.

AUTO ADJUST EXECUTE

Performs automatic adjustment for image position and size.

INPUT menu

PROGRESSIVE Settings

Adjusts the progressive mode for video signals.

VIDEO NR Settings

Adjusts the video noise reduction for clearer images.

COLOR SPACE Settings

Selects the color space for optimal color reproduction.

INPUT menu (continued)

VIDEO FORMAT Selection

Selects the video format for input signals.

HDMI FORMAT Selection

Selects the HDMI format for input signals.

HDMI RANGE Selection

Selects the digital range for HDMI signals.

INPUT menu (continued)

COMPUTER IN Settings

Sets the computer input type for COMPUTER IN ports.

FRAME LOCK Settings

Enables or disables the frame lock function for input signals.

INPUT menu (continued)

RESOLUTION Settings

Sets the display resolution for COMPUTER IN ports.

SETUP menu

D-ZOOM Adjustment

Adjusts the magnification ratio of the projected image.

D-SHIFT Adjustment

Adjusts the picture position using the D-SHIFT function.

PICT. POSITION Adjustment

Selects the vertical picture position.

SETUP menu (continued)

PICT. POSIT. H Adjustment

Selects the horizontal picture position.

KEYSTONE Correction

Corrects vertical keystone distortion.

SETUP menu (continued)

PERFECT FIT Adjustment

Adjusts the shape of the projected image for corners and sides.

SETUP menu (continued)

PERFECT FIT (Continued)

Details on adjusting picture shape and distortion correction.

AUTO ECO MODE

Turns the AUTO ECO mode on or off.

ECO MODE (LAMP & FILTER)

Adjusts ECO MODE settings related to lamp and filter.

SETUP menu (continued)

LAMP TIME Display

Displays the usage time of the projector lamp.

FILTER TIME Display

Displays the usage time of the air filter.

FILTER MESSAGE Settings

Sets the filter notification message.

IMAGE OPTIMIZER

Enables automatic image correction for visibility.

SETUP menu (continued)

INSTALLATION Settings

Configures installation settings for different projector placements.

STANDBY MODE Settings

Sets the projector's standby mode.

AUDIO menu

VOLUME Adjustment

Adjusts the volume level of the projector's audio output.

SPEAKER Settings

Turns the built-in speaker on or off.

AUDIO SOURCE Selection

Selects the audio source from available input ports.

MIC VOLUME Adjustment

Adjusts the volume level of the connected microphone.

SCREEN menu

LANGUAGE Settings

Changes the OSD display language.

MENU POSITION Adjustment

Adjusts the position of the OSD menu on the screen.

BLANK Screen Settings

Sets the mode for the blank screen.

AUTO BLANK Settings

Configures the auto blank screen function.

SCREEN menu (continued)

START UP Screen Settings

Sets the startup screen mode.

MyScreen Registration

Captures and registers MyScreen images.

SCREEN menu (continued)

MyScreen Lock Function

Locks the MyScreen function to protect current settings.

MESSAGE Display Function

Displays various messages and status information.

SCREEN menu (continued)

SOURCE NAME Configuration

Assigns names to input sources for easier identification.

SCREEN menu (continued)

SOURCE NAME Configuration (Continued)

Continues the process of naming input sources.

TEMPLATE Feature Usage

Explains how to use the TEMPLATE feature for image display.

SCREEN menu (continued)

C.C. (Closed Caption) Settings

Settings for Closed Caption display, mode, and channel.

DISPLAY Caption Settings

Configures how closed captions are displayed.

MODE Caption Settings

Selects the mode for displaying closed caption information.

CHANNEL Caption Settings

Selects the channel for closed caption data.

OPTION menu

AUTO SEARCH Function

Automatically searches for input signals.

DIRECT POWER ON Function

Turns the lamp on automatically when power is supplied.

OPTION menu (continued)

AUTO POWER OFF Settings

Adjusts the timer for automatic projector turn-off.

OPTION menu (continued)

MY BUTTON Assignment

Assigns functions to the MY BUTTON 1/2.

OPTION menu (continued)

MY BUTTON Assignment (Continued)

Details on assigning functions to MY BUTTON.

SCHEDULE Setup

Guides on setting up schedule items and activating date/time settings.

OPTION menu (continued)

SCHEDULE Setup (Continued)

Details on PROGRAM EDIT and schedule setup.

PROGRAM EDIT

Instructions for editing programmed events.

OPTION menu (continued)

SCHEDULE Setup (Continued)

Details on editing selected programs and saving settings.

Schedule Settings Note

Note regarding the saving of slideshow settings.

OPTION menu (continued)

SERVICE Menu

Settings within the SERVICE menu: ALTITUDE, AUTO ADJUST, GHOST.

ALTITUDE Setting

Adjusts the projector's cooling fan speed based on altitude.

AUTO ADJUST Setting

Configures automatic adjustment for image quality.

GHOST Elimination

Adjusts settings to eliminate ghosting in the image.

OPTION menu (continued)

SERVICE Menu (Continued)

Settings for KEY LOCK and REMOTE RECEIV.

KEY LOCK

Locks the control panel and remote control keys.

REMOTE RECEIV. Setting

Sets the projector's remote sensor reception.

OPTION menu (continued)

SERVICE Menu (Continued)

Settings for REMOTE FREQ. and COMMUNICATION.

REMOTE FREQ. Setting

Changes the projector's remote sensor frequency.

COMMUNICATION Settings

Configures communication settings for the projector.

OPTION menu (continued)

SERVICE Menu (Continued)

Details COMMUNICATION TYPE, SERIAL SETTINGS, and TRANSMISSION METHOD.

COMMUNICATION TYPE

Selects the communication type for network or external devices.

SERIAL SETTINGS

Configures serial communication parameters like baud rate and parity.

TRANSMISSION METHOD

Selects the transmission method for network communication.

OPTION menu (continued)

SERVICE Menu (Continued)

Details RESPONSE LIMIT TIME and CLONING functions.

RESPONSE LIMIT TIME

Sets the time limit for receiving responses from other devices.

CLONING

Copies and loads projector settings to/from USB memory.

OPTION menu (continued)

SERVICE Menu (Continued)

Continued details on CLONING functions for settings.

OPTION menu (continued)

SERVICE Menu (Continued)

Further details on CLONING functions, loading and setting data.

OPTION menu (continued)

SERVICE Menu (Continued)

Details on CLONING, INFORMATION, and FACTORY RESET.

INFORMATION Display

Displays current input information and frame lock status.

FACTORY RESET

Resets projector settings to factory defaults.

NETWORK menu

Network Operations Overview

Provides information on network operations and connection advice.

SECURITY menu

Enter to the SECURITY menu

Instructions for accessing the projector's security menu.

SECURITY PASSWORD CHANGE

Steps for changing the security password.

Forgotten Password Procedure

Procedure to follow if the security password is forgotten.

SECURITY menu (continued)

MyScreen PASSWORD Management

Setting and managing the MyScreen password.

SECURITY menu (continued)

PIN LOCK Management

Setting and managing the PIN lock for projector access.

SECURITY menu (continued)

MY TEXT PASSWORD Management

Setting and managing the My Text password.

SECURITY menu (continued)

MY TEXT DISPLAY Control

Controls the display of My Text on the startup screen.

MY TEXT WRITING

Instructions for writing and editing My Text content.

CLONING LOCK

Locks the cloning function to prevent unauthorized access.

Presentation tools

PC-LESS Presentation Overview

Introduction to PC-LESS Presentation features and capabilities.

Presentation tools (continued)

PC-LESS Presentation (continued)

Details on thumbnail mode for viewing presentation files.

Thumbnail mode Usage

How to use thumbnail mode to display presentation images.

Presentation tools (continued)

PC-LESS Presentation (continued)

Controlling presentations via buttons and the setup menu.

Operating Presentation Buttons

How to control presentations using remote, panel, or web remote buttons.

Selected Image Setup Menu

Instructions for setting up selected images within the presentation.

Presentation tools (continued)

PC-LESS Presentation (continued)

Operating presentations via the menu on the thumbnail screen.

Operating Presentation Menu

How to control presentations using the menu on the thumbnail screen.

Presentation tools (continued)

PC-LESS Presentation (continued)

Notes on operations, file format icons, and audio playback.

Presentation Notes

Important notes regarding operations and file format icons.

Presentation tools (continued)

PC-LESS Presentation (continued)

Details on Full Screen Mode and operations for still images.

Full Screen Mode

How to display images in Full Screen mode.

Operations for Still Images

Controls for navigating and interacting with still images.

Presentation tools (continued)

PC-LESS Presentation (continued)

Details on operations for movie playback.

Operations for Movie

Controls for playing movies, including pause, fast-forward, and rewind.

Movie Operations Notes

Notes on inaccessible operations during movie playback.

Presentation tools (continued)

PC-LESS Presentation (continued)

Details on Slideshow mode and its operations.

Slideshow mode

How to display images in slideshow mode.

Slideshow Operations Notes

Notes on operations not accessible while the projector OSD is displayed.

Presentation tools (continued)

PC-LESS Presentation (continued)

Details on slideshow configuration and settings.

Slideshow Settings Note

Note regarding the saving of slideshow settings to playlist.txt.

Presentation tools (continued)

PC-LESS Presentation (continued)

Details on playlist files and their format.

Playlist File Details

Explains the structure and content of playlist files.

Playlist Notes

Notes on playlist file limits and maximum line length.

USB Display(Windows computer)

Hardware and Software Requirements

Lists hardware and software requirements for PC connection.

Starting USB Display

Steps to connect and start the USB display function.

USB Display Notes

Notes regarding software, manual, and connection issues.

USB Display(Windows computer) (continued)

USB Display Notes

Notes on software usage, connection issues, and audio.

USB Display(Windows computer) (continued)

Right-Click Menu

Describes the options available in the right-click menu.

Right-Click Menu Notes

Note on restarting the application via the right-click menu.

Floating Menu

Describes the floating menu options for capture and control.

Floating Menu Notes

Note on repeated button presses affecting image display.

USB Display(Windows computer) (continued)

Options Window

Options for optimizing performance, transmission speed, and image quality.

Optimize Performance

Settings to optimize performance, transmission speed, and image quality.

Transmission Speed

Settings prioritizing transmission speed over image quality.

Image Quality

Settings prioritizing image quality over transmission speed.

Keep PC Resolution

Maintains the PC's resolution for display.

Sound Settings

Controls for enabling or disabling sound.

Display LiveViewer Lite for USB

Shows how to display the LiveViewer Lite application window.

Version Information

Provides version information for LiveViewer Lite for USB.

Options Window Notes

Note regarding audio settings and potential interference.

USB Display(Mac computer)

Hardware and Software Requirements

Lists hardware and software requirements for Mac connection.

Starting USB Display

Steps to connect and start USB display on Mac.

USB Display Notes

Notes regarding software, manual, and connection issues.

USB Display(Mac computer) (continued)

USB Display Notes

Notes on software usage, connection issues, and audio.

USB Display(Mac computer) (continued)

Menu Options

Describes the menu options available for USB display on Mac.

USB Display(Mac computer) (continued)

Options Window

Options for optimizing performance, transmission speed, and image quality.

Optimize Performance

Settings to optimize performance, transmission speed, and image quality.

Transmission Speed

Settings prioritizing transmission speed over image quality.

Image Quality

Settings prioritizing image quality over transmission speed.

Keep PC Resolution

Maintains the PC's resolution for display.

Sound Settings

Controls for enabling or disabling sound.

Version Information

Provides version information for LiveViewer Lite for USB.

Options Window Notes

Note regarding audio settings and potential interference.

Maintenance

Replacing the lamp

Step-by-step instructions for replacing the projector lamp.

Lamp Replacement Cautions

Caution about touching hot internal parts during lamp replacement.

Maintenance (continued)

Lamp Warning

Warnings about high voltage, temperature, pressure, and lamp shards.

Lamp Disposal Information

Instructions and recommendations for the safe disposal of projector lamps.

Lamp Handling Safety Warnings

Safety warnings regarding lamp handling, breakage, and damage.

Maintenance (continued)

Cleaning and replacing the air filter

Detailed steps for cleaning and replacing the projector's air filter.

Maintenance (continued)

Air Filter Cautions

Cautions about taking care of the air filter and potential hazards.

Air Filter Replacement Notes

Notes on replacing the air filter and checking for proper fit.

Maintenance (continued)

Caring for the projection window

Instructions for cleaning the projector's projection window.

Projection Window Cleaning Warnings

Warnings about cleaning the projection window and avoiding damage.

Maintenance (continued)

Replacing the internal clock battery

Step-by-step instructions for replacing the internal clock battery.

Clock Battery Safety Warnings

Safety warnings regarding handling and disposing of clock batteries.

Clock Battery Notes

Note regarding the internal battery's function after replacement.

Maintenance (continued)

Other Care

General care instructions for projector interior, cabinet, and remote.

Inside of the projector

General care advice for the projector's interior.

Cabinet and Remote Control Care

Instructions for caring for the projector's cabinet and remote control.

General Care Warnings

General warnings for projector care procedures.

General Care Cautions

General cautions for projector care procedures.

Projection Window Care Notice

Notice about not touching the projection window surface with hands.

Troubleshooting

Troubleshooting Safety Warnings

Safety warnings for abnormal projector operation.

Related Messages Overview

Explains common messages displayed by the projector.

Troubleshooting (continued)

Related Messages (Continued)

Continues explanation of projector messages.

Troubleshooting (continued)

Regarding the indicator lamps

Explains the projector's indicator lamp states and their meanings.

Troubleshooting (continued)

Indicator Lamps (Continued)

Continues explanation of indicator lamp states.

Troubleshooting (continued)

Indicator Lamps (Continued)

Continues explanation of indicator lamp states for CLONING.

Indicator Lamps Notes

Note on internal overheating and indicator lamps behavior.

Troubleshooting (continued)

Resetting all settings

Instructions for resetting projector settings to factory defaults.

Phenomena mistaken for defects

Lists phenomena that may be mistaken for machine defects.

Troubleshooting (continued)

Phenomena mistaken for defects (Continued)

Lists more phenomena that may be mistaken for machine defects.

Troubleshooting (continued)

Phenomena mistaken for defects (Continued)

Lists phenomena related to signal, USB, and remote control.

Troubleshooting (continued)

Phenomena mistaken for defects (Continued)

Lists phenomena related to display, image degradation, and settings.

Troubleshooting (continued)

Phenomena mistaken for defects (Continued)

Lists phenomena related to unstable output, network, and clock reset.

Troubleshooting (continued)

Phenomena mistaken for defects (Continued)

Lists phenomena related to network, USB memory, and CLONING.

Phenomena Notes

Note on liquid crystal display characteristics and potential defects.

Specifications

End User License Agreement

License agreement for the projector software.

Trademark acknowledgment

Lists trademarks and registered marks used in the manual.

Related product manuals