40
CP-X2511N(C15I-25N2) / CP-X3011N(C15I-30N2) / CP-X4011N(C15I-40N2) / CP-X2011N(C15-20N2) / ED-X45N(C15-20N2)
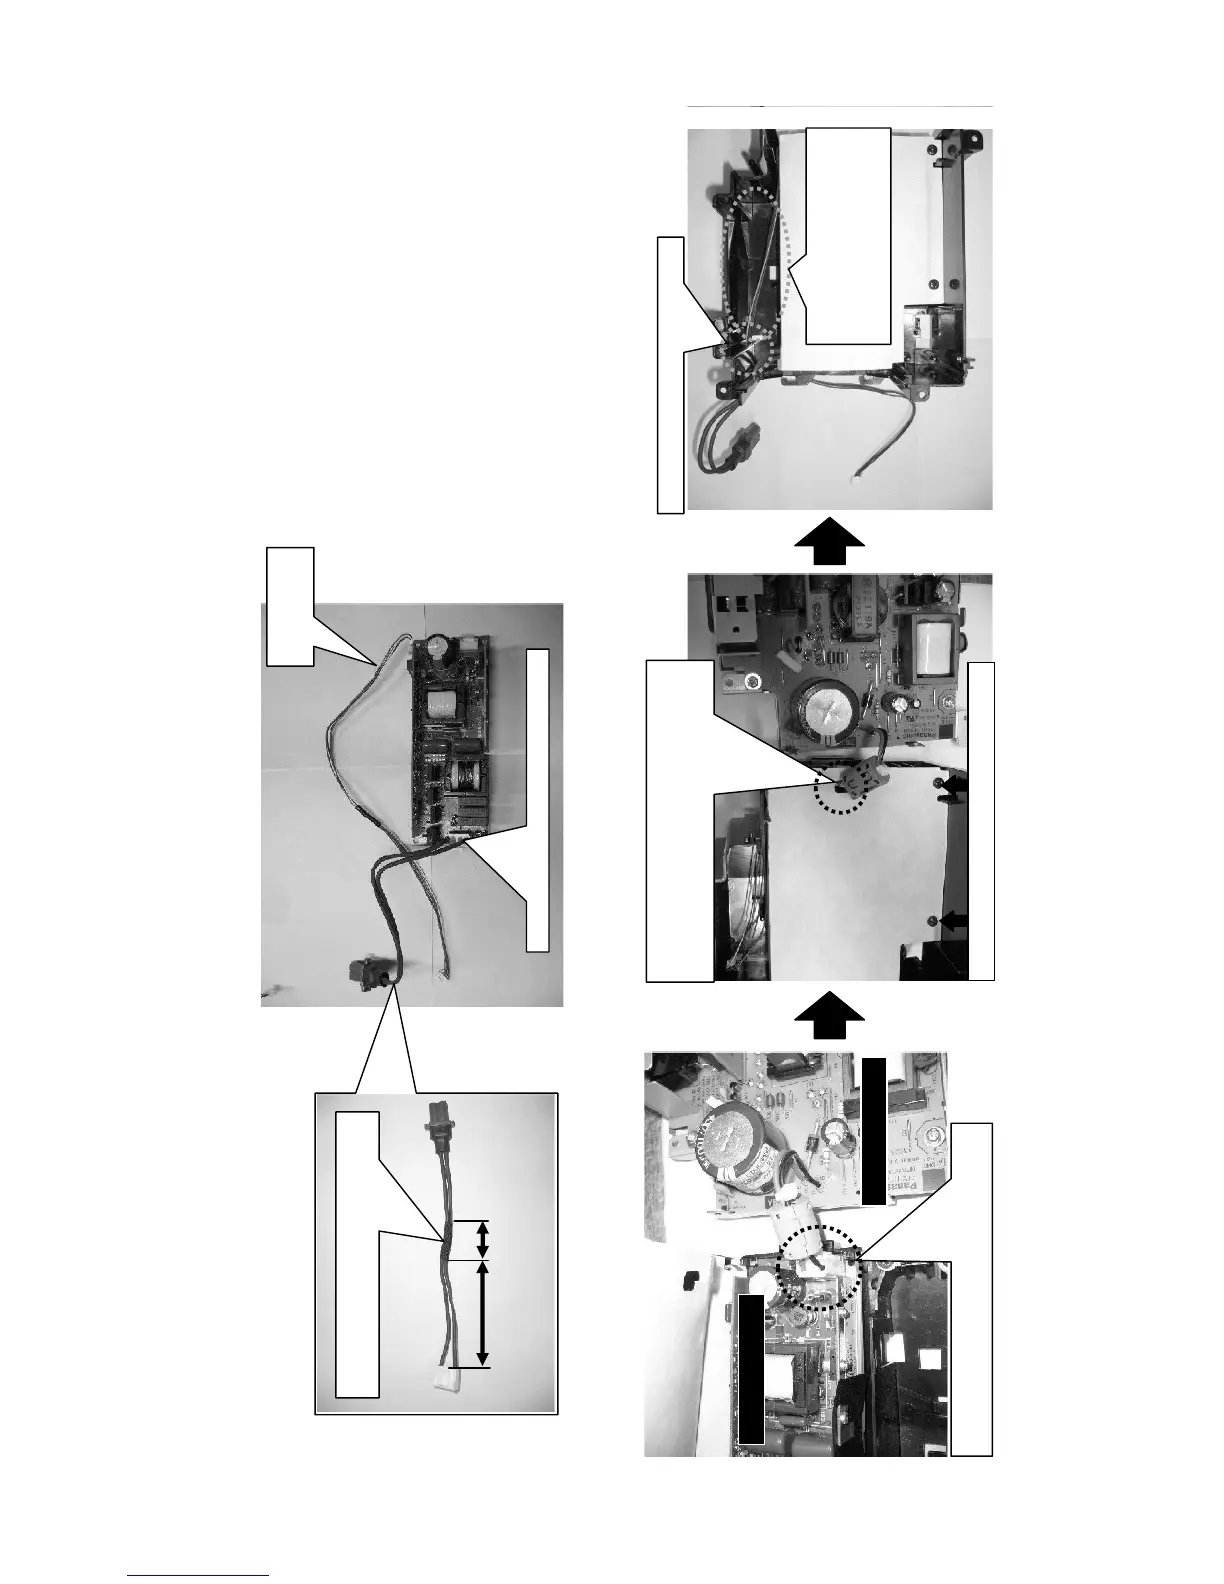
Wiring diagram 2
Wiring of power supply block 2
(1) Connect CNLAP and CNBAR
(2) Wire CNBAR
Connecting Power Unit Circuit with Power Unit Ballast, and attaching the insulating sheet
Insulating sheet
Pass the CNBAR through this hole.
Connect the
CNBAR here.
Connect the CNLAP here until it clicks.
Connect the CNPFC of the Power Unit Circuit
to the Power Unit Ballast until it clicks.
Power Unit Ballast
Power Unit Ballast
Power Unit Circuit
Insulating
sheet
Pass the CNPFC wires through the hole of
insulating sheet when putting the sheet over
the Power Unit Ballast.
BALLAST HOLDER
60 to 70mm
Confirm the tape has been wound in
proper position.
Fasten the insulating sheet with 2 screws.
Wire the CNBAR carefully in
order not to pass it under the
insulating sheet and make it
loosened here.
30mm or more