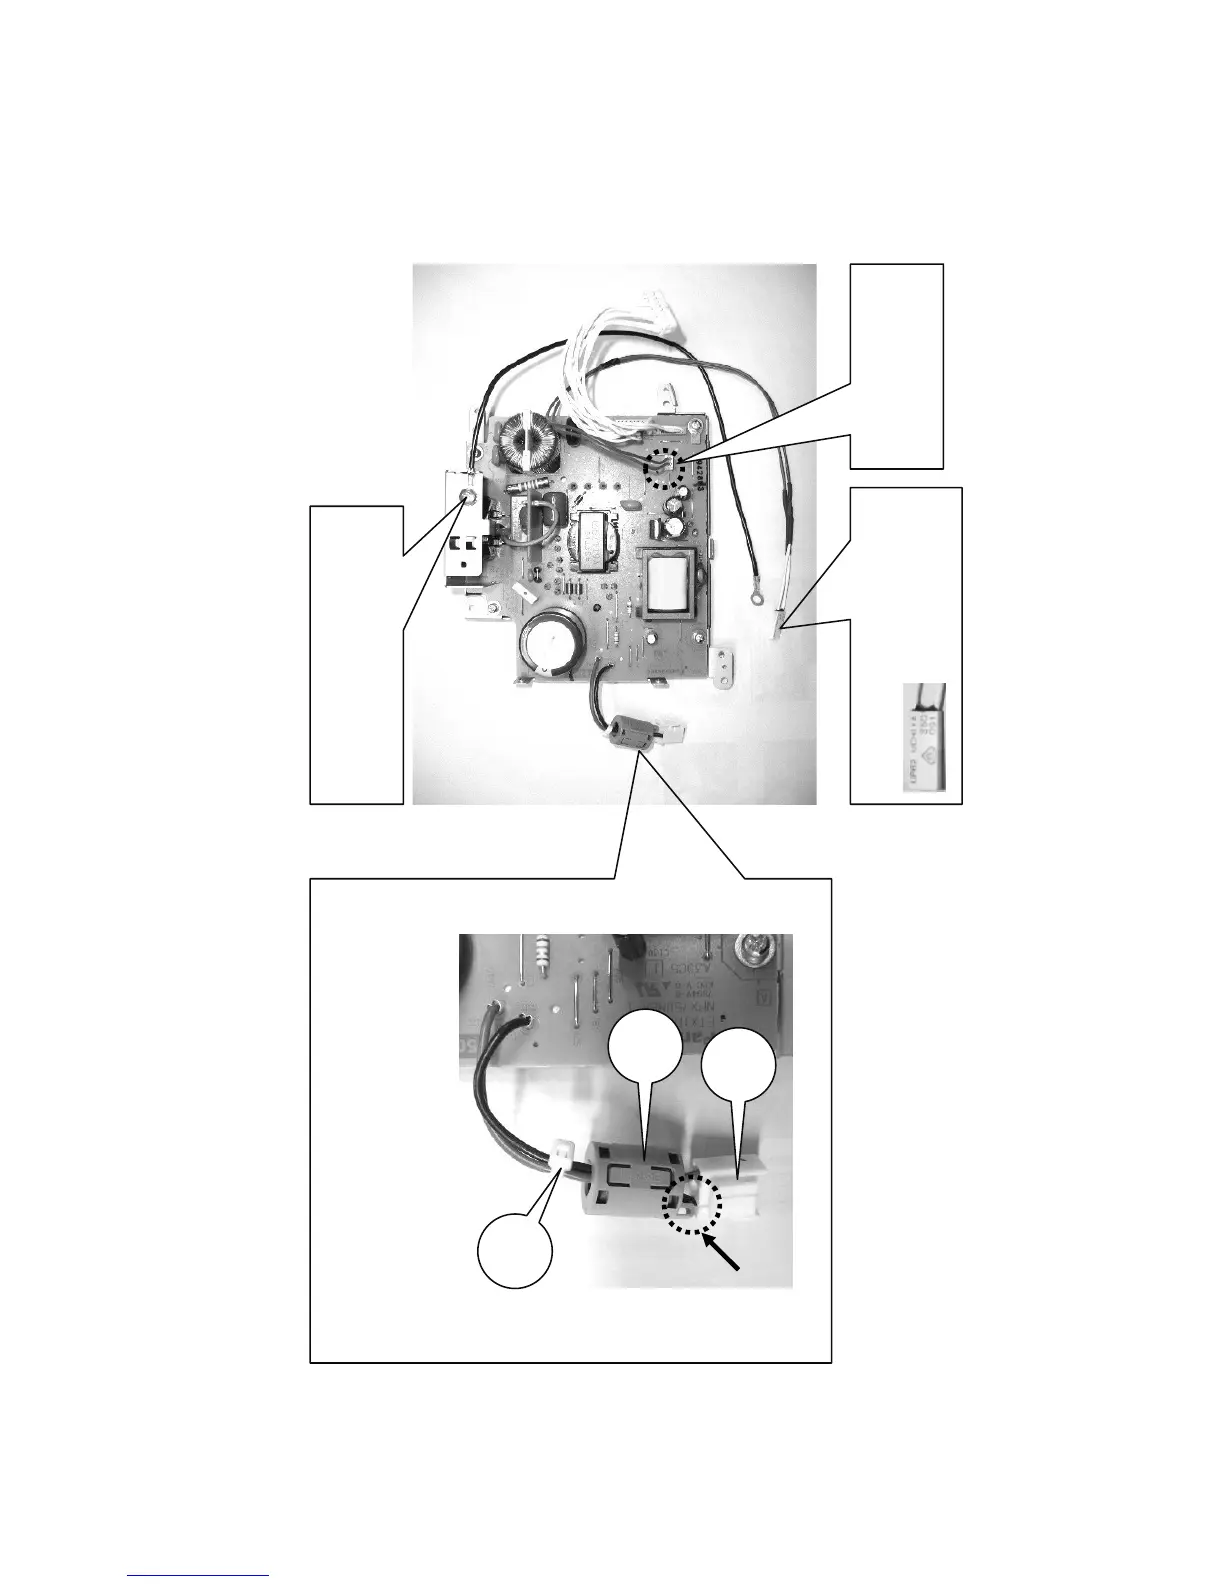
39
CP-X2511N(C15I-25N2) / CP-X3011N(C15I-30N2) / CP-X4011N(C15I-40N2) / CP-X2011N(C15-20N2) / ED-X45N(C15-20N2)
7. Wiring diagram
Wiring diagram 1
Wiring of power supply block 1
(1) Attach CNTS and CNGD1
(2) Attach FE1 to CNPFC
FE1
Attach the ferrite core FE1 to the CNPFC cable that
connects the Power Unit Circuit and the Power Unit
Ballast, so that the FE1 is placed between the housing
and the cable tie, and so that the projection is placed in
the housing side. Be sure to lock the claw.
TSW
Check the marking of TSW.
UP62 UCHIYA 95C
CNGD1
Fasten the end of CNGD1 to the
Power metal with the screw.
CNTS
Connect CNTS
(cable of TSW) here.
FE1
Housing
Cable
tie
Projection