EasyManua.ls Logo

Hitachi HT7700 - User Manual

Hitachi HT7700
5 pages
Print Icon
To Next Page IconTo Next Page
Loading...
Hitachi-HT7700 TEM Operation
No magnetic samples!!!
No Organic/bio samples!!!
Initial conditions:
o Check Vacuum system (2X10⁻⁶ or better) o HV On
Check of Specimen Stage Coordinates
For loading a specimen, the specimen stage should be at the coordinate location (home position).
The x, y and α!coordinates of specimen stage can be checked on the Stage operation
window
- Operation-> stage operation
- set the specimen stage at the home position (x, y, α = 0)
Check the box next to the greyed out Reset button and then click Reset button to reset the stage.
NOTE: If the specimen holder is taken out other than in the home position, the objective lens and
adjacent parts may be damaged by the specimen holder.
Pull the sample holder out of the column
Draw out the specimen holder from the column.
- hold the handle and pull straight back until the holder stops, turn the specimen holder clockwise 15°
- pull back again until the holder stops, turn the specimen holder counterclockwise 30° making sure that you
turn all the way till you can no longer rotate the holder.
Question and Answer IconNeed help?

Do you have a question about the Hitachi HT7700 and is the answer not in the manual?

Overview

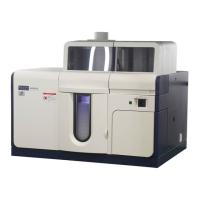
This document describes the operation of the Hitachi-HT7700 TEM (Transmission Electron Microscope).

Function Description:

The Hitachi-HT7700 TEM is a high-resolution electron microscope designed for imaging and analysis of samples. It allows for detailed observation of sample structures at very high magnifications. The system includes features for precise sample positioning, beam control, image acquisition, and vacuum management.

Important Technical Specifications:

While specific numerical specifications like resolution or accelerating voltage are not explicitly stated, the manual implies capabilities for both general imaging (e.g., searching samples at HC mode >0.2K) and high-resolution imaging (HR mode at 4K). The vacuum system is critical, requiring a pressure of 2x10^-6 or better for operation. The specimen stage has precise coordinate control (x, y, and alpha) with a home position at 0 for all axes. The system is designed to operate with non-magnetic and non-organic/bio samples.

Usage Features:

Initial Setup and Sample Loading:

  • Initial Conditions: Before operation, ensure the vacuum system is at 2x10^-6 or better, the specimen stage coordinates are at the home position (x, y, a = 0), and High Voltage (HV) is on.
  • Specimen Stage Coordinates: The "Stage operation" window (accessible via "Operation" -> "stage operation") is used to check and reset the x, y, and alpha coordinates to 0. A checkbox next to the greyed-out Reset button must be selected before clicking Reset.
  • Sample Holder Removal:
    1. Turn the "EVAC-AIR" switch to "AIR" and wait approximately 10 seconds for two sounds.
    2. Pull the handle of the specimen holder straight back until it stops.
    3. Turn the holder clockwise 15°.
    4. Pull back again until it stops.
    5. Turn the holder counterclockwise 30°, ensuring it cannot rotate further.
    6. Avoid touching the sample holder beyond the O-ring, as this is the vacuum side.
  • Sample Loading:
    1. Fix the holder using the holder fixing table.
    2. Flip the end of the sample holder up.
    3. Insert the grid with the darker side up.
    4. Flip the end of the sample holder down to secure the sample.
    5. Verify the sample is secure and will not fall out.
  • Sample Holder Insertion:
    1. Align the guide pin of the specimen holder with the cylinder groove of the specimen stage.
    2. Flip up the "EVAC-AIR" switch to "EVAC".
    3. Wait for the green lamp to light up and an alarm sound (approx. 10 seconds), indicating the lock mechanism is released.
    4. Turn the specimen holder clockwise 30° to insert it into the column (but not viewing position).
    5. Turn the specimen holder counterclockwise 15° to fully insert it into the viewing position.
    6. Important Note: If the microswitch on the specimen stage is not pressed, evacuation may not start. Gently push the holder into the stage.
    7. Important Note: If the green light and beep sound window is missed, the vacuum in the specimen chamber will degrade. Re-evacuate by turning the switch to AIR and then EVAC again. The lock mechanism will not release otherwise.
    8. Important Note: Do not forcibly turn the holder within 10 seconds after pre-evacuation, as this can damage the lock mechanism or dump the column vacuum.

Beam Operation:

  • Turning on Filament/Beam:
    1. Filament Voltage: Go to "Operation" -> "HV/Filament Operation" and click "Filam. on". This takes about 30 seconds.
    2. Beam On: Select "Auto mode" and click "Beam On". In Auto mode, the filament current automatically turns on/off when loading/removing the sample holder.
    3. Screen Camera: Click "Run" to turn on the screen camera (left display).

Specimen Height Adjustment:

    1. Push the "Lens reset" button on the operation panel.
    1. At 20 Kx magnification, find a feature near the middle of the viewing screen.
    1. Press the "WOB" button on the operation panel.
    1. Adjust the image focus using the "Z control knob" of the specimen stage until the image on the screen remains steady.
    1. Cancel the "WOB" button.

Beam Centering:

  • If the beam is not centered, push the "BH" button and adjust the beam center using the "X, Y knobs" on the operation panel.

Image Acquisition:

  • Finding Sample: Use the Screen camera (left display). Start with HC mode (>0.2K) for searching, then switch to HR mode (4K) for acquiring images.
  • Beam Intensity: Lower the beam intensity and click "Scr. out".
  • Software: Open the "Gatan Digital Micrograph" software (right display).
  • Start View: Click "Start View" to begin image acquisition.
  • Intensity Adjustment: Place the cursor in the blank area of the image window and adjust the intensity to 2,000-3,000.
  • Focus: Use the "Focus" knob on the operation panel to adjust the sample's focus.
  • Acquire Image: Click "Start Acquire" to record the final image.
  • Save Image: Click "File" -> "Save Display As" to save your image.
  • Switch to Screen Camera: Click "Stop View", then "Scr. in" (left display), and double-click "Link Screen".

Session Shut Down:

  • Before Changing Samples:
    1. Reduce magnification to 4 K.
    2. Set the specimen stage to the home position (x, y, a = 0).
  • Full Shutdown:
    1. Reduce magnification to 4 K.
    2. Set the specimen stage to the home position (x, y, a = 0).
    3. Remove the sample from the specimen holder and store the holder in the standby position.
    4. Click "Beam off" to turn off the beam.
    5. Stop the Screen camera (if no users are immediately following).
    6. Click "Film off" to turn off the filament voltage.

Maintenance Features:

  • Vacuum System Monitoring: Regular checks of the vacuum system (2x10^-6 or better) are crucial for proper operation and to prevent damage.
  • Specimen Holder Handling: Careful handling of the specimen holder is emphasized to prevent damage to the objective lens and adjacent parts, especially when inserting or removing it.
  • Re-evacuation Procedure: The manual outlines a re-evacuation procedure if the vacuum degrades, highlighting the importance of maintaining proper vacuum levels.
  • Sample Type Restrictions: The explicit warning against magnetic and organic/bio samples indicates a critical maintenance consideration to prevent contamination or damage to the TEM's internal components.

Hitachi HT7700 Specifications

General IconGeneral
BrandHitachi
ModelHT7700
CategoryMeasuring Instruments
LanguageEnglish

Related product manuals