--- 30 ---
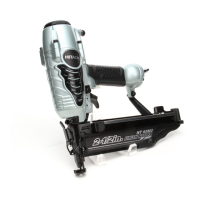
(a) Disassembly (Refer to Fig. 17.)
Disassemble the Nose Ass'y [22], the Magazine Ass'y [63] and the related parts in a single body as
described in pararaph 10-1-(1).
Extract the Roll Pin D3 x 30 [38] with a 3-mm dia. roll pin remover, and take out Plunger (B) [52], Plunger
(B) Spring [51], Washer M5 [50], Trigger [59], and the Trigger Plunger [58].
Insert a flat-blade screwdriver (or J-125 valve bushing spanner) into the groove on the Trigger Valve
Bushing [57] and, being very careful not to damage or deform the groove portion, turn it counterclockwise to
loosen it. After the Trigger Valve Bushing [57] has been removed, the Valve Packing [53] and Urethane Ball
(C) D7.14 [54] can be taken out. (Please note that the Trigger Valve Bushing [57] can be most easily and
safely removed with the J-125 valve bushing spanner.)
After removing the Trigger Valve Bushing [57], pull down strongly on the Valve Bushing [45] to remove the
Valve Bushing [45], Valve Sleeve [47], Plunger (A) [42], and the Plunger Spring [41].
Remove the Plunger O-ring [49] inside the Valve Bushing [45] and the two O-rings (P-9) [46] inside the
Valve Sleeve [47] by means of a setting pin with a rounded tip (Fig. 18).
(b) Reassembly
Reassembly can be accomplished by following the disassembly procedures in reverse. However, special
attention should be given to the following items.
Plunger Spring [41] and Plunger (B) Spring [51] are small and apt to be twisted and lost. Be careful when
handling them.
To prevent the two O-rings (I.D 10.7) [44] on the outside of the Valve Bushing [45] from being damaged
when inserted into the body, carefully apply grease to the body hole and the outer circumference of the
O-rings prior to assembly.
* If damaged O-rings (I.D 10.7) [44] are mounted, a malfunction may occur. Be careful when handling them.
The Plunger O-ring [49] inside the Valve Bushing [45] is small and hard to mount a little. Be careful not to
lose the O-ring when handling.
Mount the Valve Bushing [45] again facing the four 2.5-mm dia. holes at its center to the Body Ass'y [19]
side (Fig. 19).
10-3. Disassembly and Reassembly of the Control Valve Section
Tools required
3 mm dia. (0.118") roll pin remover
Flat-blade screwdriver [J-125 valve bushing spanner (special repair tool, Part No. 97893) is recommended
in place of a screwdriver.]
Setting pin (with a rounded tip)