123 4
5 6 7 8 9
10 11 12
13 Ih i5 16
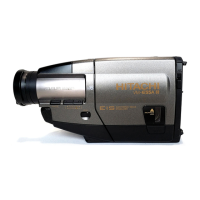
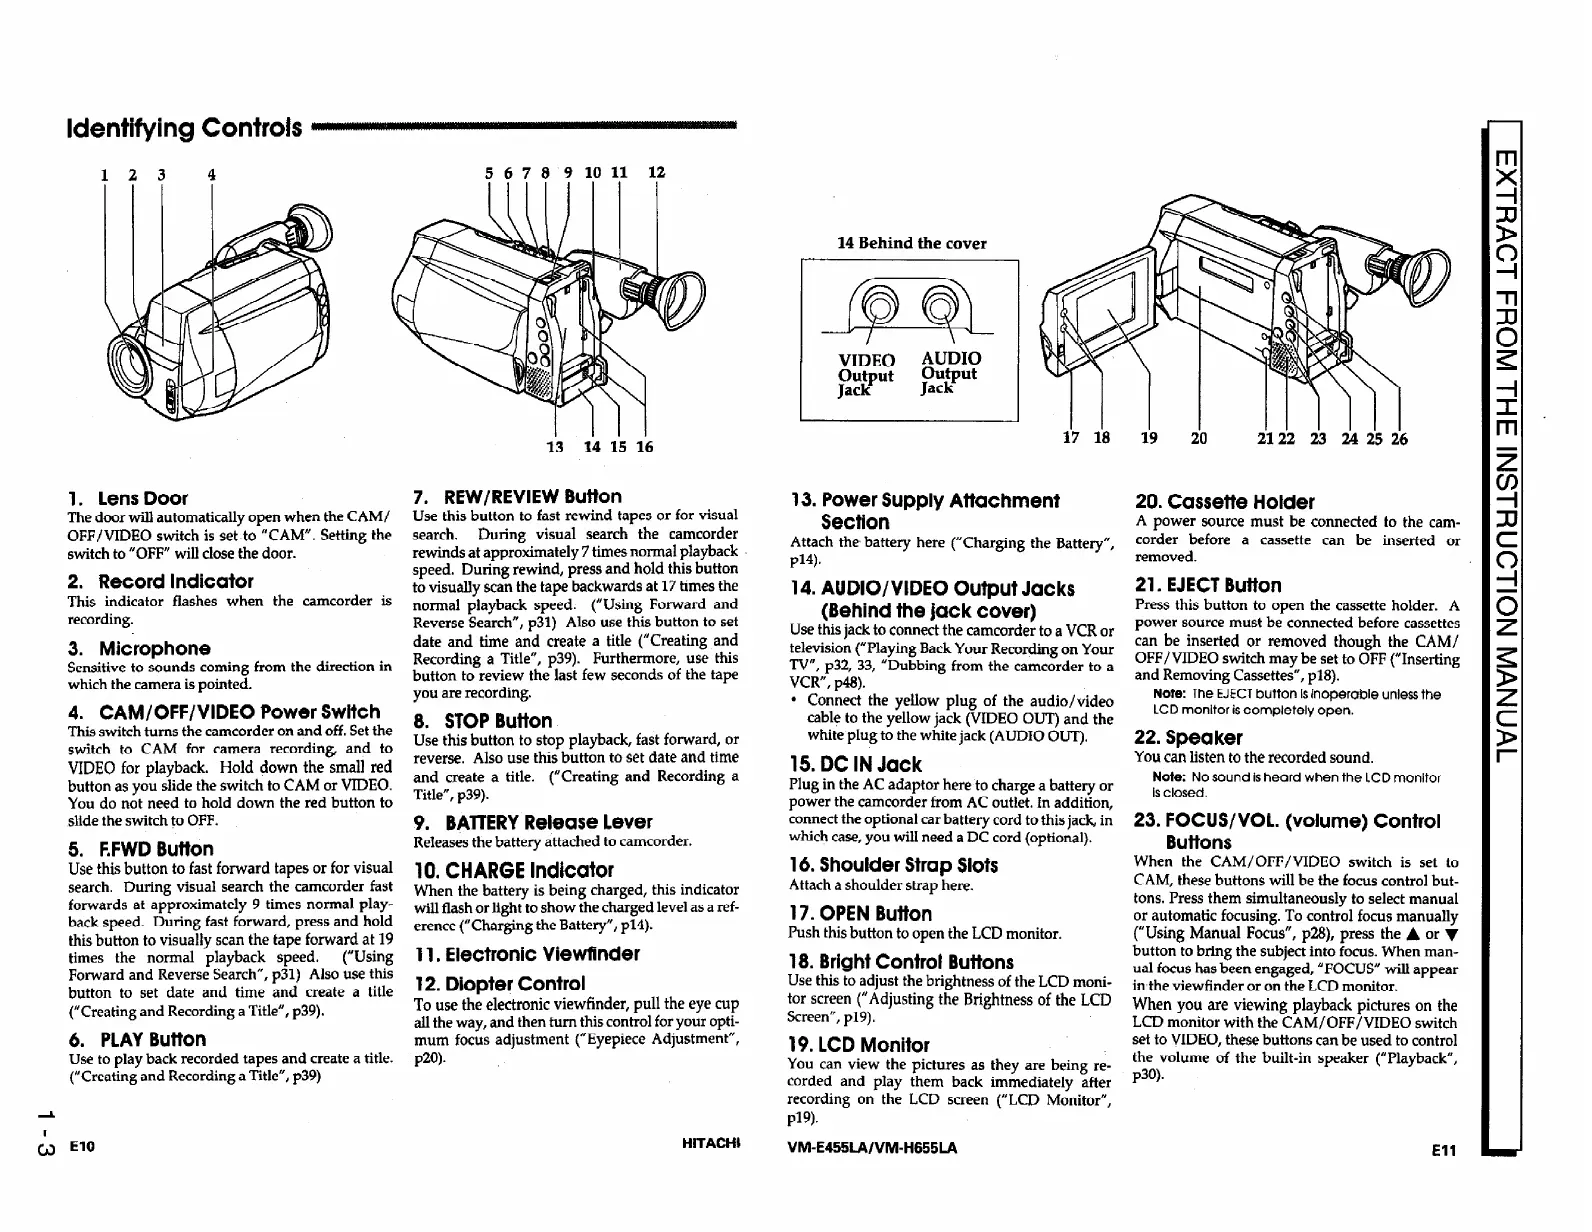
1. Lens Door
The
door
will automatically open when the CAM/
OFF/VIDEO switch is set-to “CAM”. Setting the
switch
to “OFF” will close the door.
2. Record Indicator
This indicator flashes when the camcorder is
recording.
3. Microphone
Sensitive to sounds coming from
the
direction in
which the camera is pointed.
4. CAM/OFF/VIDEO Power Switch
This switch turns the camcorder on and off, Set the
switch to CAM for camera recording, and to
VIDEO for playback. Hold down the small red
button as you slide the switch to CAM or VIDEO.
You do not need to hold down the red button to
slide the switch to OFF.
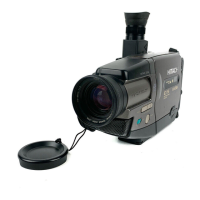
5. F.FWD Button
Use this button to fast forward tapes or for visual
search. During visual search the camcorder fast
forwards at approximately 9 times normal play-
back speed. During fast forward, press and hold
this button to visually scan the tape forward at 19
times the normal playback speed.
(“Using
Forward and Reverse Search”, ~31) Also use this
button to set date and time and create a title
(“Creating and Recording a Title”, ~39).
6. PLAY Button
Use to play back recorded tapes and create a title.
(“Creating and Recording a Title”, ~39)
7. REW/REVIEW Button
Use this button to fast rewind tapes or for visual
search.
During visual search
the
camcorder
rewinds at approximately 7 times normal playback
speed. During rewind, press and hold this button
to visually scan
the
tape backwards at 17 times the
normal playback speed. (“Using Forward and
Reverse Search”, ~31) Also use this button to set
date and time and create a title (“Creating and
Recording
a
Title”, ~39). Furthermore, use this
button to review the last few seconds of the tape
you are recording.
8. STOP Button
Use this button to stop playback, fast forward, or
reverse. Also use this button to set date and time
and create a title. (“Creating and Recording a
Title”, ~39).
9. BATTERY Release Lever
Releases
the
battery attached to camcorder.
10. CHARGE Indicator
When
the battery is being charged, this indicator
wiU flash or light to show the charged level as a ref-
erence (“Charging the Battery”, ~14).
Il. Electronic Viewfinder
12. Diopter Control
To use the electronic viewfinder, pull the eye cup
all
the way,
and then turn this
control
for your opti-
mum focus adjustment (“Eyepiece Adjustment”,
P20).
;J El0
HITACHI
14 Behind the cover
VIDEO
AUDIO
$zFt
Output
Jack
I
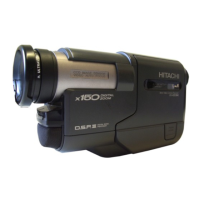
13. Power Supply Attachment
20. Cassette Holder
Section
Attach the battery here (“Charging the Battery”,
Pl4).
A power source must be connected to the
cam-
corder before a cassette can be inserted or
removed.
14. AUDIO/VIDEO Output Jacks
(Behind the jack cover)
Use this jack to
connect
the camcorder to a VCR or
television (“Playing Back Your Recording on Your
TV”, ~32, 33, “Dubbing from the camcorder to a
VCR”, p48).
l
Connect the yellow plug of the audio/video
cable to the yellow jack
(VIDEO
OUT) and
the
white plug to the white jack (AUDIO OUT),
21. EJECT Button
Press this button to open the cassette holder. A
power source must be connected before cassettes
can be inserted or removed though the CAM/
OFF/VIDEO switch may be set to OFF (“Inserting
and Removing Cassettes”, ~18).
Note: The EJECT button Is Inoperable unless the
LCD monitor is completely open.
22. Speaker
15. DC IN Jack
You can listen to the recorded sound.
Plug in the
AC adaptor here to charge a battery or
power
the
camcorder from AC outlet. In addition,
connect the optional car battery cord to this jack, in
which case, you will need a DC cord (optional).
16. Shoulder Strap Slots
Attach a shoulder strap here.
17. OPEN Button
Push this button to open the LCD monitor.
18. Bright Control Buttons
Use this to adjust
the
brightness of the LCD moni-
tor screen (“Adjusting the Brightness of the LCD
Screen”, p19).
Note: No sound is heard when the LCD monltor
Is closed.
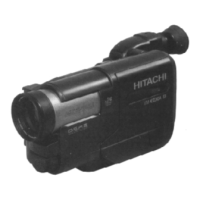
23. FOCUS/VOL. (volume) Control
Buttons
19. LCD Monitor
You can view
the
pictures as
they
are being re-
corded and play them back immediately after
recording on the LCD screen (“LCD Monitor”,
Pl9).
When the CAM/OFF/VIDEO switch is set to
CAM, these buttons will be the focus control but-
tons. Press them simultaneously to select manual
or automatic focusing. To control focus manually
(“Using Manual Focus”, p28), press the A or 7
button to bring the subject into focus. When man-
ual focus has been engaged, “FOCUS” wilI appear
in the viewfinder or
on
the LCD monitor.
When you are viewing playback pictures on the
LCD monitor with the CAM/OFF/VIDEO switch
set to VIDEO, these buttons can be used to control
the volume
of
the built-in speaker (“Playback”,
P3Q.
VM-E455LA/VM-H655LA
El1
 Loading...