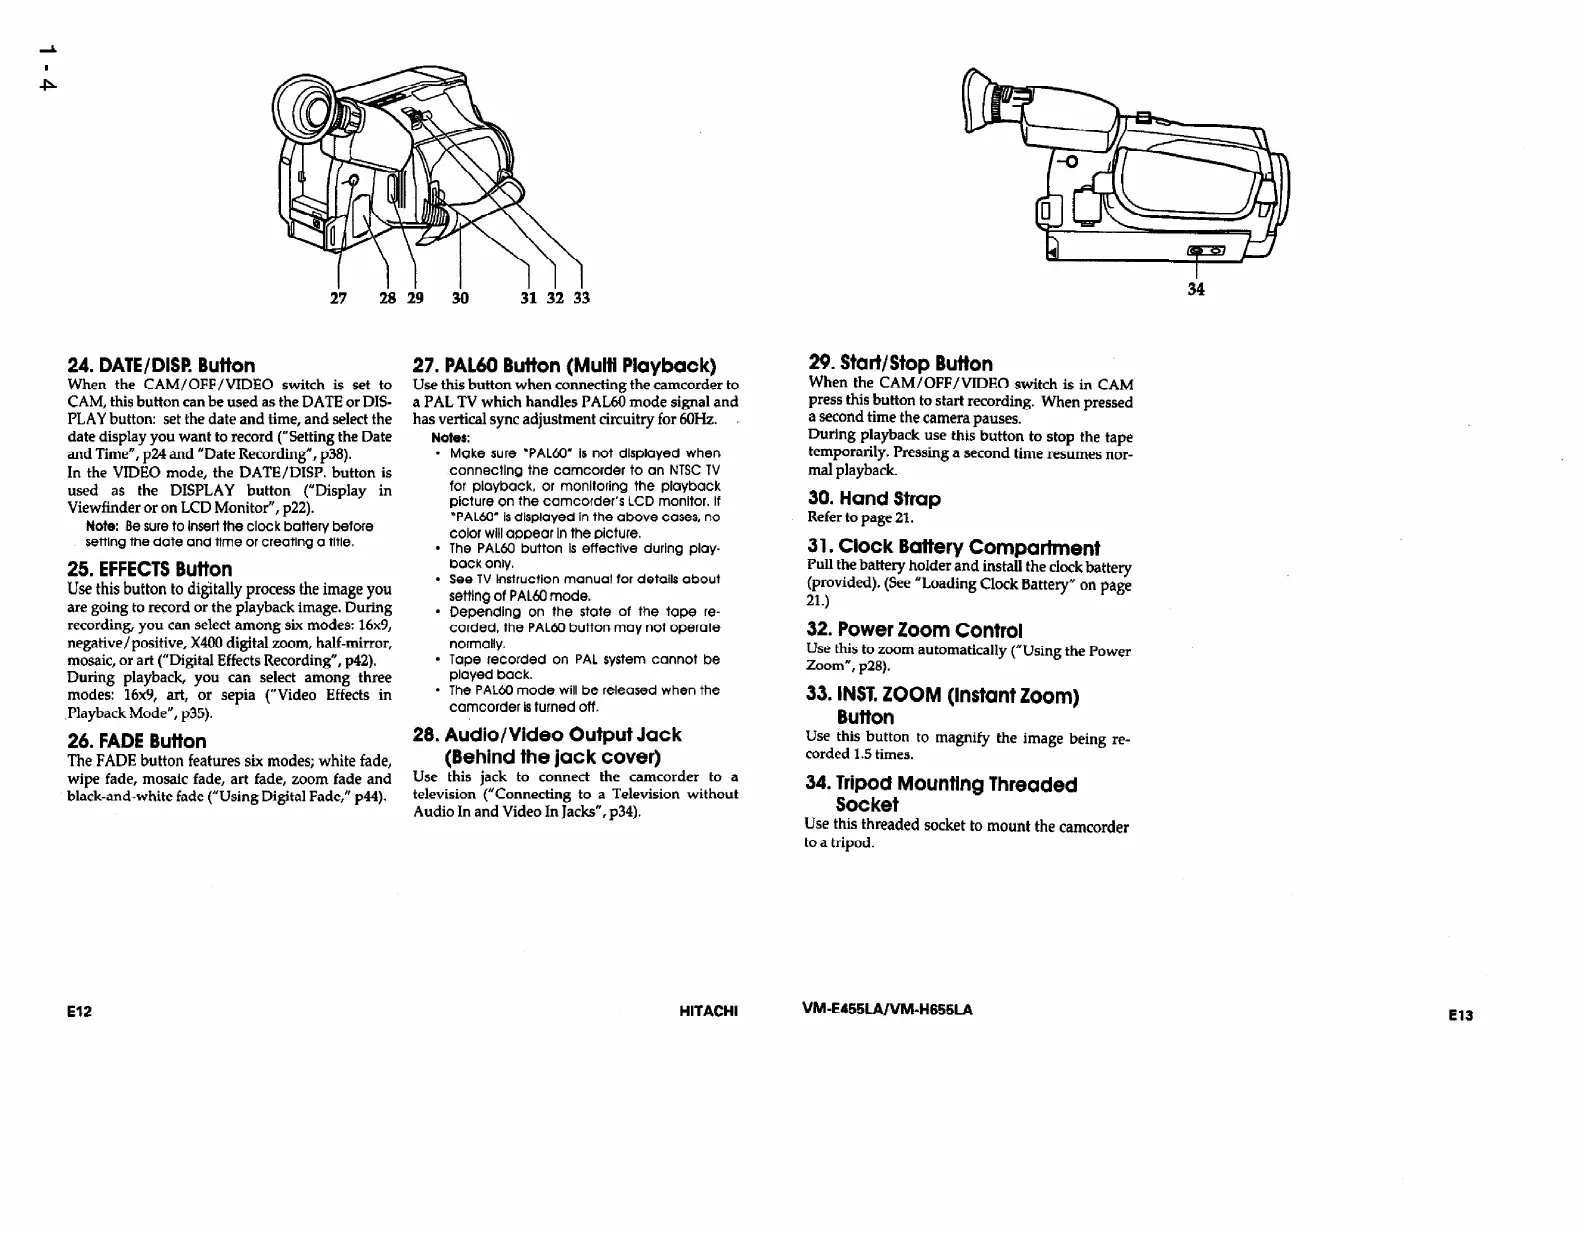
24. DATE/DIM Button
When the CAM/OFF/VIDEO switch is set to
CAM, this button can be used as the DATE or DIS-
PLAY button: set the date and time, and select the
date display you want to record (“Setting the Date
and Time”, ~24 and “Date Recording”, ~38).
In the VIDEO mode, the DA’I’E/DISP. button is
used as the DISPLAY button (“Display in
Viewfinder or on LCD Monitor”, ~22).
Note: Be sure
to insert the clot k battery before
setting the date und tlme or creating a title.
25. EFFECTS Button
Use this button to digitally process the image you
are going to record or the playback image. During
recording, you can select among six modes: 16x9,
negative/positive, X400 digital zoom, half-mirror,
mosaic, or art (“Digital Effects Recording”, p42).
During playback, you can select among three
modes: 16x9, art, or sepia (“Video Effects in
Playback Mode”, ~35).
26. FADE Button
The FADE button features six modes; white fade,
wipe fade, mosaic fade, art fade, zoom fade and
black-and-white fade (“Using Digital Fade,” ~44).
.
.
.
28.
Use
27. PAL60 Button (Multi Playback)
Use this button when connecting the camcorder to
a PAL TV which handles PAL60 mode signal and
has vertical sync adjustment circuitry for 6OHz.
.
Notes:
Make sure l PAL60” is not displayed when
connecting the camcorder to an NTSC TV
for playback, or monitoring the playback
picture-on the camcotder’~LCD r%onitor. If
‘PALW Is displayed In the above cases, no
color will appear In the picture,
The PAL60 button Is effective during play-
back only.
See TV instruction manual for details about
setting of PAL60 mode.
Depending on the state of the tape re-
corded, the PAL60 button may not operate
normally.
Tape recorded on PAL system cannot be
played back.
The PAL60 mode will be released when the
camcorder is turned off.
Audio/Video Output Jack
(Behind the jack cover)
this jack to connect the camcorder to a
.
television (“Connecting to a Television
without
Audio In and Video In Jacks”, ~34).
29. Start/Stop Button
When the CAM/OFF/VIDEO switch is in CAM
press this button to start recording. When pressed
a second time the camera pauses.
During playback use this button to stop the tape
temporarily. Pressing a second time resumes nor-
mal playback.
30. Hand Strap
Refer to page 21.
31. Clock Battery Compartment
Pull the battery holder and install the clock battery
(provided). (See “Loading Clock Battery” on page
21.)
32. Power Zoom Control
Use this to zoom automatically (“Using the Power
Zoom”, ~28).
33. INST. ZOOM (Instant Zoom)
Button
Use this button to magnify the image being re-
corded 1.5 times.
34. Tripod Mounting Threaded
Socket
Use this threaded socket to mount the camcorder
to a tripod.
El2
HITACHI
VM-E455LA/VM-H655LA
El3