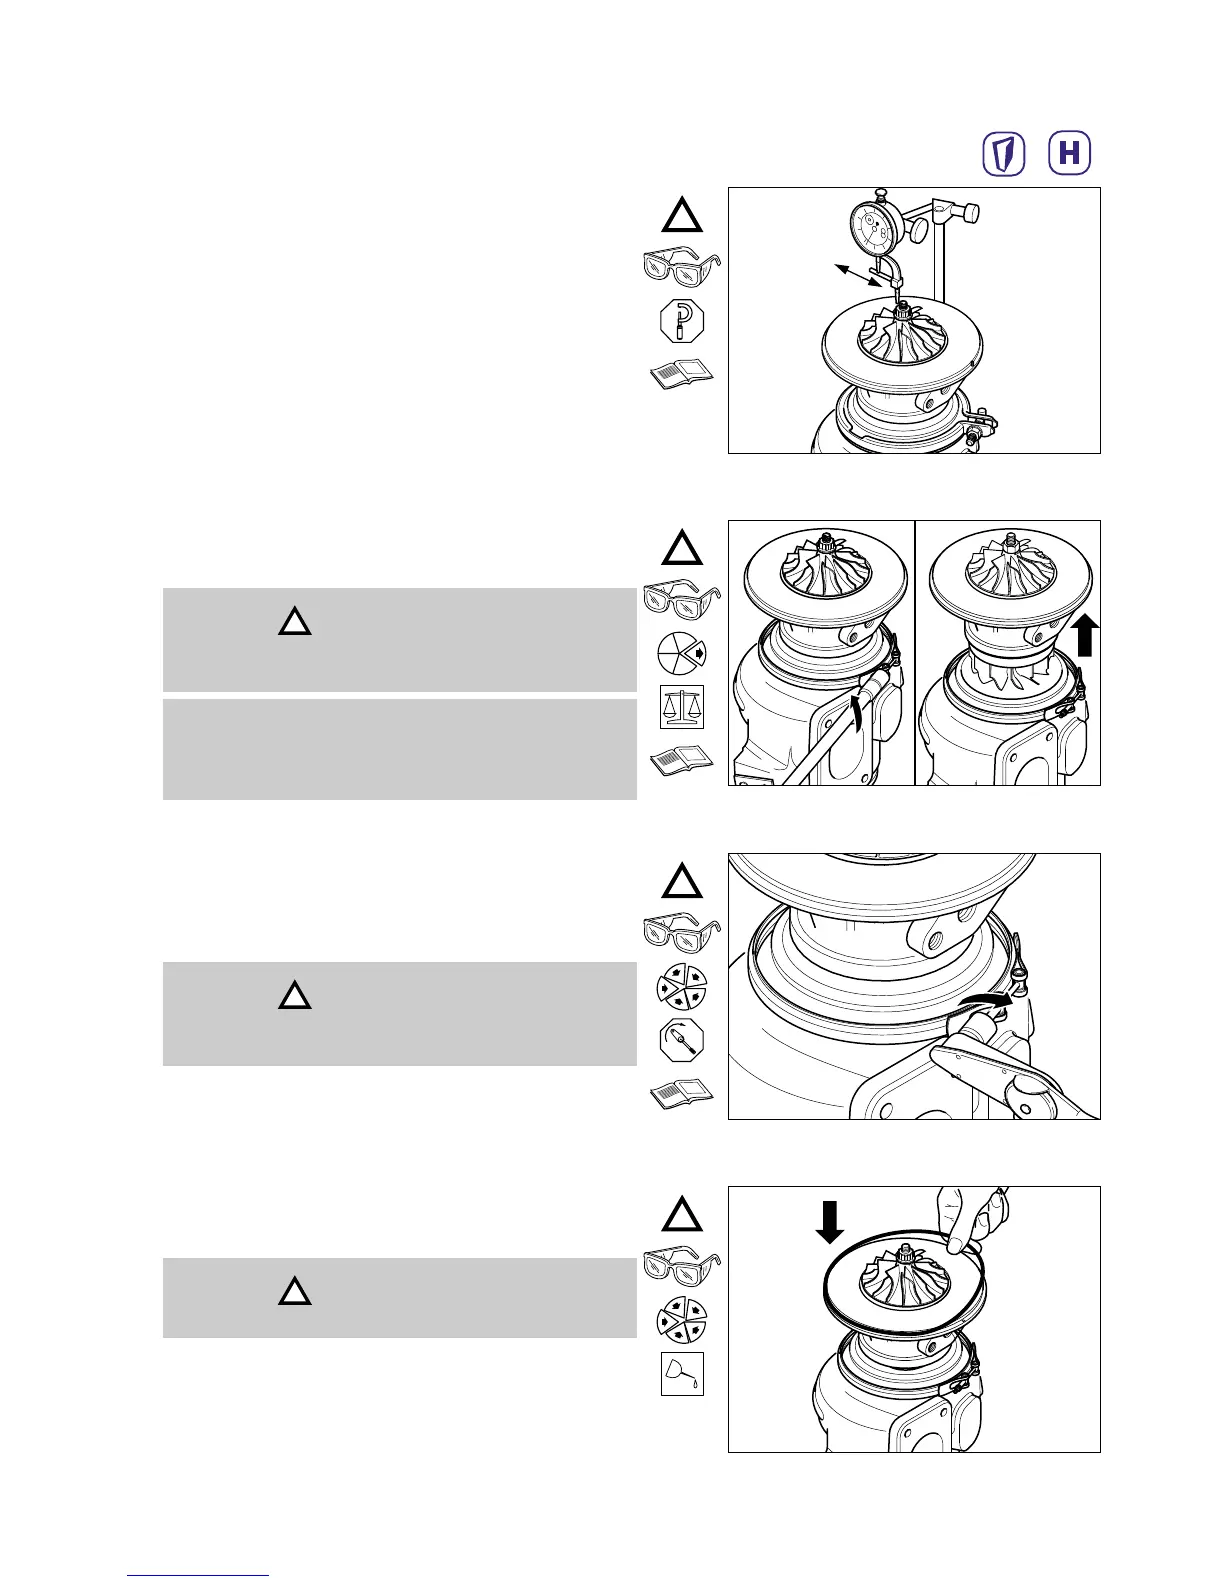
Check compressor end radial movement using a dial
gauge. Ensure clearance lies within MIN/MAX TIR
(Total Indicator Reading) values shown on
Service Data Sheet.
HX25/25W/27W Service Repair Manual Turbocharger Service and Overhaul
5:18
Remove locknut, v-band clamp and carefully extract
core for balancing on vibration sorting rig (VSR) to the
advisory limits shown in the Service Data Sheet.
M6 (10 mm)
Relocate balanced CHRA (2) into turbine housing (8)
using alignment marks to locate assembly on to roll pin
fixed in turbine housing. Apply molycote anti-seize
compound to the locknut, v-band (62). Tighten locknut
to the torque shown in the Service Data Sheet.
Using a soft faced hammer, tap the v-band clamp three
or four times at equally spaced distances around its
circumference. Re-tighten locknut, v-band (62) to the
torque shown in the Service Data Sheet.
Lightly oil o-ring seal, compressor housing (41) and
insert.
Grease o-ring seal lightly to ensure it stays in position
during reassembly.
Caution
The turbine wheel blades can be easily damaged
when the CHRA is installed.
Caution
Be careful not to bend the location pin during
disasssembly and reassembly.
Caution
Always fit a new seal on reassembly.
Note
Refer to Core Balance for a description of the VSR
balancing process.