This document provides comprehensive instructions for the assembly, operation, and maintenance of the INan002V02_UK A90-225V70 treadmill. It emphasizes safety precautions, detailed assembly steps, and various functional modes to ensure a safe and effective user experience.
Function Description
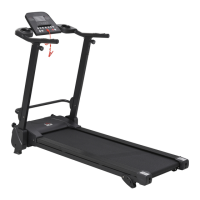
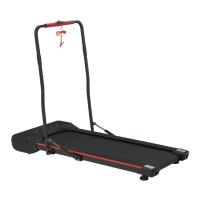
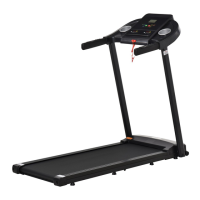
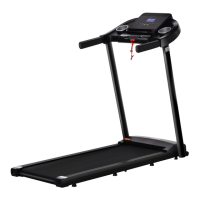
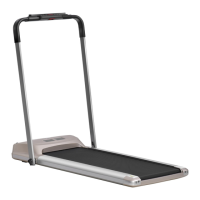
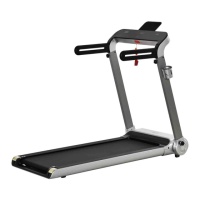
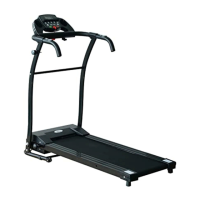
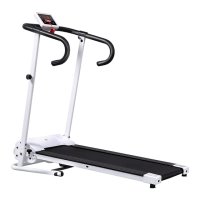
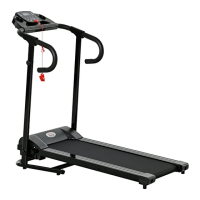
The treadmill is designed for indoor use and offers a range of features to support diverse workout routines. It includes a console with an LCD display that shows speed, time, distance, calories, and heartbeat. The console also features an MP3 interface for audio playback and a USB interface for charging mobile devices.
The treadmill supports several motion modes:
- Manual Motion Mode: Users can start the treadmill and adjust the running speed manually. The system tracks time, distance, and calories from zero.
- Countdown Mode: This mode allows users to set specific countdown targets for time, distance, or calories. Once a target is set, the treadmill will count down, and the exercise will conclude when the target is reached.
- Automatic Programming Function: The treadmill comes with 12 pre-set sports schemes (P1-P12), each divided into 20 segments with varying speeds. Users can select a program and set a desired running time, and the treadmill will automatically adjust the speed according to the program's segments.
- Custom Program (U1-U3): In addition to the pre-set programs, the treadmill allows users to define three custom programs (U1, U2, U3). Each custom program also divides the running time into 20 periods, and users can set the speed for each period. These settings are saved permanently until reset.
- Body Fat Test: This function helps users estimate their body fat index by inputting gender, age, height, and weight. After holding the Hand Pulse Sensors for about 5 seconds, the console displays the body fat index, providing a reference for health assessment.
The console features several buttons for easy control:
- START Button: Initiates the motor operation after a 5-second countdown in standby, mode setting, or programming states.
- STOP Button: Halts the motor operation and clears all data to the initial state once the motor completely stops.
- "PROGRAM" Button: Allows users to enter automatic program settings, custom program settings, and body fat test settings.
- "MODE" Button: Used to select countdown modes (time, distance, calorie) and navigate through parameter settings in the body fat test.
- "SPEED +/-" Buttons: Adjust the running speed during operation and modify parameter values during setting.
- SPEED QUICK Buttons (3, 5, 7, 9, 12): Provide direct selection of specific runtime speed values.
The treadmill also incorporates a Dormancy Function, where it enters a dormant state after 10 minutes of inactivity, turning off the display to save power. Pressing any button will wake it up.
A crucial Safety Lock Function is integrated. The safety lock must be in its designated position for the treadmill to operate. If removed during operation, the system will quickly shut down, and all movement data will be cleared.
Usage Features
The treadmill is designed with user convenience and safety in mind.
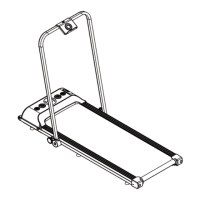
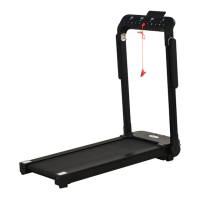
- Assembly: The assembly process is guided by clear, step-by-step instructions with accompanying diagrams. Key steps include rotating the locking plate, pulling out plastic film from the upright post frame, rotating and locking the upright post frame with decoration covers, adjusting and installing the handle bar with quick pull pins, and finally adjusting and locking the computer console.
- Folding: For space-saving storage, the treadmill can be folded. This involves loosening the knob, rotating the computer console, pulling out the pins to rotate the handle bar forward, and then pulling the adjust bar to rotate the upright post frame to a level position before turning back the locking plate for upright storage.
- Incline Adjustment: The lifting angle of the treadmill can be adjusted by changing the pin's position, offering three sections for incline adjustment to vary workout intensity.
- Workout Guidance: The manual provides guidance on warm-up, exercise stages, intensity, and frequency. It recommends consulting a physician before starting a workout, especially for individuals over 35 or with health problems. It also suggests starting with low speeds and gradually increasing intensity.
- Speed Recommendations: Specific speed ranges are provided for different fitness levels and activities, from walking (1.0-6.0 KM/H) to jogging (7.5-9.0 KM/H) and running (9.0-16.0 KM/H).
- Safety Precautions: Users are advised to ensure the safety lock is attached, avoid inserting items into the equipment, position the treadmill on a clear, level surface away from water or outdoors, and wear appropriate clothing and shoes. It is also emphasized not to start the treadmill while standing on the walking belt and to hold the handrails during initial use.
Maintenance Features
Proper maintenance is essential for prolonging the treadmill's life and ensuring safe operation.
- General Cleaning: Regular dusting and cleaning of the exposed parts of the deck and side rails are recommended to prevent the buildup of foreign material.
- Motor Cover Cleaning: At least once a year, the motor cover should be removed, and the area underneath should be vacuumed. It is crucial to unplug the treadmill from the electrical outlet before performing this task.
- Running Belt and Deck Lubrication: The treadmill features a pre-lubricated, low-maintenance deck system. However, periodic lubrication is necessary. The recommended lubrication frequency varies based on usage:
- Light user (less than 3 hours/week): Annually
- Medium user (3-5 hours/week): Every six months
- Heavy user (more than 5 hours/week): Every three months
Users are advised to purchase lubrication from the distributor or directly from the company.
- Belt Adjustment: Instructions are provided for adjusting the running belt if it drifts to the right or left, or if it becomes too loose. This involves unplugging the safety lock, turning off the power, adjusting the bolts, and then restarting the treadmill to check alignment and tightness.
- Error Message Codes: The manual includes a comprehensive list of error message codes (E01-E07) with their meanings and suggested solutions. These codes indicate issues such as communication problems, motor connection issues, speed detection errors, overvoltage protection, overcurrent protection, low voltage, and safety lock problems. This allows users to troubleshoot common issues or identify when professional assistance is needed.
- Professional Repair: Any repair needs should be handled by a professional technician.